I love telling my client or athlete that we're going to hit the “core” hard and then walk them over to the pull-up bar for pulls or the trap bar for sets of deadlifts. I cringe every time I hear someone say that it’s time to blast the core and then lay on the floor and begin crunching away for 50 reps. The definition of one’s core has gotten lost in translation over the years and we need to better understand what it really is.
I like to refer to the "core" as "any muscles and structures that support and stabilize the pelvis, spine, and shoulders". I’d have to refer back to my old A&P textbooks to confirm it, but I’m fairly certain this involves more than just our rectus abdominis. Because of this definition, exercises such as squats, deadlifts, tire flips, push-ups, and pull-ups are all considered excellent “core” movements in my book. Lying down and pulling on the back of your head to facilitate cervical and thoracic flexion isn't my idea of healthy “core” work.
Most of the everyday Joe’s and Jane’s of the world are in a seated position eight or more hours a day. Their hip flexors, pecs, and anterior shoulder muscles are tight, and their gluteals are inactive. Their scapulae are stuck in protraction, so why would we have them come into our facility and sit them or lay them down?! We are providing our clients a disservice and in the long run doing them more harm than good. I like to refer back to one of my favorite exercise related questions—why? Why are we performing a particular exercise? You should be able to defend or explain every exercise you do with every client or athlete you train.
Transfer station
I like to refer to the core as the “transfer station” for the body. I’m sure I heard that term from someone smarter than I am and I apologize for not giving them credit. It is a term that makes a lot of sense to me. Our movements come from the ground up, so when we're curling, pushing, or pressing something with our upper body, we generate our strength from the bottom and transfer it up to the moving parts. One great example of this is throwing a punch. We begin to generate that power from the ground all the way up to our fist. There are loads of studies out there to support this. Two examples include 1) Dyson, Smith, Martin, Fenn (2007) Muscular Recruitment During Punches Delivered at Maximal Force & Speed. XXV ISBS Symposium 2007, Brazil, 591–94; 2) Valentino B, Esposito LC, Fabrozzo A (1990) Electromyographic activity of a muscular group in movements specific to boxing. Journal of Sports Medicine and Physical Fitness 30:160–62.
To move or not to move
While we train most muscles to move and accelerate, we should train our core musculature to decelerate, control, and transfer movements. They work to prevent motion and provide the solid foundation needed for safe, effective movement.
Midsection moves for MMA
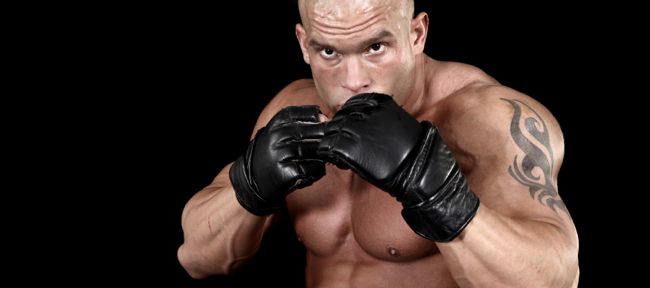
Your core/trunk/torso (call it what you want) is especially important for the sport of MMA. Having mobile hips and a strong, stable, and efficient core will lead to better footwork, stronger takedowns and takedown defense, and increased power in all your striking. Now, I’ve made it no secret that I’m not an advocate of crunching movements, especially with the everyday population. That being said, MMA athletes are a different breed. If we are being sport-specific and training them functionally for their craft, one could make a case that we should be performing various crunching movements. It’s a great conversation piece for us “exercise nerds” out there and one that I’m still on the fence with. I do have a few crunch variations that I do with my combat athletes from time to time. However, for this particular article, I'm choosing to keep it a “crunch free” zone.
My current top eight
I say “current” because I’m always trying new movements and changing the list up.
1. Seal walks
This is a great “anti-rotation” movement because our goal is to minimize the rotation of the pelvis as we move. Keep your abdominals braced and be sure not to lock out your elbows as you move. This is also great for the shoulder stabilizers and muscles of the shins and quads. Like I mention in the clip, there are a variety of tools you can use to perform this movement including Valslides, sandbells, and plates.
2. Valslide hip circles
This is a variation of the popular abdominal knee tuck that we commonly do with the Valslides or TRX. The primary difference is the abduction component of the hips. This is great for opening up the groin and is an important movement for combat athletes who want to improve their flexibility for their ground game.
3. Stability ball “stir the pots”
This is a great progression from the traditional plank. By adding an unstable tool such as the stability ball we easily increase the intensity. Also, by elevating the feet and incorporating small movements such as circles and spelling the alphabet, we can really challenge the core muscles on both the front side and back side of the body. Be sure to watch the lumbar spine on this exercise as our goal is to maintain a neutral spine throughout.
4. TRX body saw with knees
From the plank position with your feet in the cradles, initiate the movement from your torso and shoulders by pushing your body back (think heels toward the back wall). As you come forward, drive one knee toward the same side elbow. Repeat this “sawing” movement and alternate knee strikes for desired reps.
5. TRX high plank with stops and perturbations
These are two variations I like that both begin in the push-up or high plank position. For the perturbations, have a training partner push your feet in various directions while you try to resist. For the stops, you will perform pendulum swings and your partner will cue you to stop moving at random times. The challenge is to hold that position for a five-second count before swinging again.
6. Sandbag get-ups
The traditional get-up, which I also love, is typically performed with a kettlebell and an extended arm. I chose to show the sandbag version because it’s slightly easier to teach and I like having the heavy sandbag laying across the chest to challenge breathing patterns. Begin on your back with the sandbag over one shoulder and the same side knee bent with the foot flat. Leading with your chest, roll to the opposite elbow and continue to shift your weight up to the hand. From this position, drive through your hand and opposite heel to extend your hips. You will then sweep you leg underneath your body and come to your knee. Next, you want to line up your body. Think of being “tall” and having length through the spine. From this split squat or lunge position, stand up tall and come to your feet. To return to the starting position, simply reverse the steps in a controlled manner.
7. Standing tornado ball figure eights
This movement is great for developing rotational power through the thoracic spine. Try to minimize the movement of the hips and really focus on keeping your abdominals braced and your shoulders rotating. Standing in an athletic position, start swinging the ball in front of your body and begin “drawing” an eight with the ball. Maintain this rotational pattern for desired reps or time.
8. Hanging wipers
This is one of my favorite midsection movements. Like I mentioned in the clip, perform this in a controlled manner and don’t feel you need to go too far from side to side. Your lumbar spine will thank you in the morning. You need a certain amount of core control and grip strength to get into this exercise. Once you're hanging from the bar, swing your legs up so that you're inverted with your ankles, knees, and hips in a straight line perpendicular to the ground. From here, let the legs fall from side to side controlling the speed and movement from your obliques, erectors, and abs. Shoot for 20–30 reps.
Please give these a try and let me know what you think. I encourage feedback and would love to try any crunch-free abdominal exercises that you've had success with.


