


Due to the great success of Gray Cook’s functional movement screen, movement assessment techniques are becoming more and more popular among strength and conditioning coaches. At the University of Missouri, we’ve adopted our own method of assessing athletes. It isn’t that we don’t like Gray Cook’s functional movement screen—much of our system is based on it. Rather, we just needed something that was a little more applicable to our program.
Here’s a list of the movements we use as a part of the Mizzou athletic performance movement screen:
1) PVC squat
2) PVC overhead squat
3) PVC backward lunge
4) Standing Psoas test
5) Lying leg Raise
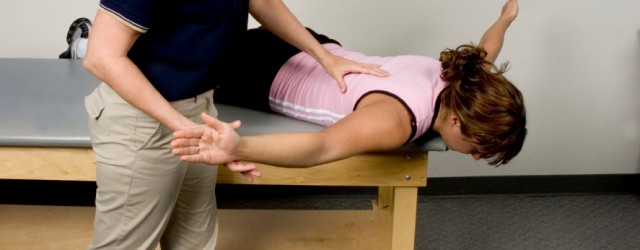
6) Four-part shoulder test
It’s important to remember one thing. In the words of Bill Hartman, “Everything is an evaluation.” This means that although we do use a movement screening system, this is by no means the end all be all of our screening system. We watch our athletes move and lift. While our movement screening system will show us a lot, it sometimes can’t predict how the athlete will move at speed or under a load. The movement variations I’ll discuss here are based on the first movement done in our movement screen. Once the movement dysfunction is identified, we can then attack the problem with corrective exercises. Let’s start with our first movement—the PVC squat.
The PVC squat is exactly what it sounds like. It’s actually an Olympic style squat performed with a shoulder width stance and toes straight ahead. The athletes are cued to go down as low as they can and take their time. We usually like to see 8–10 good squats.


A good squat
From the front: The athlete’s weight is distributed evenly on both feet. The toes remain straight ahead, and the chest is tall.
From the side: The athlete’s torso is parallel to the tibia, the knees are able to dorsiflex over the toes, and the athlete is able to keep his weight on his heels while achieving good depth (significantly below parallel).
If you’ve never done a movement screening before, you’ll quickly find out there are many movement variations that you never knew existed. While a simple squat seems easy to you and me, it proves rather difficult to a poorly training college freshman.
Below is a list of six basic movement patterns along with their likely problems and solutions. While some of these issues are very simple, others are a little more complex.
1. The athlete can’t achieve depth.


From the front: The athlete’s weight is evenly distributed. However, the athlete has a significant amount of forward lean.
From the side: Forward lean is significant, and the athlete has very limited dorsiflexion ability.
The problem: In this case, the athlete has tight plantar flexors, the soleus in particular. The forward lean may indicate the inability to extend the thoracic spine. However, that will be more apparent in later movements in the screening.
The solution: We’ll keep this simple. Stretch the calves, especially before squatting movements. This will allow the athlete to achieve better dorsiflexion when squatting. Any time you can get a change to take place in a loaded movement, you have a much higher chance of creating a more permanent change. Consider elevating the athlete’s heels while squatting. This allows the athlete to achieve greater depth without as much dorsiflexion. By gradually reducing the amount of elevation over time, we can increase range of motion at the ankle and maintain depth.

2. The athlete goes on to the toes when squatting.


From the front: The weight is evenly distributed but forward lean is apparent.
From the side: The heels lift off of the ground as the knees jut straight forward.
The problem: Once again, this is a sign of tight calves, but more importantly, this is a quad dominant movement pattern. We see this a lot with young athletes.
The solution: The athlete may never have been taught to load the posterior chain with a hip hinge. It could be as simple as teaching the hip hinge with very basic movements. However, if that doesn’t work, posterior chain strengthening is needed.
3. The athletes’ knees fall in when squatting.


From the front: The weight is evenly distributed, but the knees fall in toward the midline.
From the side: Depth is not achieved.
The problem: This could be a couple of things. First, look at the feet. If they pronate, this may be a subtalar joint dysfunction. If they externally rotate (toes spin out), it may be something different, which we’ll cover later. If the feet appear normal, the problem is more than likely a glute medius firing issue.
The solution: If the feet are pronating, the athlete will more than likely need orthotics fitted to correct movement patterns. If not, the glutes need some attention. Do some glute activation work as part of your warm up in the form of glute bridges and abduction exercises. Knee band squats are a good idea for a warm up. Post-workout do some true single leg training. There is nothing better to get your glutes to kick in than standing on one leg.
4. The athlete’s feet externally rotate when squatting.


From the front: As the athlete descends, the feet rotate outward.
From the side: The athlete looks pretty good.
The problem: This one is usually a combination of things. The first time this happens, we usually cue the athlete to keep his toes straight ahead. If the athlete continues to externally rotate his feet, the problem is actually in the hip and lumbar spine. The psoas attaches on the medial side of the femur and has several attachments on the lumbar spine. When the athlete needs to relieve stress on the spine, he externally rotates his femur to loosen up the psoas. This is actually a big indication of lumbar spine issues, and a chiropractor may need to take a look at what is going on. For our sake, we call it “psoas tightness.”
This is also when other tests kick in. Watch your athlete walk. While I’m not an expert in gait analysis, I can usually see when someone walks like a duck with his toes pointed out. This may be a compensation for tight calves, but the problem is that the compensation runs up the kinetic chain to the hips. The femur will get stuck in external rotation, and the internal rotators of the hip become very tight.
The solution: In “A Strength Coach’s Guide to Dealing with Pain, Part 2: The Knee,” I described a progression to stretch the hip flexors. That will certainly work in this case. However, we also attack at some different angles. Another strategy is to work on hip internal range of motion with a basic wall stretch. Simply have the athlete lie on his back with his feet wide on the wall and slowly internally and externally rotate the hips. Have him move his legs slowly and do 20–25 reps at a time.


5. The athlete rounds the low back.


From the front: The athlete’s chest drops.
From the side: The athlete achieves good depth, but the lower back rounds at depth.
The problem: This could be one of two things. The first is as simple as poor erector or lat strength. The second possible problem is tight hamstrings. As the athlete lowers, his hamstrings have to lengthen in order to maintain anterior pelvic tilt. If they can’t lengthen, they will pull the pelvis into posterior tilt. This will be more apparent in later movements throughout the screening.
The solution: Because hamstring tightness will be more apparent in later tests, we will simply focus our sights on strengthening the athlete’s erectors and lats. There are no special exercises needed to solve this problem. Basic posterior chain work and lat work will do just fine.
6. The athlete has an asymmetrical sway.


From the front: The weight is shifted over one leg. One knee is in a valgus position while the other is extremely abducted. The torso may appear rotated.
From the side: One ankle will show much more dorsiflexion ability than the other.
The problem: This one is a little tougher than the rest. Let’s start with the ankles. If the athlete has a history of sprained ankles, we could have discrepancy in range of motion causing a weight shift when descending into the squat. In the pictures above, the athlete achieved slightly less dorsiflexion in the left ankle. Training with this problem is going to cause a lot more problems up the kinetic chain.
The athlete above is also swaying to his left. This puts his right femur in abduction and his left in a slightly more adducted position. This indicates weak right adductors and weak left abductors.
Now take a look at the athlete’s pelvis. In this case, there is a possibility that the athlete’s left hip sits higher than his right, which would make his left shoulder sit lower than his right. What you have is a very common postural deformity known as pelvic obliquity, which leaves athletes predisposed to problems up and down the kinetic chain. This problem is better dealt with by a physical therapist or chiropractor, but there are some things we can do to help the matter.
The solution: The more complex the problem, the more complex the answer. Start by making the ankle mobility a little more symmetrical. That’s relatively easy. Then we want to target the left abductors and right adductors, which can be accomplished with one simple exercise.


The pelvic tilt also tells us that we have a muscular imbalance in the abdominals. In this case, the left QL is more than likely balled up while the right is long and inhibited. Stretch the left QL with this stretch:

Strengthen the right obliques with an exercise as simple as a side bridge.

I may be making this seem a little easier than it actually is. This is a relatively common postural deformity and extreme variations of it need extreme care.
As you can see, one movement can really tell us a lot. We will continue to go through the movements we use as assessment tools. In the end, we can get a pretty good idea of what is going on with our athletes’ bodies. Some of these problems may be out of our hands as strength coaches. Therefore, having a strong network of athletic trainers, chiropractors, physical therapists, and massage therapists can’t be understated.
Elite Fitness Systems strives to be a recognized leader in the strength training industry by providing the highest quality strength training products and services while providing the highest level of customer service in the industry. For the best training equipment, information, and accessories, visit us at www.EliteFTS.com.