


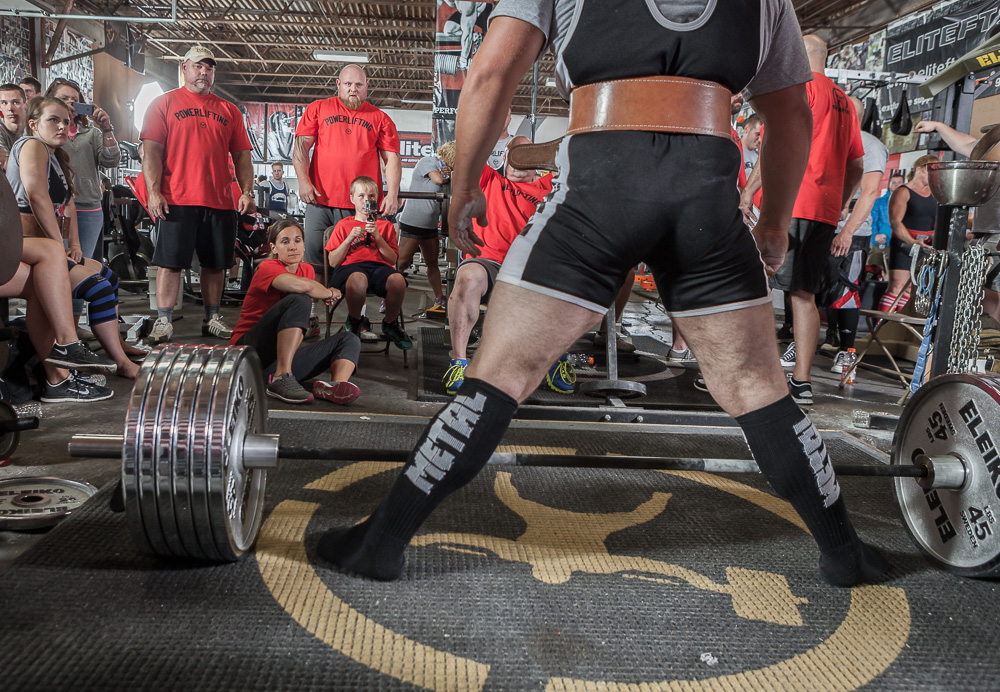
I often get messages, visitors, and clients who need help with their deadlift. More times than not, it is their setup and the start of their deadlift that needs work. The sumo deadlift, unlike a conventional stance deadlift, can’t just be muscled up. Well, you can try, but your numbers will really suffer. Sumo deadlifting requires patience and an almost perfect setup. Someone is bound to say or think, “So and so does it this way” as they read my steps. I am writing for the masses, not the one or two guys who can get away with jerking the bar, squatting down, or not using their hamstring efficiently. My method of teaching the sumo deadlift works with my clients, visitors, and at elitefts seminars. Everyone will have subtle differences because of body structure, but these are the basics and the videos below confirm how the process works.
How To Be Successful
There are a number of things that can keep a person from getting the most out of their sumo deadlift. The most obvious is being weak in the hamstrings and hips. From the technical side, it all starts from the setup. When diagnosing a broken sumo deadlift look for these indicators: squatting down, slack in the bar, loose lats, no tension in the hamstrings, driving the feet down, pulling straight up, and locking out the low back before the glutes. Each of these leads to different problems, but most of these are easily fixable.
RECENT: When IT Hits The Fan: The Stress Response
Now that the problems have been identified, let’s get set up for success. Below are the exact steps I walk Ashley (second video below) through as I teach her how to pull. If you find you are having trouble with one step, understand that you might not be strong enough to make the technical correction. This is why assistance work is so important. If you do have trouble, push your assistance work hard and re-test in 6-12 weeks.
0. Take your breath.
I added this after I made the video so I am starting with zero. Take your breath standing up. This will keep the belt tight while you get into position and not moving around. Taking your air at the top also allows for more air to be taken into the belly. More air means more spring and pressure when you lock everything into place. When you are first going through these steps it may be difficult to hold your breath the entire time. Keep working on it.
1. Bend over at the hips
Too often lifters squat down to grab the bar. They then proceed to sit and keep sitting while they try and get set up to deadlift. Then when they are ready to pull they do not readjust to create tension in the hamstrings. Loading the hamstrings is the key to a bigger deadlift. When you don’t do this you are leaving pounds on the platform.
2. Create tension on the bar through the arms.
Not pulling the slack out of the bar is another common mistake. If you use the bar to pull yourself into position you will avoid jerking into the bar you will also pull yourself into a better starting position.
3. Flex lats down toward the feet.
Loose lats sink squats but they also let the bar drift away from you when you deadlift. By shrugging your shoulders down and tightening your lats, you help keep the bar in close. The closer the bar is to the center of gravity the better.
4. Arch the low back.
Arching the low back in the bent over position locks the pelvis into place. This will help stretch/load the hamstrings as you wedge into position. Now when you drive your knees out and hips to the bar you can create even more load on the hamstrings before you explode.
5. Drive the knees out hard (weight should shift to the heel and outside of the foot).
Drive the knees out. DO NOT sit your hips down. The hips will drop as the knees go out but you are not dropping them on purpose. You want the hips in an optimal position. This will keep the hips high but not in a stiff-leg position and low enough for leg drive but not sitting them so low that you roll forward when they hamstrings can’t keep the hips in the proper position.
MORE: Elitefts Deadlift Manual
6. Wedge the hips in toward the bar and raise the chest.
Just like loading a spring, you are compressing your hips and body between the floor and your shoulders. The more you load it, the more the bar will start to come up before you even start to actively pull. When done right, light weights will start to pull before you are ready.
7. Spread the floor and drive torso to the rear (stand up).
Once you have pulled yourself into this positon you are ready to explode. Spreading the floor will bring the hips forward as you work to drive your head and torso backward. If you do go forward it is hard to recover and save a sumo deadlift without downward motion. Get your weight moving backward and use it to your advantage.
In this video I slowed down one of my deadlifts to half and at times one-quarter speed so you can see each step. In real speed it is almost seamless and you would miss one or two of the steps. The second half of the video includes Dario who pulled 424 @131 at age of 19. He added 109 pounds to his deadlift in 10 months using this set up. Katie who switched from conventional to sumo and in 10 weeks easily tied her conventional record. Lastly, myself pulling 760 @219.
In this second video I teach Ashley, a new client, how to sumo deadlift. She had never pulled sumo before and in less than 30 minutes her sumo deadlift looked pretty good. She still has some strength that needs to be done to improve this even more but the foundation is now laid.
The sumo deadlift can be very simple, but simple and easy are not the same. Building a strong sumo deadlift will require perfecting of these steps and building massive strength in the hamstrings. In my book, the hamstrings will never be strong enough.
I am always interested in how people grip the bar as well - and feel like it is often overlooked....with an attitude of I just grab the bar with a death grip. Most blame grip strength, but when it comes down to it, their grip technique is very poor. What's some common problems you see and how do you properly apply grip for both conventional and sumo pulls? To get the ball rolling, explain why gripping with hands too close together (mixed) for a sumo pull actually hinders your pull.