


Before we get into the meat of the article, I need to give a huge thanks to Chris Dalton from South Ayrshire Stalking. Chris and his wife run a B&B and deer stalking business in southwest Scotland, and he was kind enough to talk me through the butchery process. He’s as passionate as me about high quality meat and animal welfare, and one of life’s good guys to boot. For more information on what Chris does, or to book yourself a deer stalking experience over wild Scottish terrain, check out: http://www.ayrstalk.co.uk/.
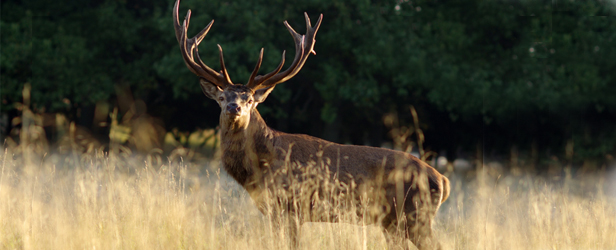
On to the article. This is Part 3 of 3 and we’re now dealing with large game, in this case a young roe deer. This is a doe, probably no more than nine months old and was selected due to it's small size and the high probability that it wouldn’t make it through the harsh winter.
 It is worth a minute to go over the shot. In the picture on the left, you can see the entry wound on the ribcage. While this would have been an instant kill for an animal of this size, it is not in the optimum position to guarantee a quick death for the animal. The ideal location is just behind the front leg (indicated with the knife point), taking out both the heart and lungs and ensuring a quick and efficient dispatch. The only problem with this method is that the exit wound causes a lot of damage and meat loss on the opposite shoulder, but this is a worthy sacrifice to ensure that the animal never knows that it has been shot.
Once the shot is taken, it is necessary to immediately remove the organs and stomach from the animal in a process called gralloching. (Gralloch is the Scots Gaelic term for intestines. In the U.S. it is more commonly called field dressing). This is carried out in the field and is necessary to preserve the flavor of the meat by allowing it to cool rapidly and prevent the growth of bacteria. In addition, it provides an immediate chance to inspect the internal organs for diseases such as TB and Johne's Disease in order to ensure that the animal is okay to enter the food chain. The skin should be left on the deer at this stage and will remain in place until a couple of days before butchering to prevent the meat from drying out.
The carcass is then hung for 7 to 10 days before butchering to allow the meat to develop flavor and also to tenderize. While you could eat the meat immediately, it would be lacking in flavor and the only cut that wouldn’t give your jaw a cramp would be the fillet. Also, the deer goes into rigor mortis for the first 24 hours, and butchering in this state can cause shortening, a process whereby the muscles contract and make it even tougher to eat.
The method of butchery is to work from the bottom up as it hangs—starting with the forelegs and then working your way up the carcass. We will produce three types of meat in this process: steaks, roasting joints, and meat for braising or grinding. To remove the forelegs, the cut follows the natural line where the leg joins the carcass. You need to make sure to get your knife behind the scapula, and the knife should slide through the gristle in the joint with ease. The meat on the foreleg can be pretty tough and best suits the ground meat pile; however, larger animals can be used for Osso Buco. The shoulder can be rolled and tied once boned and roasted, but it also makes good braising meat.

To remove the meat from the leg, simply follow the bones with your knife, pulling the meat away as you go. To remove the scapula, run your knife along the part of the shoulder blade that is visible on top of the joint. Keep following the scapula with your knife until you can get right underneath it, and cut the bone out in one. With both bones removed, the joint can be rolled and tied—ready for roasting.

The next two cuts are the brisket and the saddle. On a larger animal, the brisket can be slow roasted to produce beautifully tender meat, but on a roe this small, the meat is going into the ground pile. The saddle will be going into the steak pile. The best way to extract these cuts from the carcass is to make a cut between the sixth and seventh ribs right down to the spine.  At this point, you could use a bone saw to cut the spine, but you risk contaminating the meat with bone fragments, so the best way is to dislocate the spine and cut the spinal chord with your knife.
Once you have the front of the ribcage separated from the meat, you can get to work on the chopping board. First, remove the saddle—the cut of meat that runs on either side of the spine and up the neck. Follow the spine with your knife, teasing the meat away from the bone until you have the fillet removed. The brisket is the meat that covers the front lower portion of the rib cage and on a larger animal can be rolled and roasted. It is removed much like filleting a fish. Guide your knife in behind the meat and against the rib cage until the meat is free. The last couple of things to do with this part of the carcass is to chop up the neck for use in stocks and stews and cut the meat out from between the ribs for the ground pile—nothing is wasted.

Now, the rest of the carcass can be lifted down onto the board. Your first job is to separate the legs by severing the cartilage at the base of the spine and then snapping the spine over the edge of your chopping board. Next, follow the hip joint with your knife to remove the legs from the carcass.

From here, break the knee joint and remove the shanks for braising. With the thigh meat you have two options. Firstly, you can bone it out and separate the muscles into steaks. This is good quality steak meat and is beautiful when cooked rare and served with a rich red wine gravy. Secondly, you can leave the bone in and roast the entire joint. To roast, rub the skin with a combination of olive oil, dried rosemary, thyme, and a few cloves of garlic. Then, wrap it in plastic wrap and leave it in the fridge overnight for the flavors to penetrate. The next day, remove the wrap and cover loosely with foil and roast in the oven at 350°F (160°F). After an hour, remove the foil and baste the leg with the juices in the roasting tray. Cook uncovered for another 20 minutes. Let it rest for 20 minute before carving. It is beautiful, tender meat that is full of flavor and far leaner than beef or lamb.
What’s left of the carcass is arguably the best bits: the fillets and the strip loin. The strip loin is on the top side of the carcass and, like the saddle, runs on either side of the spine. It is removed in the same way—by following the spine with your knife and slowly removing the meat from the bone. This is by far my favorite cut of the animal.

The fillets are on the underside of the carcass and are removed in much the same way. These steaks are the leanest part of the animal and the most tender, but for me they lack a little bit of flavor compared to the rest of the animal. But good eating nevertheless).
That’s it, the deer is butchered and now you have a few weeks of high quality, free range, organic protein to store in the bottom of your freezer. You might ask why you should go to all this bother? Why not just go to your local butcher and get all this done for you? Well, for one, this is far cheaper. But there is more to it than that. Hunting your own meat brings you closer to the animal and its environment. You know exactly how that animal spent the last moments of its life; you know that it was killed humanely and that it didn’t suffer. When you butcher the meat, you feel every inch of the animal, and it sounds weird, but you develop a relationship with it. Through that relationship comes a raised consciousness and awareness of the meat and the land it came from that actually improves the flavor of the meat. There will always be arguments against hunting and I accept and respect the argument when it comes from a dedicated vegetarian, but when it comes from a meat eater, I can't accept it. For a meat eater to despise hunting but freely accept factory farming is just misguided and ignorant.

Venison Carpaccio with Soy and Lime
This is a simple recipe that I use for cooking the strip loin. I use cooking in the loosest sense, as the majority of the meat is raw.
- Start by heating oil and butter in a pan on a high heat.
- Season your chopping board generously with salt and pepper and roll the meat on the board to coat it in the seasoning.
- When the pan is smoking hot, place the meat in the pan and sear it on all sides.
- Once the meat is browned on all sides, remove it from the heat and cut it into thin slices.
- Serve with a soy lime dipping sauce. (Squeeze half of a lime into a dipping pot and add the same amount of soy sauce). Beautifully simple.
