


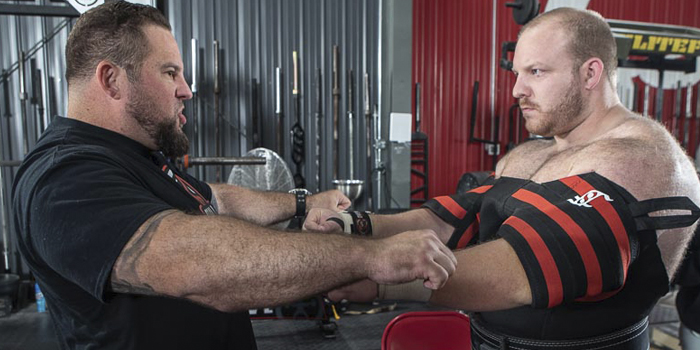
There comes a time in an equipped lifter’s life, where what you once thought was unbearably tight, becomes a mere quilted hug. What once felt like bone-crushing, skin-scraping fabric tombs of doom, are now just simply: “not that bad”. You smile at the newly outfitted offenders swimming their way into their first loose shirt and scoff at any part of material that does not seem to be painted on. So where does the more experienced ply guy go from here?
By now you have most likely tried a few different brands; are familiar with some stylistic choices; and know what you like for the most part as far as grooves and feels. Now you need to make your way into putting up some more serious numbers and relying on more skill inside the suits or shirts. At 5’5” and 225 pounds, getting into stock sizes and finding a tight fit can sometimes be challenging. So, to cater to my measurements, going a size or two down and stretching the material to fit an arm or leg is something I have gotten quite good at. I have become quite accustomed to doing this for new purchases, whether they are straight out of the bag from the vendor or if they are used gear deals I have found on Facebook marketplace.
Helpful Advice
Going down a size or stretching material is also currently very useful as now I do not need to order a custom piece. Another reason for doing this with previously owned gear is to avoid turnaround times from the manufacturer. Many of these companies have an eight- to twelve-week lead/production time—if you are lucky!
With that being said, get that tight-ass shirt or suit; know what parts need to be stretched for you to squeeze into it; and begin the all too fun process of breaking in that bad boy! You might surprise yourself with how much you can get away with as far as sizing down!
Disclaimer: Please do small amounts at a time so as not to overstretch your gear, which defeats the purpose entirely. Take your time in doing these methods and check measurements and fits periodically before further expansion of the fabric.
I tend to compare a garment that currently fits to the smaller garment that needs stretching and use that as a guideline as I go along (sleeves on shirts, hips, and legs on suits and briefs, etc.).
Stretching Suits and Shirts
Depending on the level needed to adjust and stretch the material, there are a few options I have commonly used to accommodate these various arrays of needs.
The first is easily found: an inflatable football or soccer ball. These can be bought in various sizes depending on the lifter and where the ball needs to fit and expand, such as the sleeve of a shirt or the leg of a pair of briefs or suits. Target, Walmart, and any larger commercial store carry these alongside hand pumps to inflate and deflate. Bonus points if you have an actual air compressor to speed up fill time, but all of this is just as doable without.
**It is to be noted that larger lifters will more than likely need a bigger stretching apparatus to fill larger circumferences and will want to possibly skip to the next section of this article.**
Start by inserting the ball in a half or semi-deflated state into the sleeve or leg of the garment that needs to be stretched. Spray the seams of the material with water: I use an empty spray bottle of fabric cleaner, pet stain remover, or shampoo; just be sure to clean out any leftover chemicals thoroughly before using them on your precious gear.
RECENT: 4-Day Outlaw Program
Once the sleeve or leg is wet, pump the ball to expand it until it is tight against the material. Continue to expand and stretch in small amounts at a time.
Leaving the ball inside pumped up is recommended, sometimes overnight if need be. Make sure to check and not overstretch the shirt or suit, as you want it just tight enough to get into with the aid of slippers or grocery bags. I most commonly use this tactic for shirt sleeves in single ply if needed to stretch about a quarter to half inch max.
Need More Stretch in Your Suits?
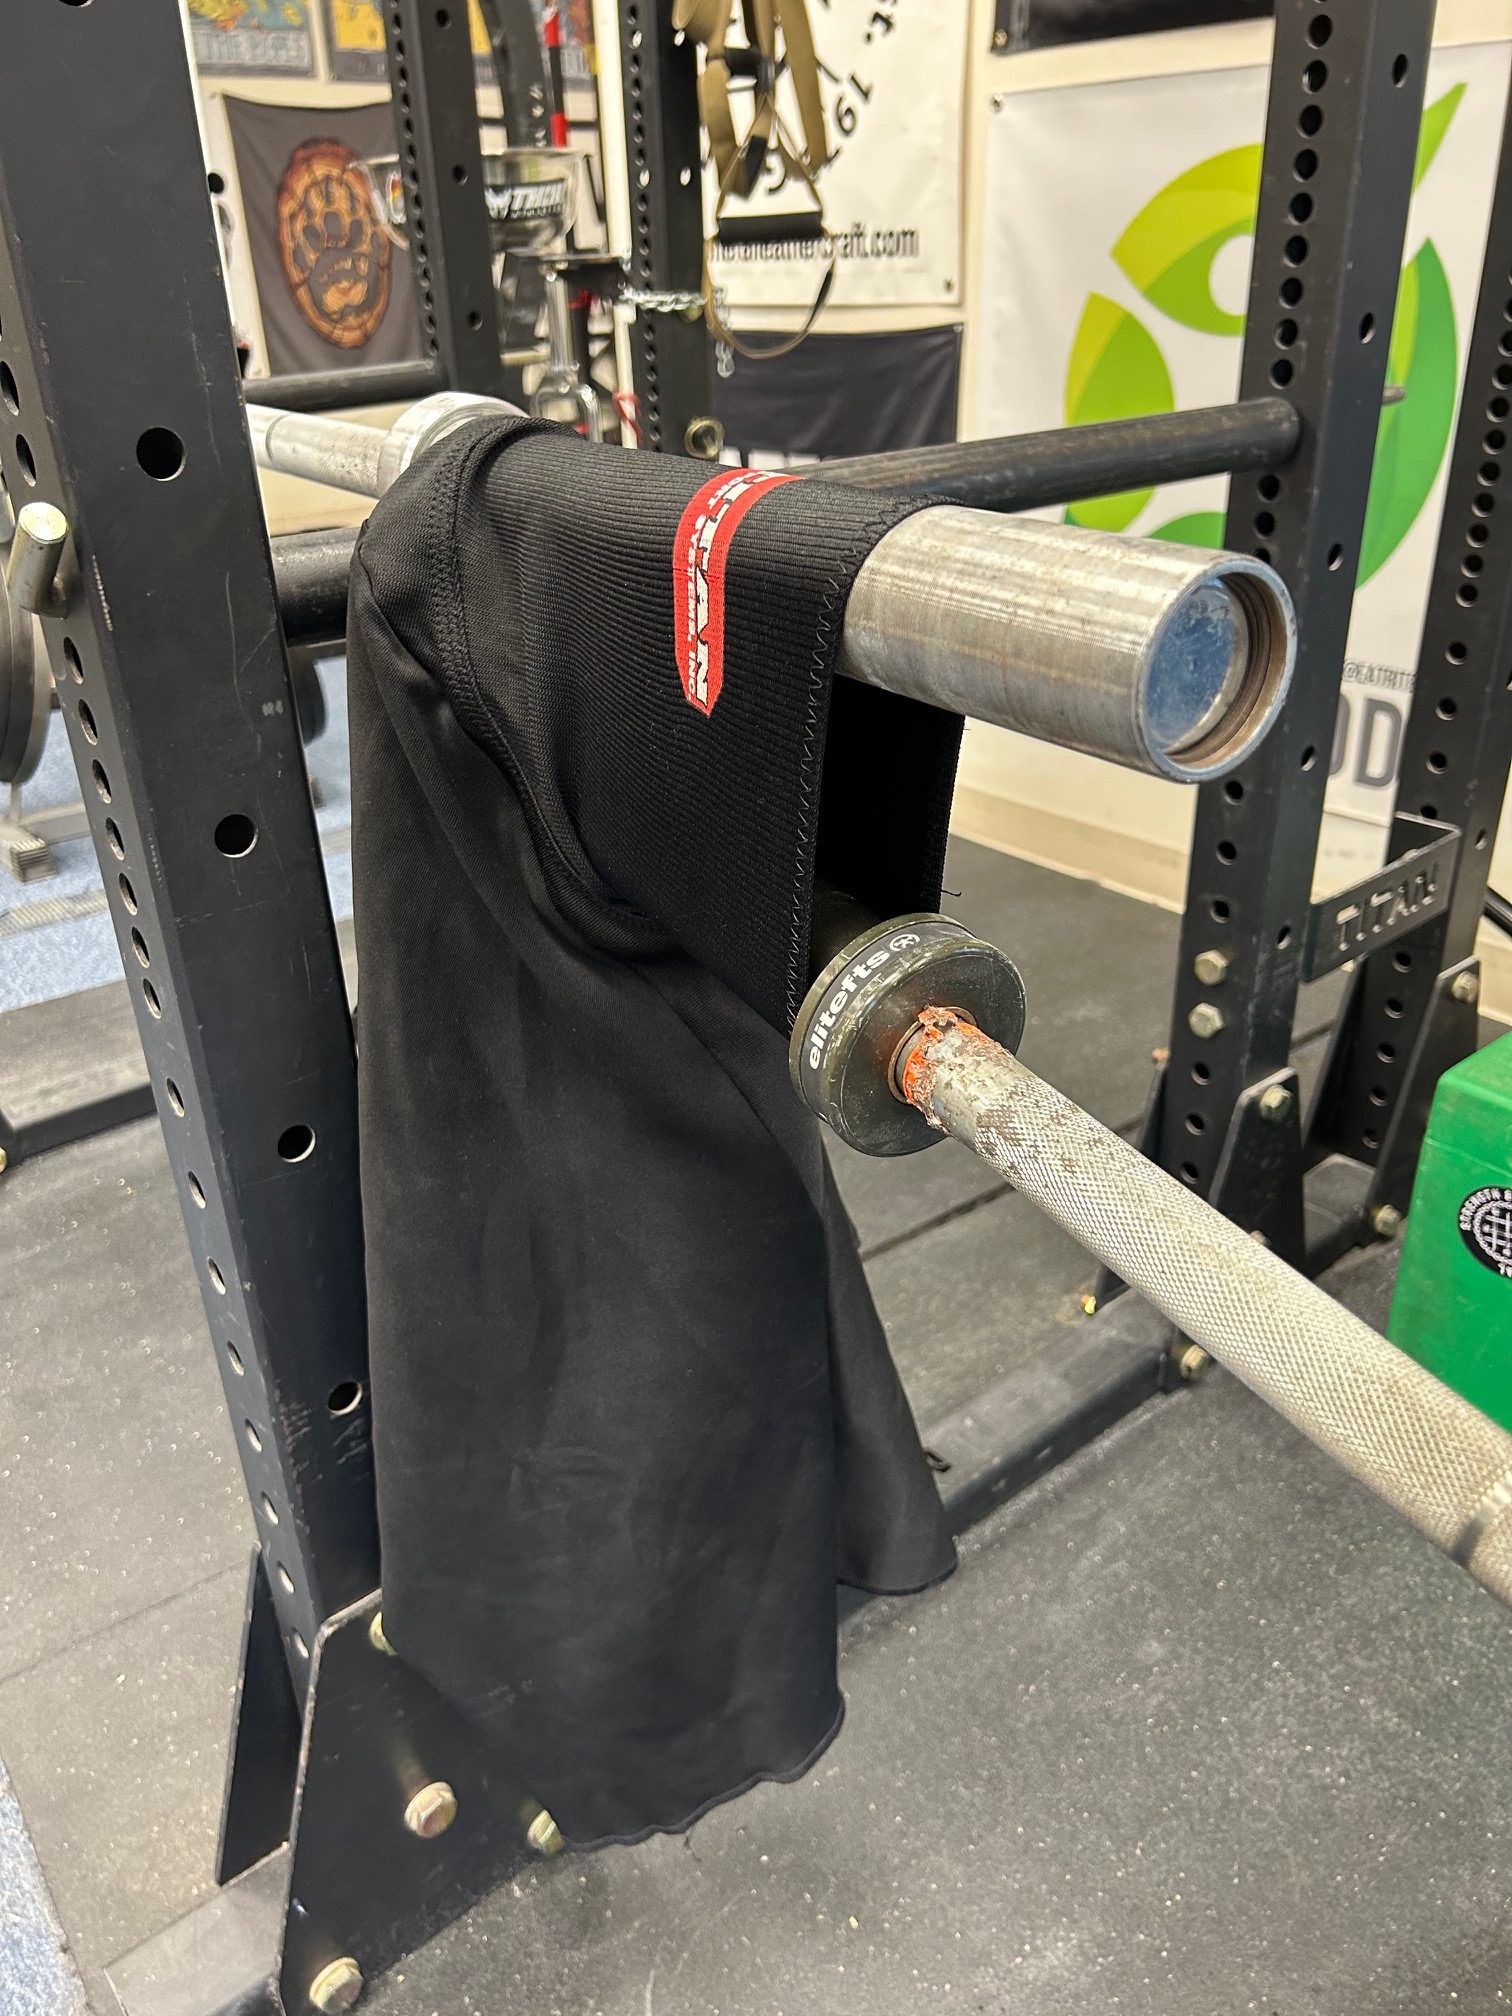
For sleeves that are more aggressive or need a lot more stretch, you will require the use of a chain, a power rack, and two barbells.
Set the pin safeties to waist height, put one of the power bars on top of them. One end of this barbell will be used to stretch and hold the shirt while the other is held in place on the rack. Using a chain and a carabiner, loop the chain around the bar shaft or sleeve and the safety that it is resting on to “tie” it to the rack. By now, you should have one free end of the barbell while the other end is chained down. Taking the shirt you wish to stretch, hang the first sleeve over the barbell end (the sleeve of the barbell should be inside the sleeve of the shirt) with the shirt collar and shoulder ending right at the outside of the barbell collar.
Next, insert the second barbell sleeve inside the hanging shirt sleeve so both barbell sleeves are touching inside the shirt. Make sure the sleeve of the second barbell goes under the safety to create a makeshift “jack.” Using the spray bottle of water, spray the seams and sleeves of the material and stretch the fabric by pushing down on the second barbell (the one not chained down) with your body weight. This will begin to work the sleeve and stretch it. You may also use an up-and-down motion instead of just holding it down in the stretched position. As before, take it off frequently to check the fit of the sleeve so as to not stretch it excessively. Repeat for the opposite shirt sleeve by simply removing the barbell, hanging the shirt again, and inserting the second barbell again.
Stretching the Legs in Your Suits
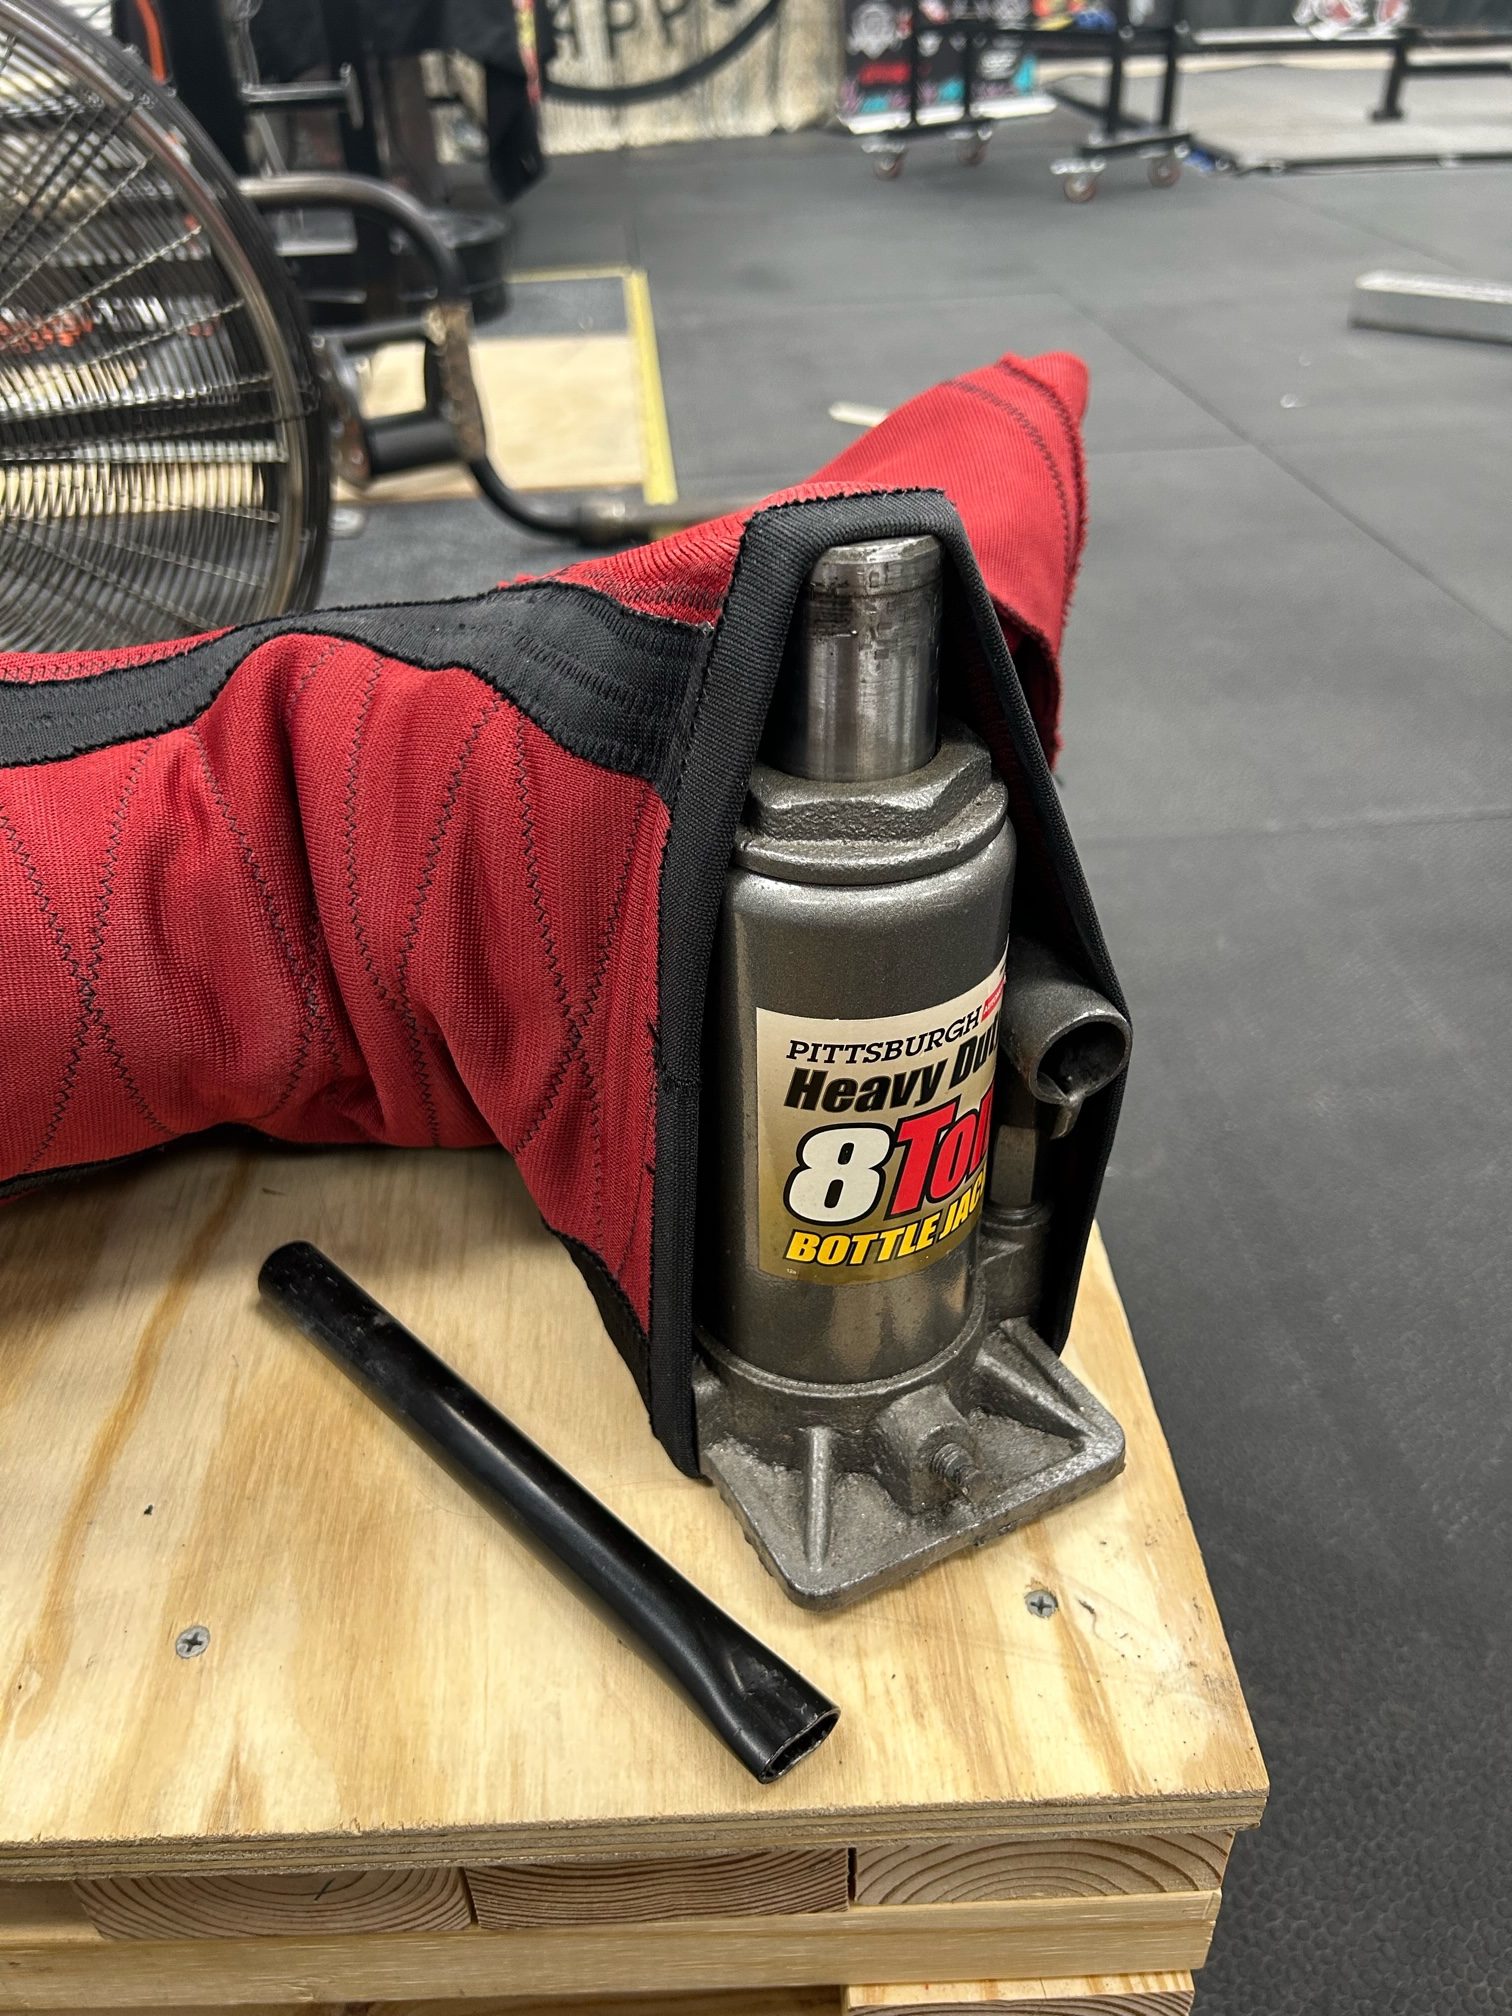
Finally, if you have to pull out the big guns for the legs of your squat or deadlift suit, you will need a six to eight-ton jack. These can be found online via Amazon or at stores like Harbor Freight or other home improvement stores. These are the same jacks used to control the rack heights on monolifts.
Loosen your jack and make sure the extending arm is all the way down, and then wiggle the flat part of the jack into the bottom of the leg with the tightening nut and actual pump handle insert facing out so you can still get to it. Slide and pull the top part of the leg over the extender. I also use a rubber piece to cover the top of the extender that will push against the fabric of the suits or briefs for the sake of protection.
Simply tighten the jack nut and insert the handle, pumping the jack until the extender is tight and the leg is fully stretched. Pump it a few more times to stretch the seam of the leg and leave it. Let it stay stretched for a while, usually in small cases, for about 30 minutes; for bigger jobs, I will leave it overnight before switching legs. This will open up the seam/lip that sticks to your quads and does not allow you to seat the suit properly in the crotch. As always, adjust in small increments to not overstretch the garment. I even take measurements of the opening to check how much I am stretching it and compare it to a suit that is tight, but I can still get into.
Cutting
Additionally, for single-ply, you may alter the back of the shirt by slitting the top of the spandex back panel a few inches. Most federations prohibit the use of velcro for the back of a single-ply shirt or opening the entire back (cut in two), so slitting the top to make the shirt more adjustable may be a solution for you if you are having trouble positioning it. This entails cutting a straight line down from the top of the closed back with scissors. This will expose more of the lifter’s back and shoulders. This is not recommended for beginners, as lowering the collar and seating the shirt more on the triceps will make touching exponentially harder and more likely to force a lower groove and touch point.
I usually only open up about four to five inches, which allows me to lower the shirt and belt it into position much easier in tighter or smaller sizes, especially if the fabric lacks length and it becomes difficult to belt the shirt in place.
Tabbing
Finally, one other adjustment you can make in making a single-ply squat or deadlift suit tighter would be sewing your own straps, also known as “tabbing.” This leaves a small amount of material that is pinched together and sewn underneath but does not overlap or cut the material to keep the suit legal. Many federations have rules against velcro straps of overlapping material used to tighten or fasten the suit. When the material overlaps another layer of material, this creates what is considered multiple plys.
The following method is a quick fix that you can do yourself to avoid such complications. You will need a pair of scissors or a knife to cut your thread, tapestry needles, a thimble for pushing the needle through the tough fabric, and heavy upholstery thread in the color of your choice. I suggest pinching your strap at the top (where it would lay on the top of the shoulder) and having a clip or pin to hold the pinched part together while you draw a line with chalk or a fabric marker where you want your stitch line to be.
Keep in mind that since the strap is tabbed, it takes the same amount from both sides of the crease. If you sew a line a half inch down from the top fold, it also took a half inch from the other side, resulting in the shortening of the strap by an entire inch. This is significantly tighter, so please proceed with caution and only tab a small amount at a time.
Sewing
Cut a generous amount of thread to complete one strap at a time. Thread your needle through the eye with your thread and pull the string until both ends are even, with the needle in the center of the other end. This will essentially double up your stitch. Tie a few half knots at the two meeting cut ends, so now you have a giant loop. This will serve as a stopper and prevent your thread from coming through.
Begin sewing by pushing your needle through the fabric at the start of your drawn line until the knot is stuck on the starting side and your needle and thread are on the other. Go back through (not around or overtop) a tiny bit in front of where you started. Once on the other side, go only a small bit in front of the original push-through. Pull through and then repeat, slowly advancing your way down the line. This will backstitch and overlap, improving the strength of the tab so your seam does not pop.
When you reach the end, tie a few more knots and thread through a few stitches to pull through and cover the loose thread. Trim leftover thread as needed.
I commonly do this to my deadlift suits as I buy my squat suits super tight and usually have to stretch them, while my deadlift suits are looser to get to the bar more efficiently. As I break in the suit and become more acquainted with it, I will slowly tighten the straps to get more pop from the bottom.
Final Thoughts
This of course is not a be-all, end-all article, and there are tons of methods that one can use to stretch suits. These are just a few I have had the most success with and did not require extra manpower or even more elaborate stretching setups. I hope this helps at least a few of you gear hoarders out there as you navigate the wild waters of equipped lifting.
Take your time; be careful with your equipment and yourself, and enjoy being more in tune with your gear. It might just be that little extra something you needed to get a suit or shirt to work in your favor!

Travis Rogers currently resides on the Eastern Shore of Maryland, where he owns and operates a strength training facility, “The Bear Cave.” He also works as a graphic designer, 10th and 12th grade ELA teacher, and is active in the community with his 501(c)3 charity organization for underprivileged children. He is the WRPF MD and DE state chairman, a national-level referee, and a meet director for the surrounding area.
Travis has been in the top-10 198 rankings for the last four years in both sleeves and wrapped divisions. After double quad rupture surgery, he's begun a new journey in equipment. In his first meet back from surgery, he totaled 2138 in the unlimited 198 division.
1 Comment