


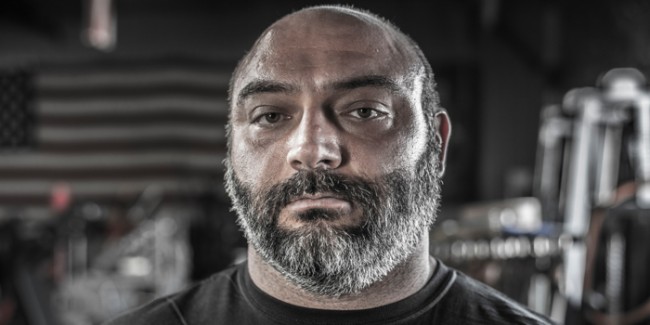

Don’t be a sissy – make ‘em sumo pull! I know this movement has, for the most part, fallen out of favor for athlete development, but hear me out. They are not that hard to teach, and once you have them in your rotation, they are a great tool. Sumo pulls (from the floor, pins, or blocks) will help develop hip mobility and strength, upper back strength, hamstring strength, CORE strength, static-to-dynamic strength (first-step speed), and even change of direction! Yes, you heard correctly! Driving out laterally on your foot on every rep, like we do with box squats and sumo pulls, helps develop change of direction. We rarely ever did “agility drills” with our athletes, and the majority of their agility scores consistently improved. I’m very confident that proper box squatting and sumo pulls were a major contributor to this.
Implementing Sumo Pulls
These should be implemented the same way that max effort lower body work is: as speed work. Start putting them in on your speed lower days after speed squats. The first day you introduce these, you may have to spend 20 minutes doing speed pulls with your group. Set the speed weights for them and have them do sets of two while you adjust their weights and coach them up. When three quarters of the room looks proficient, move on. If you had to, you could even pull speed squats for a couple of weeks and put these in their place to teach them, if time is a big factor for you.
RECENT: Learn to Train X — Box Squat Technique Fix for Athletes
Once the athletes are proficient with them, keep them in on a weekly basis on speed lower days. They can be rotated in as a max effort movement too, but I’m a firm believer that their most powerful application is on speed lower days. The reasons for this are: we can do them almost every week year-round, and the maximal acceleration will give us supramaximal force production with submaximal weights, so we have less wear and tear on athletes, while still getting a great training effect. The submaximal weights also allow the athlete to think and correct form as they are training. Allowing them to do the movements correctly leads to the proper neuromuscular firing patterns that we’re all after. THIS is where dynamic correspondence has a chance to work – as long as the athlete continues to do their sport and the basic locomotor patterns needed to do so (i.e. running, jumping etc.).
The sumo pull has somehow been deemed as “too technically involved” to use in an athletic development program. It doesn’t have to be! Let’s go over the process of teaching your athletes to pull like MF’s.
Setting Up
- Make sure that the athlete is centered behind the bar (seems simple, but…).
- Their stance should be the same width as their speed squat stance. When working with athletes, their feet have to be wide enough so that they are in a position to have some horizontal pressure going out the side of their shoe when they are about to pull on the bar. This is critical. Their feet can be under their hips, so all force is going straight into the ground. I completely understand that we have to put force into the ground to run faster and jump higher. However, according to Tom Myslinski during an elitefts Q&A in 2004, “force must be produced proximally (at the hip joint) before we can display it distally (ground).” If the athlete is in the proper position and drives out on the feet properly, we produce a ton of force at the hip joint.
- The bar should be over the athlete’s big toe knuckle when the athlete looks down. This will give them a chance to sit into position and then pull the bar into them; this is easier than starting with the bar on the shins. See, being able to coach big, bloated powerlifters just had massive carry-over to teaching tight, immobile sport athletes!
- Have their toes pointed out SLIGHTLY. Usually, you can let the athlete go with what’s most comfortable. Don’t let them get overly externally-rotated though – they shouldn’t have to play that card.
- Make sure that there is tension going out of the sides of the shoes. Again, lateral pressure is HUGE – make sure they have it. Also, make sure that their toes are on the floor; this is why I hate the “weight in your heels” cue.
Getting Down to the Bar
- Get a big breath in through the stomach. They should be able to fill up with air without their shoulders rising. They have to get the air in their gut!
- Keep the eyes and chest up. They should stop looking at the floor with lower body movements – instead, eyes and chest need to be slightly up. Before anyone rips this, keep in mind, these are things that we say to athletes. Sometimes when practicing, you have to over-emphasize things. These cues have worked best at getting athletes into a good position.
- SQUAT down to the bar – do not bend over. I guarantee, the first thing that they will do is to drop their chest and bend over. Don’t let them – make them open the knees and load the hips and hammies to get down there. Then, demonstrate flaring the knees out until you are close enough to grab the bar.
- Use a double overhand grip as long as possible. This will help with balance and back development. At some point though, you will have to let them alternate hands.
- Have them pull the bar into their shins and roll their knees out BEFORE they pull. Then they can pull the bar into their shins and pull the slack out.
Standing up with the Bar
- Make sure that their stomach is pushing out and braced.
- SIMULTANEOUSLY have them drive their shoulders back and drive OUT on their feet.
- Athletes tend to leg press it up, which results in the hips coming up first – then the shoulders.
- Tell them to pull back sooner to remedy this.
- Typically, you will have to over-emphasize pull-back to get them to raise their shoulders at the same rate as their hips are coming up.
Keep in mind: these are used to get athletes pulling at a level from which they can get the benefits of pulling sumo. These generally are not meant for an elite-level lifter with years of training experience. Once the athlete has these down, then you can start working on other points of execution.
Cuing for the Pull
1. Setting up:
- “Pressure out on your feet”
- “Fill your belly”
2. Getting to the bar:
- “Flare your knees”
- “Chin/chest up”
3. Standing up with the bar:
- “PUSH OUT/PULL BACK”
- “Pull back sooner” (if their hips are raising before their shoulders)
- “Squat up, pull back” (for kids that tend to “RDL” the weight up)
Now that you have the cues, let them be your performance rubric. If the athlete can do all of these things correctly, then more than likely you have some proficiency of movement. Assuming that they are pulling hard and fast, you and your athletes should be able to start reaping some benefits of sumo speed pulls. Typically, we did our speed pulls doing 6-10 sets x 2 reps. If you want to be a real prick, you can program 5x5 – just have justification for it. Remember, dynamic work was originally meant to be TIME-specific to powerlifting. So, if the sport has different time demands, you can implement those too – but when all else fails, being strong and explosive is never a disadvantage!
4 Comments