


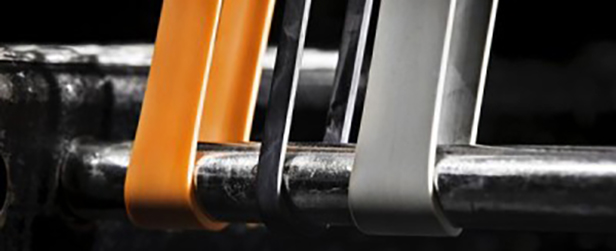
Anyone reading this already knows about the use of bands and chains and how their use can markedly affect accommodating resistance and the strength curves that we are all trying to master in this sport. Rather than focusing on how to use bands, I will focus on how to set up bands at home. It took a bit of trial and error until I found a set up that worked well for me.
I have my band calculations and set up for squatting at approximately one-inch below parallel. If you lift in an organization with more or less stringent depth requirements, you may need to adjust accordingly.
I use the time-honored (i.e. non-monolift owning) tradition of unracking the weight and backing up with the bar on my back. A word or two of caution must be heeded here. I load my bands onto a bar that is at my squat height. If you do not have help (i.e. someone to hold the bar), it will do a Peter Pan and fly out of the rack the minute you put a blue band on it. This is obviously bad.
A green band may or may not send the bar and rack flying backward. If you’re by yourself, you can load some chains or a weight release with some plates to keep the bar anchored. Always load the band from behind the bar, or in other words, standing so that your head is in front of the bar. If the band catches the bar, it will take your teeth out. Not good. Also, you will need to have something anchoring the jack stands. If squatting with blue bands can launch a monolift on its end, imagine what a relatively light set of stands will do.
I have my stands anchored with 75-lb sandbags like this:

When I put on more than a blue band, I add a 70-lb dumbbell to the front of the rack to anchor it even further. You don’t want to chance the rack taking you out. Four pair of dumbbells anchors the bands to the ground. I suppose you could fasten some pipe or other attachment to a platform, but this is how I have done mine:

Note that I have a black line. This lines the dumbbells up so that they aren’t crooked. I squat very wide and have the last dumbbell off the platform. When I use the blue and green together, I usually throw a sandbag on the middle dumbbells to keep them on the floor. They probably won’t come up during a squat, but I don’t take chances when using the bands.
One question that you’ve probably asked is about the resistance that the bands offer.
Though far from perfect, I do have a fairly good method of determining resistance (see
below).
From my calculations, the bands add approximately this much resistance (per
pair, not counting bar weight):
- Pink, 30 at the bottom, 60 at the top
- Green, 70 at the bottom, 140 at the top
- Blue, 100 at the bottom, 250 at the top
The blue bands are more than twice the weight at the top, a little different than the other two. I have two pairs of each band and have calculated this using both sets. Remember though, the important thing is that you have resistance; Dave and Jim will tell you not to worry too much about how much weight the bands add. However, you do need a starting point.
The way I calculated the band weight is crude but more or less effective. I placed the bar on my back with a band on one side and had my training partner load up weight on the side of the bar without the band. When I first did this, I had no clue where to start. With the resistance that I calculated, you’ll have a better idea of what to start with on the bar.
Here’s what it looks like:

Unless you have a fulcrum, it will be difficult to know exactly how much resistance the bands add. When the bar is more or less stable (e.g. not rocking on your back or tilting), you will be pretty close. Again, note that I have a fairly deep box in this photo. If you squat higher, the band resistance will of course be much more.
When determining the resistance of the bands at the top of the lift, remember that you should be in your squat stance, not just standing up. If you are a wide stance squatter, you will be much lower than when standing up with the weight when coming out of the rack.
Also, if you aren’t used to it, the bands will send you flying backward when you first come out of the rack. Be ready for a slingshot effect the first few times (you will get used to it).
This is what it looks like at the top of the lift when trying to calculate the band resistance. Note that the bar is tilting to my right. With 30 kg (66 lbs), this isn’t enough to keep the bar level. With taut blue bands, it takes another 20-kg plate or so to level the bar.


This is the final product—a bar with a bit of weight (260 lbs) and some blue bands pulling against the bar giving me a resistance of 360 lbs on the box and 510 lbs at the top.
Again, be careful of the initial pull that you’ll receive from the bands when first backing up.
Here’s what the set up looks like when on the box:

You can position the dumbbells anywhere you like. Notice that the bands are lined up more or less with the heels. When I first began training with bands, I had the dumbbells a bit more forward at about the mid-foot position. This provided a great deal of lower back work in that I was fighting not only the bar vertically but also horizontally. If you’re a lifter who is having some trouble keeping upright, you may want to try positioning the bands so that they pull the bar forward, requiring you to push back against the bar.
Hopefully, this will get you started with using bands in your home gym. If you’re looking for a means to incorporate them into your squats and don’t have a monolift, this might work for you nicely.