


So, you’ve just spent a day’s pay on a great piece of powerlifting apparel, whether it’s a squat/deadlift suit or a bench shirt. You use it for a training cycle and a meet and find that it’s simply not as tight as it was out of the package. Or, you lose a bit of weight and find yourself in a lower weight class. Now, your suit and shirt are actually (gasp) comfortable! Sound familiar? Sure it does.
Gear alterations can be a touchy subject for some. After all, you’ve just recently dished out $100–200 or more on a piece of equipment. The last thing you want to do is ruin it by making a mistake with shears or a sewing machine. At this point, you can wear it as-is, buy something new, or have the existing suit/shirt tailored. Even those of us who place custom orders and change out gear four or five times per year find ourselves at the tailor often, modifying our way to a better fit. Regardless of your gear situation, by having your gear altered, you may be able to increase its life and keep it working for you. Let’s spend some time taking a closer look at a few basic principles of gear alteration as well as some common mistakes made and how to find the right tailor for the job.
The basics of tightening gear
With the exception of denim gear, powerlifting suits are made from varying levels and plies of polyester and are normally brought to life by using thread-constructed seams. The end result is a piece of supportive equipment with the capability of allowing the lifter to handle increased loads. Interestingly, there are a good number of lifters out there who use gear but get nowhere near what they could out of their equipment. Although many attempts at fit are ball-parked quite well, many utilize gear that has stretched to the point where marginal usefulness is attained. However, others’ equipment choices produced results that were loose from the very beginning. In large part, loose gear errors are no one’s fault because it is difficult to know the difference without having had a frame for comparison or advice from a knowledgeable coach or experienced lifter. Plus, rare is the person who receives a stock suit/shirt from a manufacturer and finds that exquisite, perfect fit. Most require some tinkering.
In addition to the potential to lift a greater amount of weight, tighter gear also serves other purposes. It can help lock us in to more correct form positions! For example, if you deadlift sumo style, you may find that your shoulders have a knack for pitching you forward over the bar. By tightening up the straps on the suit and seating the straps over your traps, you can effectively cue the locking of your shoulders back into a more advantageous position. To cite another example of using gear to help with form, my pelvic ring and acetabulum position pose major issues for me. Therefore, my suit must have an accurate internal leg angle and be extra tight at the hips among other points.
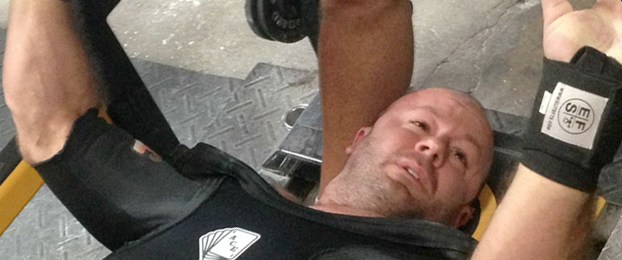
Bench shirts are also not exempt from visits with the tailor with lifting form in mind. Perhaps the lifter can touch weight to his/her chest much too easily. Maybe the lifter has structural or muscular weaknesses that could be helped with a different arm angle. These are just some examples of reasons to perform some “secondary engineering” on a suit. Are you thinking about your own gear yet?
Common mistakes made by lifters and tailors
Modifications that destroy the integrity of the material: One of the worst things that can happen during an alteration is for the weave and/or actual material to be destroyed. This can happen from the sewing machine needle breaking fibers or damaging the structure of the material weave itself.
In Figure 1a and 1b, the edge noted by the white arrow indicates where there was once a secured seam. The individual performing alterations on this suit utilized shears to cut off the initial seam and its surrounding material, leaving fraying material exposed and an incomplete zigzag locking stitch (yellow arrows). The seamstress then followed up with a very dense/close zigzag stitch in an effort to create a new and strong seam, but he or she damaged the fibers and material weave in the process. What resulted were runs and a loss of the material’s integrity.
Now for the scary part…figure 1 was a three-month-old bench shirt, and the seam shown is that of where the chest panel meets the arm. Would you be confident enough to use this shirt in a meet? After one practice use for five reps, we could see ripples and runs creeping into the chest panel from the seam. In an effort to salvage the shirt, the entire seam was then bent over the inside of the chest panel and secured down (lighter thread lines), strengthening the inefficient created seam. Despite our attempt at salvage, this is one $150 plus shirt that never saw a meet.


Taking in too much: It is crucial to understand that when you walk into the alterations shop and provide them with instructions such as, “I need the straps on my brand new $200 suit taken in half an inch,” that both you and your seamstress/tailor are on the same page. Do you mean half an inch total? Or do you mean half an inch on the front and half an inch on the back for a total of one inch (figure 2)?

Unequal alterations: Unless you have a very obvious limb size discrepancy, alterations to shirts and suits should be made to both sides. Adjustments made to one side of a suit very obviously change the equipment’s performance. Nevertheless, I recently saw a suit that had been taken in. The owner had informed his tailor that he had wanted it made one-quarter inch tighter. The tailor did just that. He made it one-quarter more restrictive—on one side.
Using the wrong thread: If you want an education in thread, talk to a local tailor/seamstress who has been in the business for awhile and offers work on various materials from silk to blue jeans to convertible car tops. These professionals will no doubt have a wide range of thread and can explain the properties of each type. Using cotton thread to make alterations on a powerlifting suit means that you’re utilizing a weak thread to hold together heavy material that will be placed under a great deal of stress on the platform. Polyester thread is the de facto choice for most of today’s clothing. It’s stronger than cotton and still rather cheap. Nylon thread is known to be super strong and takes a great deal of force to break or snap. With breaking strength so great, many can’t even snap the thread by hand and have to cut it with scissors or a knife.
The bottom line is that we all like bargains. However, request that your tailor use the strongest, highest quality thread possible given the designated mission of your suit. Your performance and safety depends on it.
Not washing suits/shirts: Interestingly enough, there are people who never think to wash their gear, despite the funk that eventually emanates from their gym bag. Believe it or not, your sweat and bodily oils are enough to degrade the material over time, too. Gear, like any other garment, requires cleaning. However, it’s important to exercise more care than just throwing it in the washing machine with your underwear and socks. Turn your suits and shirts inside out and either hand wash or machine wash them together. Use mild detergent or commercially available soap for synthetic fabrics. Don’t use fabric softener, please. Toss them in the dryer on mild heat only. In doing so, the material will tighten up and regain some of its original shape.
Finding the right person to alter your gear
Not every tailor and seamstress shop is going to be staffed with workers who are comfortable handling and making changes to powerlifting suits and shirts, especially when you inform them that the item is extremely important to your lifting and most especially when you ask them who their next of kin is should they damage your gear in any way! Nevertheless, use commonsense when locating an alterations shop. Personally take your equipment in and talk to the person who will be working on your gear. Painstakingly explain what type of equipment it is, the need for stitching that will not come apart or destroy the material, and the fact that the garment should be quite tight.
Ask them to explain how they will make the alteration you require and ensure that they possess the proper equipment (some shops do not have industrial sewing machines capable of stitching through multiple layers of suit/shirt material) and will utilize the correct thread. Remember, if a seamstress tells you that regular cotton thread or even blue jean thread is “good enough” for your equipment, this should be your cue to make a hasty exit.
Know that the alterations you undertake (sans those sent back to the original manufacturer) generally void any warranty on the garment. Should a suit/shirt blow following an alteration, the manufacturer is under no obligation to replace it. This is why an understanding of the basics of gear alteration may save you time and money in the long run. You will have a better idea of what you need in terms of modifications, and they may save you from having to purchase a new suit so soon.
No matter which manufacturer you prefer or what materials you find to best suit your needs, it is important to understand that even with custom gear, you may not receive that perfect fit right out of the box. Making modifications to suits, provided that those alterations fall within the guidelines of your federation, can enhance your performance during training and on the platform.