As strength and conditioning coaches, it is our responsibility to have and know the proper progressions and regressions for all exercises that we plan on coaching. We will also need a system of how to implement and teach our exercises. When coaching a large group, we need to pick the variations that most lifters can pick up on pretty easily and variations that can get our athletes a lot of solid reps. With anything in the weight room, we want quality reps.
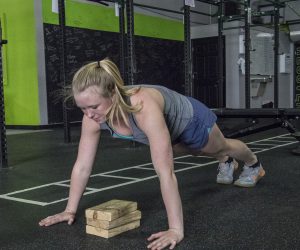
Most athletes should be able to do a push-up, but the truth of the matter is that not many can do a legit push-up. That’s why we need to start right away by incorporating push-up position planks and partial range of motion (ROM) push-ups into our program. The partial ROM push-ups allow the athletes maintain a proper push-up position while slowly working through their weak areas of the movement. I suggest you use wooden blocks for your partial ROM.
WATCH: The Strength Coach Development Center — Squat Progressions
The biggest thing when teaching a beginner how to bench is to teach the proper form from the beginning. You will start to see that some cues can carry over to all lifts. Even in the push-up we can begin to teach our athletes how to engage their lats and set their air (bracing). The push-up position plank and the push-up itself are great for core stability and bringing the upper and lower body together by creating full body tension. There is more core involvement in a push-up than in a bench press, so you can even get weight in your kid’s hands right away with the dumbbell bench and then incorporate push-ups a few times a week.
Remember, don’t over-coach your kids — smallest effective dose with your coaching cues. Have them hold a plank. If they can do it, then have them do 10 push-ups. As with everything, give them goals to reach: push-up position plank for one minute, 25 push-ups, dumbbell bench 50 pounds for 10 reps, etc. Don’t rush to put the bar in their hands. They have to earn that right.
Sample Bench Press Progression
All athletes must establish movement proficiency to progress to the next step.
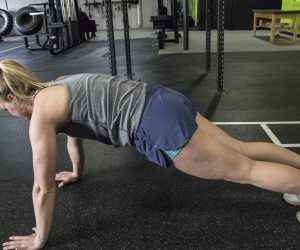
1. Push-Up Position Plank
Key Points:
- This is a great way to teach your athletes what they should be engaging in a push-up and that it’s not just a matter of simply going up and down.
- Cue athletes to screw hands into the floor to engage lats.
- Pinch armpits is a cue that can be carried over to multiple lifts to help engage lats.
- Use for core stability and teaching full body tension.
- Add to warm-ups or into programming at least two times a week.
- Teach breathing and bracing, as this is something that can be carried over to all lifts.
- You can overload this movement by adding a plate onto back of athlete.
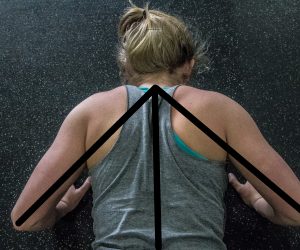
- Look for that arrow position (see picture) at about a 45-degree angle relationship between the elbows and torso. A lot of younger athletes like to be in the super wide, elbows flared position. This is no good, as it puts a ton of torque on the shoulders.
- Don’t tuck the elbows in tight, as that will drive the humeral head forward, possibly causing shoulder pain.
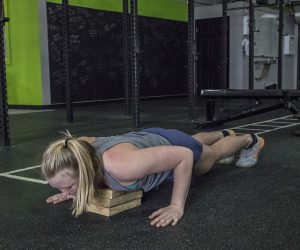
2. Push-Ups
Key Points:
- This is an awesome full body movement.
- Cue athletes to screw hands into the floor to engage lats.
- Pinch armpits is a cue that can be carried over to multiple lifts to help engage lats.
- Pull shoulders down and back is a cue that will be used in the bench press; this also helps keep the upper body locked in.
- Pull hands towards your feet and feet towards your hands is a cue that will help engage your athlete's core and get them to begin what it feels like to brace.
- Glutes is a cue that is used on every lift. Use them. In the push-up, this will lock the hips and lower body in. Remember full body tension.
- Teach them proper breathing (inhale prior to going down, exhale about halfway up).
- Pull chest down and push chest away. Just like in the bench press, pull the bar to you and push the bar away.
- Look for that arrow position (see picture) at about a 45-degree angle relationship between the elbows and torso. A lot of younger athletes like to be in the super wide, elbows flared position. This is no good, as it puts a ton of torque on the shoulders.
- Don’t tuck the elbows in tight, as that will drive the humeral head forward, possibly causing shoulder pain.
- If your athlete isn’t strong enough through the full range of motion, give them something to go down to like a medicine ball or board press boards.
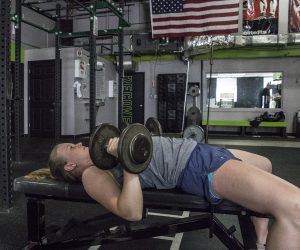
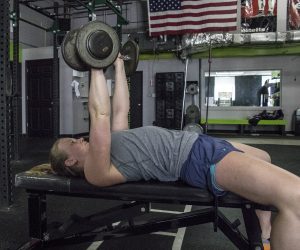
3. Dumbbell Bench Press
Key Points:
- You may utilize this stage in the progression along with push-ups.
- Cue to squeeze the dumbbells throughout the whole movement. A tight grip will create more tension in the upper body
- Cue big chest or chest up.
- Traps should be driving into the bench.
- Teach the athletes that perking the chest up creates a natural arch in the low back. We don’t need to coach excessive lumbar extension; it happens naturally if that athlete is in the right position
- Keep that arrow position with the elbows at 45 degrees.
- Start to cue rowing the weight in like a row and when it touches the chest to push the dumbbells away.
- Every rep must be locked out.
- Have a weight and rep goal that the athlete must hit in order to get a bar in their hands.
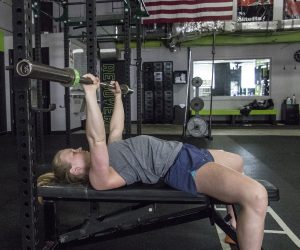
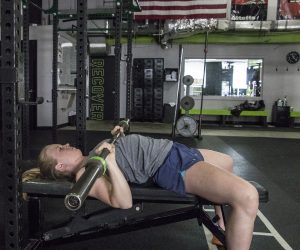
4. Barbell Bench Press
Key Points:
- THEY AREN’T POWERLIFTERS. Please remember this. They are athletes. Don’t go chasing numbers and let your egos get in the way.
- Five points of contact: two feet, glutes, upper back, and head.
- Set up with the bar against the J-Hooks and eyes directly under the bar.
- Cue them to drive upper traps into the bench.
- Keep the shoulder blades back and down (or scapular adduction and depression for all of you anatomy nerds). We need to create stability and minimize unnecessary movement in the shoulder. Doing this with the shoulder blades creates a natural arch.
- Teach them to pull the weight out: shoulders tight and locked in, elbows flexed while squeezing the bar as tight as possible.
- Align elbows and wrists, just like throwing a punch.
- Leg drive is hard to teach but what you can teach is contraction of the glutes. This, in turn, will help get some contraction of the hamstrings.
- So, get the upper body set, pull the bar out, and have the athletes contract their glutes and hamstring. Whereever their feet are in that position, leave them.
- We are looking for a solid base.
- Control the weight, don’t let the weight control you.
- If the athlete is in a position that feels “weird” then play around with their grip, their footing, and everything in between.