


The was first posted 06-05-03 for T-muscle.com as a 4 part series. We decided to stick them all together as one resource so get ready for a very long, but very good read.
The Eight Keys - Part 1
Remind us not to bug Dave Tate about submitting articles to T-mag. See, here's what happened. Dave got a little busy with life in general and didn't send us any articles for a while. We kept nagging him and finally he must've snapped.
Luckily, he didn't go Hulk on us and toss TC's car through the office window (again). Instead, he sat down at his computer and composed a twelve ton nuclear warhead of an article and lobbed it on us! We're talking a book-length article here that covers every aspect of his style of strength training! Below is the first installment of this roughly 56 part article.
Okay, okay, it's just four parts, but they contain enough info to make you the strongest S.O.B. in your gym. And if you don't belong to a gym, you can simply print out this series of articles and deadlift it. Either way, you're gonna get insanely strong!
" The individual who goes the furthest is generally the one who is willing to do, dare and attempt new things. The sure thing boat never gets far from shore." Dale Carnegie

Read Before Assembly
Have you ever tried to put together a baby crib or any other furniture item that comes in a box? I had to do this recently. First, I dumped the pieces out of the box so I could see all the parts on the floor. This took up roughly half the floor space in my house. I knew I was in trouble. There must have been 10,000 parts, most of which were the size of microorganisms. What the hell was I thinking?
Swallowing my manly pride, I decided to consult the instructions. That's when it really hit me: there's no way I'll ever do this! Who the heck wrote these directions? Was English their first language or their third? Did they really think the average person could decipher this secret code? The problem was obvious: the directions were written by a person who knew what he was doing. I, on the other hand, had no idea what I was doing.
The author of the assembly instructions had probably tried to make it as simple as possible, but he failed to realize that what was simple to him wasn't so simple to those of us without advanced technical knowledge and, say, a double major in engineering and quantum physics. (In the end, we decided the new baby could sleep in the box the crib came in.)
When I wrote the "Periodization Bible" articles for T-mag, I was much like the author above. I wrote what I thought at the time was the easiest way to explain the concepts and principles used for maximum strength development. It's taken over 10,000 e-mails, hundreds of seminars, and hundreds of hours on the phone to see that I missed the boat. Most people could care less as to the reasons why; they want the how. Not only do they want to know how, but they want it as simple as possible.
This new series of articles should be exactly what they, and perhaps you, need. I've come up with eight key factors that are required to get as strong as possible. These include:
- Coaching
- Teamwork
- Conditioning
- Strength
- Speed
- Recovery
- Attitude
- Nutrition
Each of these variables is just as important as the next and not one should be left unexamined. If one is off, the entire program will suffer because of it.
Let's examine each key factor. In Part One of this article, we'll look at coaching, teamwork, and conditioning.

Coaching
A coach is a mentor, training partner, motivator, and leader. There are many other functions the coach will fill but the most important is this:
The coach should strive to make you better than he is.
A great strength coach will be one who's lived in the trenches and has paid his dues with blood, sweat, and iron. If you want to squat 800 pounds, why would you ever listen to someone who's never squatted 455?
Ask yourself this question and you'll see my point. How much do you bench press? The answer doesn't matter that much, but let's say it's 400 pounds. Now ask yourself, how much more did you have to learn about training to bench 400 as compared to when you pressed 200? Would you also agree that there's much more to learn to take your bench from 400 to 500? I think so.
Now, how much more training did you have to do to go from 200 to 400? Did it come overnight? Or did you have to work hard and work smart to get there? Nobody will ever be able to convince me that no knowledge was gained in the 200 pound process!
The next question would be, could this same under-the-bar-knowledge be learned from a book? In other words, is there another way to gain this same knowledge? I don't think so. I feel the best coaches are the ones who've attained both under-the-bar knowledge and book knowledge. If you had to only choose one, it would have to be the under-the-bar coach. He knows how to get you where you're going because he's been there.
After all, how do you know what really works if you never put it to the test? I see tons of new programs on how to get strong and the first thing I ask the author is, "Have you done it? What did it do for you?"
I could go on and on about coaches as it's one of those topics that drives me nuts, but it would become a huge rant article. I'll leave you instead with this short story. Years ago I came to train with Louie Simmons at Westside Barbell. He was semi-retired at the time. We had a big group of lifters but only two or three were elite and most were below average. I believe there was only one 900 pound squat. When Louie decided to make a comeback and begin training hard again, the entire gym changed and a few years later, we were all elites and had over six 900 pound squats. The rest was history.
Tell me a coach who trains isn't a better coach! If you're a coach, get your ass in the gym and get strong again. You owe it to yourself and your team.

Teamwork
If you train alone you're putting limits on yourself. Training partners are critical for many reasons, including group energy, subgroup coaching, and competing. Have you ever noticed when you go into a gym all the strong guys train in their own little clique? Do you think they were always strong, or could a couple of strong guys have taken another guy under their wings to bring him up? That's usually what happens with a team. In fact, they're all stronger because of the team.
The energy a team can provide is enormous. We all need relationships in our lives to take things to the next level. Think back to your football or other team sport days. Remember the locker room talk before the big game? You find yourself sitting on one knee listening to the coach. As the coach speaks and the game gets closer, your energy meter is getting jacked up. Your blood is moving fast in your body and you can feel the adrenaline flowing. You're jacked up and ready to go. You're at maximum level!
Now what if I was to tell you there's a way to take it one level higher, but this can’t happen when you're alone? You'll need others to make this work. Go back to the game. What happens after the coach finishes his speech and you stand up? You find everyone in the room is jacked up. There's fire in everyone’s eyes and you're taking in more energy from them. It's almost unreal! There are high-fives, head butts, screams, rage, and extreme motivation. This happens because everyone in the room has his own level ten, but when it's combined for one purpose and one goal the energy goes off the chart! You find yourself at a level you never thought possible. This can’t be achieved alone.
I use this as an example of group energy. I'm not telling you to go nuts with your training partners each session. I'm saying there's energy there that can’t be found any other way! If you want to take it to the next level, find some training partners who share the same goals. You'll be amazed.
Training partners are also a great subgroup of coaches when you're training. When you're bench pressing, are you pressing the bar on the right path? Are your elbows tucked? Are you sure? A training partner can do two things: point out the mistakes and provide the proper verbal queuing during the movement to make sure you don’t screw up the next one.
You'll also notice one key thing in all lifter interviews. They always thank their training partners. Why do you think they do this? They know that without them they wouldn't be where they are today. If you train alone, stop messing around and get a partner!

Conditioning
If you think you can excel in any sport without a base level of conditioning you're out of your mind. The days of over-fat, bloated, can’t breathe, can’t sleep powerlifters are over!
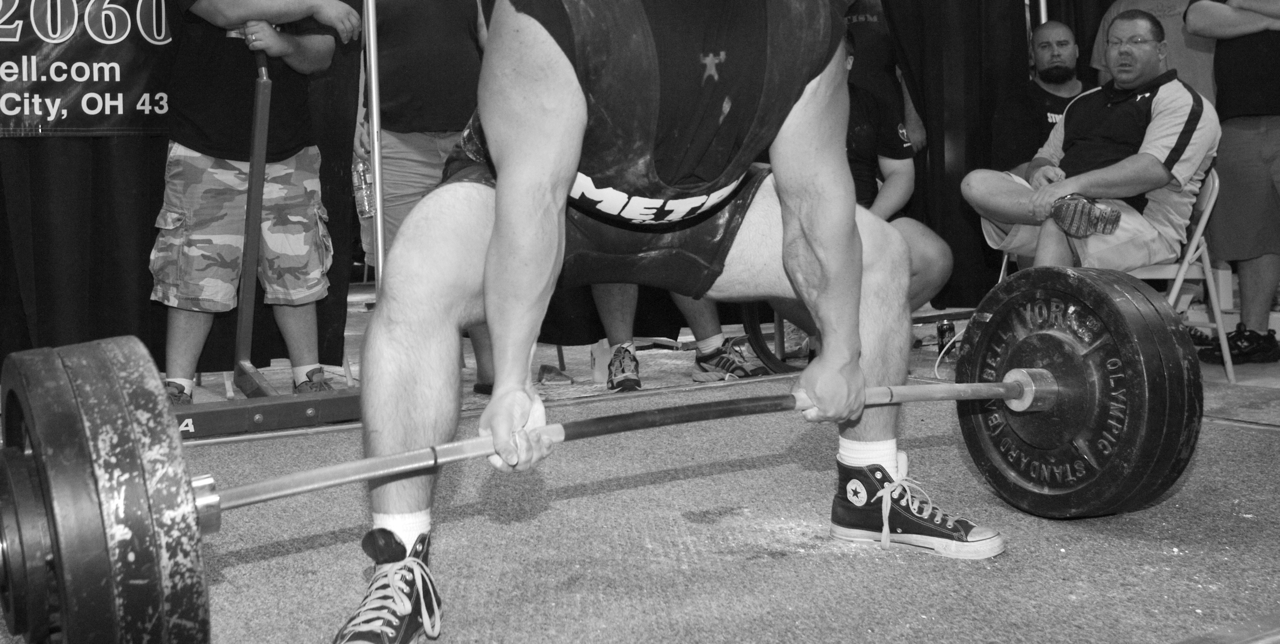
Let me describe what I define as a powerlifter so everyone is on the same page. A powerlifter is one who competes in the squat, bench, and deadlift to arrive at the highest total. A full meet can last up to nine hours and nine max lifts will be attempted. To be able to do this, a lifter must be in great condition or he'll pay the price come the deadlift.
Here's where one of the biggest mistakes I've seen over the past few years will come into focus. You can get conditioned by adding extra workouts and GPP (General Physical Preparation) training, but I've seen lifters go from three workouts per week to fourteen and wonder why they can’t recover. There are many ways to get conditioned (increase work capacity and GPP), but what I suggest doing is taking a slow build-up process to condition the body to the extra work. To do this, add in warm-up work for a few weeks. For example, a startup warm-up session would look like this:
Warm-Ups
- Sled Dragging: 3 sets of 20 steps
- Glute Ham Raises: 1 set of 6 reps
- Push-Ups: 1 set of 10 reps
- Lat Pulldowns or Chins: 1 set of 10 reps
Over the next few weeks, the sets, reps and movements will increase to something like this:
- Sled Dragging: 4 sets of 80 steps
- Glute Ham Raises: 4 sets of 12 reps
- Push-Ups: 4 sets of 15 reps
- Lat Pulldown or Chins: 3 sets of 15 reps
- Incline Sit-Ups: 3 sets of 20 reps
- Neck Raises: 3 sets of 10 reps
- Dynamic Band Stretching: 5 minutes
As you can see, the total volume and work has increased and the main part of your training session has remained unchanged. When your warm-up gets over seven to eight items, then you can cut it in half and move four items to an afternoon session (in an extra workout). Now you can add four more movements (over time) to the morning warm-up session and four more (again, over time) to the afternoon session.
You may find that keeping it all in the morning session is the best way for you and you won't need the afternoon sessions. You may also find you need different movements to get your body ready for the real work of the day. Whatever you choose to do, remember that extra work should be added in a slow process over time. And as long as you're making gains, don’t be so quick to add extra work.
Listed below are a few items I feel are great for extra workouts and warm-up sessions:
Light Plyometrics: Rope Skipping and Low Box Jumps (under 10")
Glute Hams Raises: Not the "natural" glute ham raises everyone seems to think are GHR's. You need a special bench to do these. The natural GHR is too intense for warm-up and extra work and is better left in the main session.
- Reverse Hypers
- Any Abdominal Training
- All Type of Sled Dragging
- Any Light Band Movements
- Free Standing Squatting
- Light Deadlifting (under 40% of max)
- Push-Ups
- Dumbbell Shoulder Raises
The sport you lift in will determine the level of conditioning you'll need and how many extra sessions you'll need to work into. For more information, see the sport specific area of our Q and A section at elitefts.com.
In the next installment, Dave will discuss the strength portion of his system, which as you can guess, is a whole article unto itself. He'll also open beer bottles with his teeth and swallow the glass. Don't bring the kiddies.

The Eight Keys, Part II
Strength
To be strong you must have strength. Pretty simple concept, don’t you think? So did I, but then I started getting a lot of e-mails telling me strength isn't important for sports. So I had to go back to the drawing board and rethink this one. After many hours of deep thought I still have to say: strength is very important! A quick football example and I'll move on to how to develop strength.
I've been told there's no need for a lineman to be able to squat over 350 pounds as he'll never have to move more than that on the field. This may be true if he had to move the 250 pound guy one time and it didn't matter how fast he moved him. We know in the game of football that the rate of force development is very important. You don't want people being moved slowly. We know from Mel Siff's writings that max force in the barbell squat can be measured at around 60%. At Westside we've found close to the same percentage to be true.
The other thing we know is the average play will last under ten seconds and there'll be between three and ten plays per drive. Our lineman who squats the "recommended" 350 will now be able to create max force at 210 pounds and may or may not be conditioned to do this more than one time. Too bad the guy across from him weighs 350! Who will wear who down?
Now, if the lineman could squat 600 pounds he'd create max force at 360. Does he have to actually squat 600 pounds? No! But he better be able to create max force with 350 pounds for eight to ten sets of two to three reps (around ten seconds set length) with 45 to 60 seconds rest. If not, he's at a disadvantage.
So how do you get strong?
We use a method called the max effort method. This is lifting heavy weight for one to three reps. There are two max effort training days per week, one for the lower body (squat) and one for the upper body (bench). One max effort movement will be completed for each day. The best movements for beginners to use are listed below:
Max Effort Squat Movements
- Deadlifts standing on 3 inches of mats or boards for 1 rep max.
- Good Mornings for 3 to 5-rep max sets. When you become used to the movement, then singles should be performed.
- Close Stance Low Box Squats for 1 rep max . Set the box so your hip at the crease of the leg joint is three inches lower than parallel.
- Safety Squat Bar Squats — If you have one of these bars then start using it. It's one of the best ways to build the muscles that squat and deadlift. The reason for this is the bar is trying to toss you forward and you have to fight to keep it in a good path. It also takes the weight off your shoulders as you don't have to hold the bar as you would a regular squat bar. You'll hold this bar by the front yokes. Don't hold onto the rack and pull yourself up, either. If you don't have one of these bars, then try to do anything you can to change the center of gravity of the movement. This can be done a number of different ways. You can use what's called a Manta Ray that snaps onto the bar; you can do high bar squats; or you can wrap a thick towel around the bar so it'll sit higher on the back. Each of these will all work the body differently.
- Pin Pulls for 1 rep max. I like to have lifters use pins below the knee at various positions for this movement. Only pick one position per day.

Max Effort Bench Movements
- Various Board Presses — Same as bench press except you'll bring the bar down to a select number of 2 x 6 boards on your chest. The two board press would be two 2 x 6's (one on top of the other). The board is usually around 12 to 16 inches in length to make it easy for a spotter to hold it in front of you. If you don't have a spotter to hold the board, you can tuck it under your shirt, use a band, or use one of those rubber waist trimmer things to go around both you and the board.
- Floor Presses — Lay on the floor and perform a bench press with a one second pause at the bottom. This exercise is designed to strengthen the midpoint of the bench press. It's also very effective in increasing triceps strength.
- Close-Grip Incline Presses — Use a low to steep incline with one finger on the smooth part of the bar.
- Pin Presses — Place a bench in a power rack and a bar on the pins. Adjust the pins (safety supports) to change the range of motion. Do these from various positions, from just off the chest to two inches below lockout.
- Reverse Band Press — This movement is the same as a bench press except you'll use two large flex bands to hang the bar from the top of the power rack.
Note: Bands and/or chains can be added to any of these movements for variety and training effect.
So how many sets and reps should I do for this max effort movement?
Make sure to only do one max effort movement per session. The sets are dependent on how strong you are and how you work up. If you only bench 185 pounds, it wouldn't be wise to start with 135, then jump to 155 for a set and then finish with 185. There's very little volume completed this way. It's better to use a set rep scheme as follows:
- 2 Board Press (Max 185)
- 45 pounds for 3 sets of 5 reps
- 70 for 3 reps
- 95 for 3 reps
- 115 for 1 rep
- 135 for 1 rep
- 155 for 1 rep
- 175 for 1 rep
- 190 for 1 rep
The last one should be an all-out effort. If not, keep working up. There's nothing wrong with missing a weight on the movement. As you can see, the volume is much higher and the work load more productive to strength gains.

What do I do after the max effort movement?
Your choice of movements after the main max effort movement should be based on where your weaknesses are. For 90% of the lifters and athletes I've seen, this movement would be something for the triceps on bench days and hamstrings on squat days. These would be followed with other movements designed around the individual lifter. To better illustrate, see the sample templates below:
Max Effort Bench, Upper Body Day
Warm up
Main Session
- Max Effort Movement — Board Presses. Pick one movement from above and work up to max.
- Triceps Movement — Pick one or two of the following listed below:
- Dumbbell Triceps Extensions with elbows in
- Dumbbell Triceps Extensions with elbows out
- JM Presses
- Close Grip Incline Press
- Close Grip Rack Lockouts (mid to high)
- Close Grip Board Presses (mid to high)
- Barbell Extensions to nose or lower
- Close Grip Push-ups with hands on hex dumbbells
Sets and reps are dependent on what each lifter feels he needs to do. Most have found one heavy day and one lighter day per week to work best. I'd recommend the heavy day to be on the max effort day and the lighter day to be on the speed or dynamic day.
For the heavy day, work up to one to three heavy sets of five reps. This can either be the same weight for all sets or it can be staggered weight for the three sets of five reps. The light day will consist of 4 to 8 sets of 8 to 12 reps.
3. Shoulder Movement — You should only do one or two light shoulder movements as the shoulders get hit in every session anyway. For example, when you squat, your shoulders are getting pounded. They also get trained each time you bench press.
I believe most shoulder injuries are a result of overuse and overtraining of the deltoid area. With this in mind, I'd suggest all the shoulder movements be part of the raises or rotation categories. These would include:
- All types of rotator cuff work
- Side Raises of any kind
- Front Raises of any kind
- Rear Raises of any kind
- Chest Supported Rows — Performed on any rowing machine where your chest is supported on a pad.
- Barbell Rows
- Dumbbell Rows
- Face Pulls — Stand in front of a lat machine and pull the bar to your face.
- Chins to the front
- Pulldowns to the front with close or wide grip
The sets and reps would average around 2 to 4 sets of 10 to 12 reps.
4. Lat Movement — I used to feel all lat work should be performed on the same plane as the bench press. In other words, all lat work should be rows. While this makes sense in theory, it doesn't hold up in real life. Too many lifters don't do this and many bench a hell of a lot more than me!
Yes, I do feel rows are a better choice but there are advantages to the pulldown and chin-up movements as well. I'd suggest mixing them up and doing one to two movements per session. The best of the best in this category include:
The sets and reps on the lat work is somewhat tricky and will depend on the movement. All movements should be done strictly and with good form. This will keep the weight relatively low. For the chins, training to failure on each set seems to work best, while the rows seem to work better with lower reps (5-8) and fewer sets (2-3). The pulldown and face pulls all seem to feel and work better in the higher reps range (12-15) for higher sets (4-5).

Max Effort Squat or Lower Body Day
Warm Up
Main Session
A) Max Effort Movement — Low Box Squats with Safety Squat Bar. Pick one movement and work up to max
B) Hamstring Movement — There are tons of hamstring movements but only a few that'll make my list as the best of the best. Most hamstring movements are a complete waste of time for strength because they only work the hamstrings from either the hip or knee and not both at the same time. The best of the best list includes:
1. Glute Ham Raises with a real GHR bench! The reason I say "real bench" is that I'm in the equipment business, so I see the junk that's out there and it frustrates the hell out of me. First off, a so-called "natural" glute ham raise (where you kneel on the floor and someone holds your heals as you fall forward) is not a glute ham raise; it's a manual hamstring curl.
Second, to the beginner, a GHR should be hard to do. If you get on a bench and can knock out 10 to 15 reps the first time you do it, then the machine isn't built correctly. The toe plate should be long enough to push your toes into it. The pad should have an angle on it to keep your body in the correct position so you don't fall off at the top. I can go on and on with this, but the fact is that too many companies build equipment designed by people who've never lifted a real weight in their lives!
To do a GHR, you'll start with your body in a horizontal position on the bench with your toes pushed into the toe plate. Your knees will be set two inches behind the pad and your back will be rounded with your chin tucked. You then push your toes into the pad and curl your body up with your hamstrings while keeping your back rounded. As you approach the top position, squeeze your glutes to finish in a vertical position.
The sets and rep scheme for the GHR depends on the strength of the lifter. I find most athletes and lifters to be very bad at these as the hamstring strength of most people is downright terrible. For those who fall into this category, I'd have them do two to three sets of GHR as part of their warm-up for every workout of the week. I suggest they strive to get 3 sets of 10 reps. This will mean for most that they'll be doing three sets to failure, failing around 3 to 5 reps each set. Over time this will improve.
Once they get better, I'd have them keep the GHR as a warm-up movement and drop the sets and reps to 3 sets of 8 reps. At this time in the program, they'd now add the GHR as a main movement as part of the main session at least one time per week. Yes, they'll be doing GHR's five times per week!
For the main session there are several suggestions to follow for the highest success. While doing the GHR as the main movement, it's "bust ass" time. The reps and sets will fall into several categories and should be rotated every few weeks. Examples of these programs would include:
• Three sets to failure
• One hundred total reps (using as many sets as needed)
• Three heavy sets of 5 to 6 reps while holding weight across chest
• Three heavy sets of 5 to 6 reps while holding weight behind head
• Three heavy sets of 5 to 6 reps with the back of machine inclined up 4 to 30 inches.
• Dynamic GHR sets — Here you get to the top position and drop fast and rebound out of the bottom with as much force as you can. You can use a heavy medicine ball or weight to lower faster and drop the weight at the bottom.
• Static-Dynamic GHR — Start at the horizontal position and have a training partner place his hands on your back for a three to five-second count. While doing this, drive into your partner’s hands as hard as you can. After the five seconds, your partner will pull away and you should fire up as fast as you can to finish the rep. This is best preformed with 5 to 6 sets of 3 reps.
• Yielding GHR — For this version you'll break the movement into three holding positions, each for 5 to 10 seconds. Start at the horizontal position and hold for 10 seconds, raise halfway and hold for another 10 seconds, then rise to the top and hold for 10 more.
• Timed GHR — In this version you'll give yourself a set time and do as many reps as you can. For example, you use five minutes and end up with 70 reps the first time you do it. The next time you'd use the same time and try to beat the 70 reps.
• GHR with bands — This is a movement for the more advanced lifter. Strap each of the bands around the bottom of the GHR and place the other end around your upper traps. The bands will add heavy resistance at the top.
• Forced GHR with heavy eccentric — This is a good version for those who aren't strong enough to get one rep. With this version the training partner will help the lifter get to the top and then he'd lower the rep on his own. Only enough assistance should be applied to help the lifter get one rep. Sets of 3 to 5 reps are best with this style of the GHR.
2. Reverse Hypers — Here's another one of those things that bothers me. The reverse hyper is a trademarked name, so there's only one way to do them and it's on a reverse hyper machine. Anything else is not a reverse hyper!
This machine is also very good for the development of the hamstrings, glutes, and lower back. There are many ways to perform the reverse hyper but these three are the best I've found:
• Three to four heavy sets for 6 to 10 reps — This is a looser style then many are used to. After you get on the machine you'll use a couple of reps to get the weight moving (these don't count for the total). When you get a full range of motion, you'll try to catch the weight at the bottom of the motion where the axis of the plates begins to cross the front legs of the machine (closest to your head). This way you reverse the weight before it reverses you. This style seems to hit the hamstrings and glutes very hard.
• Strict sets for 3 to 4 sets of 15 reps — To do the strict reverse hyper, set yourself on the bench so your hips are 3 to 4 inches off the back of the machine, then arch your back as hard as you can while keeping your chest off the machine. This will put your body in a diagonal position.
To perform the motion, you'll begin with the axis of the plates even with the back legs on the machine (closest to your hips). From the start position, focus on arching the weight up with the lower back. You'll only be able to get the weight so high. When you get to the top, try and hold the position for a one count. This will be impossible to do but try your hardest. The tempo of this movement is twice as slow as the first style of hyper. You'll feel this style more in the lower back than anywhere else.
• Timed Reverse Hypers — This is a classic Louie Simmons movement. Use much less weight than you would with the other two styles. Either style of the reverse hyper can be used for this. Pick a designated time (usually 3 to 5 minutes) and continue with the set nonstop for as long as you can or until you hit your time deadline.
3. Pull Through — The pull through is a special exercise designed to train the muscles of the lower back, hamstrings, and glutes. Begin by facing away from a low pulley cable with a single "D" handle. Next, bend over and grab the handle between your legs while facing away from the machine. Then pull the handle through your legs until your body is in an upright position. This movement is best trained with 4 to 6 sets of 10 to 15 reps.
4. Dimel Deadlift — The Dimel deadlift is the one movement we get the most questions about. To perform it, stand in front of the barbell with around 30 to 40 percent of your max deadlift weight. Pull the bar to the top position. This is the starting position of the exercise.
From here you want to arch your back as hard as you can and push your hips back until you feel a extreme stretch in your hamstring and glutes. For the first few reps you'll lower the bar with a controlled tempo to just below knee level then rebound back up. Once you get the bar path figured out you'll then begin to lower very fast and rebound out of the bottom in a ballistic fashion. This is a high speed, high rep exercise that's best trained with 2 to 3 sets of 20 reps.
5. Close Stance, Stiff Leg, No Touch Deadlifts Off Box — This is another great movement for the lower back, glutes, and hamstrings. Stand on a four inch box and pull deadlifts. The key here is you'll not touch the floor until the set is finished. The bar will stop short of the floor by a few inches before you complete the next rep. I've seen this trained two ways. First, for a couple of heavy sets of 3 to 5 reps; second, for a few sets of 15 to 20 reps.
6. Sled Dragging — Sled dragging is a very underrated hamstring movement. There are a few ways to really hit your hamstring with the sled. The most popular is forward walking where you make sure to really kick the front leg out.
The second method is to grab the sled handle or strap behind your knees with a close stance. While in the bent over position, keep your hands behind your knees while walking forward. You'll only be able to take small steps but after a few steps you'll know right away what you're training.
There are two very good ways to drag the sled for hamstrings. First is with very heavy weight for 15 to 20 steps per set. The second is with lighter weight for 70 to 100 steps per set.
7. Inverse Leg Curls — This movement is performed on a glute ham bench or a standard hyper extension or back raise bench. To perform it, set your body on the bench as you would a back raise. You'll be in a facedown, rounded over position with your heels and toes off of the toe plate. The only thing holding you should be your heals against the pad. If you're using a GHR bench you'll want to set the toe plate forward so your knees are just off the pad.
To begin, arch your lower back as hard as you can and force your heals into the pad. Pull yourself into the horizontal position and then try to leg curl your way up another three to four inches. If done correctly, you'll only be able to pull yourself up a few inches. When you hit your highest spot, you'll hold statically for a three count then lower. This is best trained for 4 to 6 sets to failure.
C) Torso Work — These torso movements are intended to train the muscles of the lower back and abdominals. This could very well be the most important group of the entire training program.
Many great movements for the training of maximum strength are listed below. Choose one for the lower back and one for the abs. If you feel the need, two can be performed for each muscle group, but try to keep the total main session movements down to four to six movements. If you feel the need for more torso work, add it to the warm-up or an extra workout later in the day or on an off day.
1. Reverse Hypers — This movement is already described above. If you choose to do the exercise as a hamstring movement, find something else to do for the torso work or use a different method to train it.
2. Banded Good Morning — This is a great high rep movement. To perform this exercise, you'll need to use a Jump Stretch flex band. Stand on the band with one end of the loop under both feet using a medium stance. Place the other end of the band around the upper traps. From here do a standard good morning movement by bending over and standing up while keep the knees slightly bent. Make sure you're forcing back onto your hamstrings as you bend over. This movement can be trained a variety of ways for a few sets of 20 reps to a few sets of 100 reps.
3. Pulldown Abs — Begin by placing a rope or leather triceps handle on the lat pulldown machine. Face away from the machine and grab the rope behind your head with both hands. Perform the movement in the same motion as a deadlift. Start by pushing your abs out and then tighten them as hard as you can. Bend over at the waist until your torso goes below parallel to the floor. Reverse the motion in the same manner.
4. Back Extension — This exercise will help strengthen your lower back. Using a glute ham raise or back raise, lock your heels in and bend forward at the waist. Begin the movement by arching yourself to a parallel position and holding for a second. Return to the starting position slowly to avoid getting dizzy.
5. Ab Wheel — This is a great exercise for your abdominals. All you need is an ab wheel (which can be purchased at EliteFTS.com). Start on your knees and roll yourself out, keeping your abs tight. Once you're parallel to the floor, bring yourself up, back to the starting position. This isn't an exercise for everyone as it requires great core strength.
6. Hanging Leg Raise — You can hang from a chin-up bar or use special straps. This exercise can be done several ways. The first way is bringing your knees to your chest and lowering them back down. This is the easiest way to do them and recommended for beginners.
The more advanced version of this is keeping your legs straight throughout the entire movement. For those wanting a good challenge, try bringing your feet to the top of the chin-up bar. Make sure you don't swing and use momentum to perform reps. If you're not strong enough to do this, have someone place his hands on your lower back.
7. Roman Chair Sit Ups — This is a great exercise to develop your hip flexors and abdominals. Place your feet under the GHR foot pads, keep your knees relatively straight, and perform sit-ups. To make the exercise more difficult, hold a plate behind your head.
8. Rainbows — This exercise is designed to isolate the obliques. To begin this movement, lie on your back with your hands over your head holding onto a heavy object. Pull both knees toward your chest in a tucked position. Keeping this tucked position, roll your knees to the left side until they touch the floor, rotate back to the center, then roll them to the right. You must keep your shoulder blades on the floor. To increase the difficulty, perform the movement with your legs raised in a 90 degree angle.
9. Straight Leg Raises — This exercise is intended to strengthen the abs and hip flexor muscles. Lie on your back on a flat bench or on the floor. Keep your arms out to your sides or hold onto the rack. Raise your legs to a 90 degree angle and press your lower back into the bench as hard as possible. Lower your legs until you feel your back start to arch. At this point, raise the legs back to the starting position. Not everyone will be able to go all the way down at first, just go as low as you can before your back arches. If you try to force it too soon you may injure yourself.

How do I cycle the max effort movement?
You have to always remember that with this style of training every movement has its own life cycle associated to it. In other words, each movement cycles independent of the other. Also, each day cycles independent of the other days.
For the max effort day, the first movement (max effort movement) will rotate in a one to three week cycle. There are several ways to accomplish this. The more advanced the lifter, the faster the movement has to change. An advanced lifter will need to change this movement every week. An intermediate will change every two weeks while a beginner will change every three.
How do I know if I'm a beginner, intermediate or advanced? If you have to ask this question, then you're a beginner. Everyone new to this style of training should treat himself as a beginner. There are checks and balances (C & B's) throughout the program so you'll know when to change. The C & B's for the max effort movement are if you're breaking records or not. If you chose two board presses and hit 315 on week one, 320 on week two, and 335 on week three, then you should use a three-week rotation.
Now, if you hit 315 on week one, 320 on week two, then can’t do 315 on week three, then you should switch every two weeks. The longer you use the method, the sooner you'll be switching every week. There are a few alternative approaches worth looking into:
1) Many coaches have found it best to use a two week cycle with their athletes where week one would be an intro week to the movement. Here they may use a percentage based scheme for a week (such as 70% of their best with the same movement for 2 sets of 5 reps, or 80% for 3 sets of 3 reps). These coaches have found the athletes do much better on week two (when they hit the one rep) when they use an intro week to the movement.
2) Another approach similar to the first one is a three week cycle based on 70% for 5 reps on week one followed by 80% for 3 on week two and then 100 plus on week three. I personally don't like this as I feel the chance of injury is too high with the higher reps when compared to the singles.
3) One approach told to me by a very successful lifter overseas was to cycle the down sets of the max effort movement. This lifter would work up to a one rep max and then hit a down set of a prescribed percentage. He'd use 70% for 2 sets of 5 reps on week one, 72% for 2 sets 5 reps on week two, 76% for one set of 5 reps on week three and 80% for 5 reps on week four. The max effort movement would change every week but the down sets percentage went up for the fourth week, then the cycle would start again.
Do you do the max effort movement every week?
This answer depends on what you're doing on all the other days as well as the individual. If you're hitting it very hard with bands on the dynamic day, then you may find you can’t hit the max effort movement every week and may have to take it easy one workout of the month. If you find you're not recovering, then you'll want to take it easy one of the workouts each month. When you "take it easy" (not a day off) you'll replace the movement with higher rep work using a movement intended to train the same muscles.
How do you know if you went heavy enough?
If you have to ask this question, then you're totally missing the boat. This movement is about straining as hard as you can. If you make the weight and have something left then you need to add more weight and go again. When using the max effort method you must strain to gain!

How do you cycle the other stuff?
The max effort movement isn't the only movement that has to cycle on this day. All the supplemental movements must also cycle. These movements won't cycle at the same rate as the max effort movement as they can be cycled longer. The four ways I recommend cycling these movements are weight related, rep related, set related, and movement related.
1) Weight Related Cycles — With this method you'll try to use more weight for the same reps with the same movement until you can’t increase any longer. At this point you'll switch the movement.
For example, let's say you choose dumbbell extensions for your triceps movement. For week one you perform 50 pound dumbbell extensions for 3 sets of 10 reps. The next week you do 60 pound dumbbells for 3 sets of 10 reps. The third week you use 70 pound dumbbells for two sets of 10 reps and one set of 6 reps. Now it's time to change the movement or the method of training the same movement.
2) Rep Related Cycles — With this method you'll try to get more reps on each set of a given movement. For example, let's say you choose the GHR for your hamstring work and get one set of 6, one set of 5 and a third set of 5. The next week you want to try to get more reps then you did the last time. After three to four weeks (or when you can no longer add more reps), you'll switch the movement or the method for training the same movement.
3) Set Related Cycles — This method is one of the best for increasing volume fast over the training cycle. All you do here is add an additional set to the movement with a desired number of reps. For example, you decide to use reverse hypers as your lower back movement. For week one you do 2 sets of 10 reps. Week two, 3 sets of 10 reps, for week three, 4 sets of 10 reps, and on week four you get 4 sets of 10 reps, but only 7 reps on the fifth set. This is when it's time to change the movement or method.
4) Movement Related Cycles — With this method you'll switch the movement every week and cycle the sets and reps from week to week. This is the best choice for the more advanced lifter as they've already figured out how to train on feel.
The actual movement doesn't need to change every three weeks but something has to change every few weeks. I feel the reverse hyper and GHR are both very important to my training and both are trained two to four times per week. This would be an example of how I'd cycle my GHR movement for the main session:
GHR Cycle
Weeks 1-3
Monday: GHR, rep related cycle
Friday: GHR on 6 inch incline, weight related cycle
Weeks 4-7
Monday: Ballistic GHR, rep related
Friday: GHR on 10 inch incline, rep related cycle
Note: These cycles may not last the three weeks as the change may need to happen before then because of stagnation. The two days will also cycle independent of each other.
Closing
That wraps up the strength portion of the eight keys.
The Eight Keys, Part III
Speed
The speed day (dynamic effort day) is designed to make the lifter faster. If you were to do a vertical jump, would you try to jump slowly? If so, how high would you go? What would happen if you were to try and jump fast and apply more force? You'd go much higher, of course!
Training for maximal strength has to have a speed element to it or you won't be training to the fullest potential. There are some lifters who are stronger than they are fast and others who are faster than they are strong. You have to train both elements regardless of where you fall. This way you can harness your strength and bring up your weakness.
There are two days of the week devoted to training for speed. The first is for the bench press and the second is for the squat and deadlift. There are a few different movements that can be rotated for the speed work. These include:
Speed Squats
1) Parallel Box Squats — The benefits of this exercise are numerous. It develops eccentric and concentric power by breaking the eccentric-concentric chain. Box squats are a form of overload and isolation. The box squat is the best way to teach proper form on the squat because it's easy to sit way back while pushing your knees out.
To take the barbell out of the rack, the hands must first be evenly placed on the bar. Secure the bar on the back where it feels the most comfortable. To lift the bar out of the rack, one must push evenly with the legs, arch the back, push your abs out against the belt, and lift the chest up while driving the head back. A high chest will ensure the bar rests as far back as possible. Slide one foot back, then the other, to assume a position to squat.
Set your feet up in a wide stance position. Point your toes straight ahead or slightly outward. Also, keep your elbows pulled under the bar. When you're ready for the descent, make sure to keep the same arched back position. Pull your shoulders together and push your abs out. To begin the descent, push your hips back first. As you sit back, push your knees out to the sides to ensure maximum hip involvement. Once you reach the box, you need to sit on it and release the hip flexors. Keep the back arched and abs pushed out while driving your knees out to the side.
To begin the ascent, push out on the belt, arch the back as much as possible, and drive the head, chest, and shoulders to the rear. If you push with the legs first, your buttocks will rise first, forcing the bar over the knees (as in a good morning) which causes stress to the lower back and knees and diminishes the power of the squat.
2) Safety Bar Box Squats — This is the same as listed in the max effort section in part 2 of this series except now it'll be used for speed training. Using this bar for speed squat training can have a profound effect on your deadlift because of the added strength gained in the upper and lower back.
3) Cambered Bar Box Squats — This bar has a huge 14-inch camber to allow your hands to rest closer to your body’s midline. This is a huge advantage for several reasons.
First, it takes stress off the shoulders. You have to always keep in mind how much shoulder work you really do. When you squat, your shoulders are held in an isometric contraction with max weight. Your shoulders are worked on all bench movements as well. The cambered and safety bar offer a much needed break to allow the shoulders to recover.
The second benefit of this bar is related to the one above. Because your arms are held lower, you're taking much of the stress out of the upper back and placing it on the lower back, glutes, and hamstrings.
If you choose to do a band cycle with this bar, the way you attach the bands will have to change. If the bands were to attach the traditional way where you choke at the bottom, there would never be tension at the bottom of this bar because the plates are held fourteen inches lower. You can solve this by pulling the band around the plates while still choked at the bottom.

Speed Deads
1) Speed Pulls — Speed deadlifting can be trained with either the conventional or sumo method of pulling. The speed pulls are usually completed right after the speed or dynamic squats (yes, on the same day). Most lifters prefer to use 40-50 percent for 6 to 10 sets of one rep with 20-45 second rest periods.
• Conventional Deadlifts: This max effort exercise is designed to test overall body strength. It's normally advised to use a close grip, hands touching the smooth part of the bar. You'll be pulling the bar a shorter distance by rolling the shoulders forward as you rotate the scapulae. This works fine for smaller lifters, but large men will do better by using a wider-than-shoulder grip. This allows room for the stomach to descend between the thighs, which are naturally set wider because of their girth. Most small men should keep their feet close together to use mostly back muscles, whereas big men use a lot of leg drive to start the lift.
Pull the bar up to a standing position.The key with the conventional deadlift is to make sure you arch the lower back and round the upper back while keeping the shoulders behind the bar.
• Sumo Style Deadlift: Use a moderate stance and a close grip. To start the lift, you'll rock into the bar; the hips come up fast toward the bar. This requires a strong back because the legs lock out long before the bar is completely locked.
The most common style is with the feet very wide (out to the plates). The lifter shouldn't lower the hips any more than necessary. The back must be arched to the extreme. Most important is to push your feet out to the sides, not down. Why? By pushing down with a sumo or wide stance, your knees will come together, which is the most common mistake in the sumo. By pushing the knees out forcefully, the hips will come toward the bar fast, making for a favorable leverage and placing most of the work on the hips, legs, and glutes. Remember, don’t stay down too long; it'll destroy the stretch reflex.
2) Speed Pull Against Bands — With the use of a Jump Stretch band platform, attach bands around the platform and then the bar. This will make the tension greater at the top of the lift because of the pull of the bands. For this type of speed training, 20-30% barbell weight will be used with a variety of different band tensions. Usually 5 to 8 sets of 1 to 3 reps would be completed with 20 to 45 second rest periods.
3) Speed Pulls Off Box — This style of speed deadlift involves standing on a box or series of rubber mats to elevate the lifter 2 to 4 inches off the floor. Use 30-40% of max deadlift weight for 5 to 10 sets of 1 rep with 45-60 second rest periods.
The Bench Press
1) Speed Benches — The bench press should be performed with the shoulder blades pulled together and driven into the bench, elbows tucked. The bar should hit you in the lower chest area. The bar must be pushed in a straight line, not back over the face. The total time taken for all three reps should be no longer than 3 to 3.5 seconds per set. This style of speed training is the staple method with this program and should be used most of the time.
2) Speed Catch Benches — This is the same as the bench press except you'll lower the bar quickly, catch it (stop it) one to two inches from the chest, and explode back to lockout. This style of speed work is great for starting strength and will usually only be cycled a few weeks at a time.
3) Floor Presses — This is the exact same floor press as described in the max effort section in part 2 of this series, except now it'll be used for speed training. This is great when coming back from shoulder, pec, or triceps injuries. Make sure you don't bounce your elbows off the floor but pause for a static second and then explode to lockout. This is great for bringing up the pressing muscles because the legs are (to a degree) taken out of the motion.
4) Floor Catch Presses — Same as above but you'll stop one to two inches short of the chest (because you're lying on the floor) and explode back to lockout. This is great for bringing up weak triceps.
5) Speed Low Board Presses — This is a special max effort exercise designed to help strengthen the lockout of the bench press. It's also very effective in increasing triceps strength. This exercise is performed exactly the same as the bench press except you pause the bar on a board that's placed on your chest. The board for this workout will be one or two 2x6 boards that are about 12 inches in length. Make sure to pause the bar on the boards before the ascent. This movement is also great for increasing the starting strength of the bench press.
What type of sets and reps should be completed on speed day for the box squats, bench press, and deadlift?
There are many different cycles that should be rotated for the box squat and most depend on the level and experience of the lifter. Many of the cycles will incorporate the use of bands and chains to help take the training to another level. For more information on this, I'd suggest reading my Accommodating Resistance article.
Beginner Cycles — A beginner is someone who's never trained this way before, has a ton of muscle that needs to be built (ya can’t flex bone!), or has technique problems that need to be addressed. For these lifters, I've outlined two different training cycles for the squat and two for the bench press and deadlift.
Some key notes to remember:
For the bench press you'll use up to three different grips for these three sets. These grips will range from one finger on the smooth to one finger outside the lines. There will only be a total of eight sets completed with all grips. You don't do eight sets with each grip! Also, you can vary the grip however you like.
All squatting should be done on a parallel box and with good form. All dynamic work must be executed with a very fast concentric (lifting) phase. The beginner should only use the standard box squat, bench press, and deadlift for speed training. He shouldn't use any other special speed movements!

Beginner Squat Cycles
Squat Cycle 1
This is designed for the total beginner or lifter who has to address form and technique issues with the squat.
• Week 1: 20-30% for 15 sets of 2 reps with 60 second rest periods
• Week 2: 20-30% for 18 sets of 2 reps with 60 second rest periods
• Week 3: 20-30% for 20 sets of 2 reps with 60 second rest periods
Squat Cycle 2
This cycle is designed for those who've been lifting for some time but are new to the box squat and this style of training.
• Week 1: 50% for 8 sets of 2 reps with 60 second rest periods
• Week 2: 55% for 8 sets of 2 reps with 60 second rest periods
• Week 3: 60% for 8 sets of 2 reps with 60 second rest periods
Beginner Bench Cycles
Bench Cycle 1
This is designed for the total beginner or lifter who needs to address form and technique issues.
• Week 1: 20-30% for 15 sets of 3 reps with 60 second rest periods
• Week 2: 20-30% for 18 sets of 3 reps with 60 second rest periods
• Week 3: 20-30% for 20 sets of 3 reps with 60 second rest periods
Bench Cycle 2
This is designed for those who have training experience but are still new to the system.
• Week 1: 55% for 8 sets of 3 reps with 60 second rest periods
• Week 2: 60% for 8 sets of 3 reps with 60 second rest periods
• Week 3: 65% for 8 sets of 3 reps with 60 second rest periods
Beginner Deadlift Cycles
Deadlift Cycle 1
This is designed for the total beginner who needs to address form and technique issues.
• Week 1: 20-30% for 15 sets of 1 rep with 60 second rest periods
• Week 2: 20-30% for 15 sets of 1 rep with 45 second rest periods
• Week 3: 20-30% for 15 sets of 1 rep with 30 second rest periods
Deadlift Cycle 2
This is designed for those who have gym experience but are still new to this system.
• Weeks one, two and three: 50% for 8 to 10 sets of 1 rep with 45 second rest periods

Intermediate to Advanced Cycles
These training cycles are intended for those who've been training for many years and have developed a good training base. These lifters will also have some previous experience with this style of training. There are many different training cycles that can be used for a variety of reasons, ranging from basic conditioning to competition training.
Squat Cycles for Intermediate to Advanced Lifters
Straight Weight
This means training without the use of chains, bands, or any other devices. This phase is used by many lifters for a variety of different reasons. Some lifters like to use this phase pretty much all year around. (I did this for eight years before we even had bands and chains and made great gains.) Other lifters like this to be the first phase after a meet to get back into the flow of training.
• Week 1: 45% for 8 sets of 2 reps with 60 second rest periods
• Week 2: 50% for 8 sets of 2 reps with 60 second rest periods
• Week 3: 55% for 8 sets of 2 reps with 60 second rest periods
Regular Band
The regular band phase is the one band phase that's used more than any other. This is the key band phase. The band selection depends on the strength of the lifter. A lifter who squats under 450 to 500 pounds will use a light band; 501-700 pounds will use an average band; 701 and up will use a strong band.
• Week 1: 47% for 8 sets of 2 reps with 60 second rest periods
• Week 2: 49% for 8 sets of 2 reps with 60 second rest periods
• Week 3: 51% for 8 sets of 2 reps with 60 second rest periods
Heavy Band
This is a killer phase that'll usually only last one or two weeks at the most. For this phase you basically jack up the band tension as high as you can tolerate. A great place to start is 2.5 times the band you normally use. For example, if your regular band cycle is an average-rated band, you'd then use two average bands and one light for this cycle. You may also work up to a heavy single after your five sets have been completed.
• Week 1: 20-30% for 5 sets of 2 reps
Circa — Max One
This phase has been great for most of the lifters I know who squat over 700 pounds! It's intended for the advanced lifter, not the novice or beginner. This phase is used when trying to peak for a meet. Extra bands are added to the bar. The bands used for this cycle would be an average and light band for those who squat 500 to 800 pounds, and a blue and pink for those who squat 800 and above.
• Week 1: 47% for 5 sets of 2 reps with 60 second rest periods
• Week 2: 51% for 5 sets of 2 reps with 60 second rest periods
• Week 3: 53% for 5 sets of 2 reps with 60 second rest periods
• Week 4: 47% for 5 sets of 2 reps with 60 second rest periods
At this point the lifter would de-load for the meet. To do this, the lighter band is removed. The recommended bands used for this phase are the same as the regular band phase detailed above.
• Week 1: 53% for 5 sets of 2 reps with 60 second rest periods
• Week 2: 47% for 5 sets of 2 reps with 60 second rest periods
Chains
The chain cycle uses the exact same loading as the straight weight cycle as the chains are de-loaded at the bottom and only add resistance to the top of the movement. The chains should be loaded with a support chain that holds the weighted chains to ensure the chain is de-loaded. If the chains attached to the top of the bar are dropped straight to the ground, most of the weight of the chain would stay on the bar.
Recommended Chain Weight
• Squat Max: 200-400 pounds = 60 pound chain
• Squat Max: 400-500 pounds = 80 pound chain
• Squat Max: 500-600 pounds = 100 pound chain
• Squat Max: 600-800 pounds = 120 pound chain
• Squat Max: 800-900 pounds = 160 pound chain
Conditioning Phase
This phase is a killer three week phase intended to get you into shape very fast. The rest periods are the key to this phase.
• Week 1: 40% for 10 sets of 2 reps with less than 45 second rest periods
• Week 2: 42% for 15 sets of 2 reps with less than 45 second rest periods
• Week 3: 44% for 15-20 sets of 2 reps with less than 45 second rest periods
Bench Cycles for Intermediate to Advanced Lifters
The bench training cycles for this group are pretty basic and percentage-based with a flat wave. A flat wave is a wave where you try to get faster each week while using the same percentage.
Cycle 1
Week 1: 50% for 8 sets of 3 reps with 60 second rest periods
Week 2: 50% for 8 sets of 3 reps with 60 second rest periods
Week 3: 50% for 8 sets of 3 reps with 60 second rest periods
Cycle 2: Bands
The best bands to use for bench speed training are the mini bands. Place one end of the band on the bar. Pull the band down and under a dumbbell and then pull the band back up to the bar again. This is called a "double mini band." By using one dumbbell you can expect 70 to 80 pounds of tension at the top and 30 to 40 at the bottom of the motion. This is plenty for all those who bench under 450 pounds.
If you bench over 450, you'll want to use two dumbbells on each side to increased the spread distance of the band at the bottom. This will increase the tension to 100-110 pounds at the top and 50-60 in the bottom position.
Week 1: 40% for 8 sets of 3 reps with 60 second rest periods
Week 2: 40% for 8 sets of 3 reps with 60 second rest periods
Week 3: 40% for 8 sets of 3 reps with 60 second rest periods
Note: The bands are not figured into the percentage.
Cycle 3: Chains
The chains should be set up so half of the chain is on the floor while the weight is in the rack. The weight of the chain will depend on how much you bench. If you bench under 300 pounds, a total of 50-60 pounds of chain should be used. If you bench between 300 and 500, 80-90 pounds of chain should be used. If you bench 500 and up, 120-130 pounds of chain should be used.
Week 1: 50% for 8 sets of 3 reps with 60 second rest periods
Week 2: 50% for 8 sets of 3 reps with 60 second rest periods
Week 3: 50% for 8 sets of 3 reps with 60 second rest periods
Note: The chains are not figured into the percent.
There are also several alternative cycles that many lifters have been using with great success. There are too many to mention in this text, but some of the methods include:
• Using more band tension than recommended above while lowering the barbell weight.
• Adding an extra band after the first few sets for two sets, then pulling the extra band off for the last few sets. The same can also be done with the chains.
• Staggering the weight over the 8 sets. For example: 40% for 2 sets, 45% for 2 sets, 50% for 2 sets and 55% for two sets.
• Catching the barbell. This is one that most lifters are doing incorrectly! To use this method you lower the bar with speed (but under control), then catch the bar one or two inches before touching the chest, then explode back up. This method should only be used for one or two weeks at a time. If you use it longer than that, you're looking for trouble.

Deadlift Cycles for Intermediate to Advanced Lifters
There's really no need to go into cycles with this one. The most popular way to cycle the speed deadlift is to use a percentage around 50% and pull 5 to 8 singles. The key here is form and speed. You may also do these with the use of bands or chains to increase the work at the top end.
When can I use the other speed movements and what phases can I use them with?
You can use the safety squat bar, buffalo bar, or cambered squat bar for any of the squat cycles listed above. I know of one lifter who'll only use a squat bar the last three weeks before the meet and he squats over a grand! He spends the rest of the time using the safety squat bar. He feels this allows his shoulders to rest, thereby allowing him to put more into bench training.
For the bench press you could use the cambered bench bar or fat bar in place of the regular bar to change up the muscle firing pattern. There are many lifters who use the fat bar for all bench training and then only use the regular bar at the meet.
Are all the percentages set in stone?
No way! The percentages are only guidelines. If the weight feels way to light then use more weight; if it feels too heavy then lower it some. Percentages can only help you to find a starting point.
The problem with percentages is they're all based on one rep maxes. You may or may not be as strong as or stronger than you were when you did your 1RM. I'll say if you're having problems getting stronger then the first thing you should do is lower the percentage! Yes, I said lower. This will bring more speed back into the training. Speed is very important for many lifters and can make a big difference in their training.
For example, what would you think if I told you my best pin lockout on the bench for pin 13 is 455 pounds? Pin 13 is a four inch push for me. It pretty much says I can’t lock out 500 pounds. So how did I bench 600? The speed from the bottom carried the bar through to the top! I'm a speed lifter, not a strength lifter. Max effort lifts are equal to lifters who total 400 pounds less than I do. This tells me I have to get stronger on max effort work while at the same time harnessing my speed.
There are other lifters who are strength lifters. They're very strong but very slow. What happens if you lift a weight slow? Very simple, it takes longer to lift the weight. The longer it takes to complete the lift, the stronger you'll have to get.
What do you do after the speed or dynamic movement?
You do whatever you need to do. I'd suggest you hit your weak point first. What if you don't know your weak point? First, you could find a good coach to help you out. Second, you can check the list below for help.

Squat Weak Points
Weak at the top: In this situation, you stall out near the top of the lift, but don't fall forward or backward. This is one of the best problems to have as you've kept the proper squat form but just stalled out. There are no technical problems for this except not driving your hips forward. Usually this isn't the problem.
The first thing to do to fix this problem is to get stronger! This sounds simple and it is. Sometimes you don't have to look so hard for what your weaknesses are. I think too many people feel they're being held back by some secret weakness when in fact they just need to get the entire body stronger.
The second thing you can do is get faster. If you get fast enough, the momentum will bust you through the sticking point. The third thing you can do is to take a reality check. Is this your sticking point because you now own it? What I mean here is, do you always fail at this same spot? Have you always failed there? Have you engrained it in your mind that this is where you fail? If so, fix it!
Getting smashed at the bottom: There are many things that can cause this to happen. The first and most apparent problem is it was just too much weight. I know many of you are thinking, "Well, no crap!" but you'd be shocked at some of the e-mails and calls I get.
For example, I had one guy call because he got crushed with a 315 bench and couldn't figure out why. I later find out he barely made 275! It was simply too heavy for him!
This could also be improper set up from the start. If you don't start with a good arch and tight abs and then don't sit back, you'll sit straight down. You have to sit back into the squat to get the most out of your hamstrings, lower back, and hips. If you sit straight down you're forcing most of the weight onto the quads and allowing the bar to actually travel forward.
The third reason could be you're not forcing your knees out on the way down and keeping them forced out of the hole. This could be fixed with a simple verbal queue like "Knees out!" You may also need to do more hip work. Some great things for this are seated abductions with bands around the knees. We call them "knee-outs with the band." A second thing that'll help with this is wide stance low box squats with light weight and higher reps (around ten). Squat to the bottom position and then only raise half to one-forth of the way up, then go back down. This will keep the tension in the range of motion you're having your problem with.
A fourth reason you may miss in the hole is you're letting your chest drop on the way down. A fifth reason is that your hamstrings aren't strong enough to sit back on. I see this one all the time in the seminars we conduct. What happens is the lifter will sit back so far and then just drop. The strength is just not there to keep sitting back. To fix this, use a box height on speed day that you can sit back on and keep good form. Who cares if it's four inches high? Just do it! Then, over the next few weeks, lower the box half to one inch each week, but keep the form 100% correct.
You can also strengthen the hamstrings with glute ham raises, reverse hypers, good mornings, pull-throughs, and many other movements. This could be due to weak abs and lower back muscles. This is another reason why we all need more ab and back work.
Falling forward coming out of the hole: This is the king of missed squats. I see this one more than any other sticking point. This can happen for several reasons, many physical and many technical.
One technical reason is not rising with your chest first out of the bottom. You're rising with your hips first. When your hips flex first your chest will always go forward. You have to think of rising with your chest first and squatting the bar back, not up. If you have the bar driving back it'll travel in a straight line instead of going forward. The shortest distance between two points is a straight line and this is how the bar must travel.
You may also have allowed your head to drop down. Your body will always follow your head so you must keep your head back. Notice I didn't say up, but back. Watch the eyes of any great squatter as he rises out of the bottom. Through the blood clots you'll see his eyes are focused up and he's driving his neck back into the bar. Even the guys you think are looking down are still driving their head into their traps.
Now, why are these technical problems happening in the first place and how do you fix them? All technical problems should be corrected by learning what you're supposed to do and then perfecting it with the lighter weights. You should also use verbal queues. The best queues I've used for this one are "Head up!" or "Chest up!"
Falling forward may also be caused by weak abs and lower back. If your core isn't strong enough to transfer the flex from the lower body to the bar, then the body will have no choice but to collapse. The best movements for this are exercises that work both the abs and hip flexors (pulldown abs, leg raises, spread eagle sit-ups etc.) For the lower back, reverse hypers, back raises, and good mornings are ideal.
One last thing that can really help with this is to use a cambered squat bar for low box squats. The reason? If you don't rise with your chest first you'll have some very serious instability issues. This will only happen once and then you'll automatically figure out what to do.
The bottom line here is, no matter what weakness you have, act on them and fix them! This will take commitment and discipline. Basically, do what you gotta do because no one will do it for you!
Falling forward halfway up: This is probably the second most common problem or sticking point I see with the squat. What happens here is the lifter comes out of the hole strong and then about halfway up he begins to fall forward. This happens because he has great reversal strength out of the bottom but then, as he begins to hit the mid-point, he stalls. He can’t continue to strain because the torso is beginning to die out and the force of the movement keeps the hips coming up, yet the upper body can’t stay upright.
To fix this he needs to make sure the time-under-tension on the max effort movement is specific to the time of the strain needed in competition. This will be around 3.0 to 4.0 seconds. Second, the ab work has to come up and be heavy. A third remedy for this problem is to do static work in the position at which you lose the lift. To do this, use a bar with a light weight (around 20%) and a band. Squat down to the spot you lose it at and hold for five seconds, then squat back up and hold at the top for five seconds. This would best be done with 3 to 5 sets of 5 reps. The good morning can also be used for this and may even be a better choice as there'll be more work on the torso when compared to the barbell squat.
One last solution for this problem is to use the safety squat bar for max effort work. The safety squat bar tries to toss you forward as you squat up because of the design of the bar. If the bar is trying to toss you forward, there's only one way to keep this from happening: you have to fight to keep the bar in position, thus developing those muscles.
Falling backwards: This is actually the best thing that could happen because you're squatting the bar back and all the strength is there. The only thing that really needs to be done here is technical. Just sit back more to allow the torso to lean in some. The lifter may also not be sitting back because of weakness in the hamstrings.
Knees coming in while squatting down: This is also a very common problem with beginners and intermediate lifters. This can happen for many reasons: weak hips, poor flexibility, or bad form. If the lifter has bad form all he needs is verbal queues of "Knees out!"
If this is a flexibility problem then the lifter should squat on a higher box at the point where he can keep the knees out. Over time the box height will come down as he gets more flexible. If this is a strength problem with the hips, then the same solutions as "getting smashed at the bottom" should be followed.

Bench Weak Points
Missing at the top: If you miss at the top of the bench press it can be because of a missed groove or weak triceps. There are many ways to bring up your triceps listed earlier in this series.
Missing on the chest: This can also be caused by many problems. First, lack of reversal strength and speed. This is where the speed training comes in. If you have any type of explosive strength then you should never miss off your chest unless the weight is too heavy in the first place.
The second reason for missing off the chest can be a factor of weak starting strength after the press command. The bench shirt may also affect this as the tighter the shirt, the harder it is to get down, thus the harder it is to use reversal strength because the bar won't be able to come down as fast as without using a shirt. This means the lifter will pretty much be pressing from a dead stop. One of the best things for this is low pin presses with the bar just off the chest for max effort work or as a second movement for max sets of 3 or 5 reps. Make sure to pause on the pins for a second or two.
Missing off your chest can also be caused by weak lats, upper back, and rotator muscles: Think of these muscles as your launch pad. If you don't have a solid base to press off, you're firing from a weak foundation. A few other things to help strengthen the bottom of the bench are close grip inclines, dumbbell work, and push-ups.
Missing halfway up: This sticking point means the lifter is blasting the weight off the bottom very well and then dies a few inches off the chest. This can also be fixed with more bar speed as this will allow the lifter to bust through this sticking point.
This can also be caused by weak triceps. The best max effort exercises for this problem are mid-position pin presses, two board presses, and floor presses.
Bar flying off your chest and straight back into the rack: This is mostly a bench shirt issue. You either don't know how to use the shirt or you have a bad shirt. With a shirt you have to bring the bar low and not heave it off your chest. If you heave, the bar will fly back. You have to press the bar up off the chest and build speed as the bar leaves the chest. If your shirt is bad it'll also cause the bar to fly back.
This problem can also occur because your shoulders are stronger than the triceps. You're trying to get the load off the triceps and onto where you're the strongest and that's causing the problem. On the flip side, it can also be because your shoulders aren't strong enough to keep the bar in the right path.
Another technical reason this may happen: you aren't keeping your arms under the bar. This can happen if your wrists get folded back and the bar ends up being behind the forearm. If this happens, then the force isn't under the bar. These problems can all be fixed with proper coaching and training. Make sure your form is on and bring up the lockout power with specific triceps work and high board and high pin presses for max effort work.
Deadlift Weak Points
Most all deadlift weak points will mimic the same muscle groups and patterns that are weak with the squat. So outside of technical issues, the squat will take care of the deadlift. The max effort deadlift training and speed deadlifts are intended to train the form of the deadlift, so double check your form and make sure you're keeping your shoulders behind the bar and keeping your body falling backward.
As you can see, most of the solutions to these problems are already being taken care of with the general guidelines presented earlier. The general template is intended to bring up the most general weaknesses with the hamstrings, lower back, hips, abs, and triceps. Just follow the basic guidelines, pay attention to what you're doing, and don't skip the key things you need to do.
Closing
Whew! That wraps up the speed portion of the eight keys. Next week in the fourth and final installment, I'll explore the last three components of the system: recovery, nutrition, and attitude. I'll also layout a complete nine week training program. Stay tuned!

The Eight Keys, Part IV
Recovery
As I've mentioned in this series already, GPP or General Physical Preparation is very important, especially for recovery. According to Yuri Verkhoshansky in The Fundamentals of Special Strength Training in Sport and as outlined in Supertraining by the late Mel Siff, there are several functions of GPP:
• To form, strengthen or restore motor skills, which play an auxiliary, facilatory role in perfecting sports ability.
• To teach abilities developed insufficiently by the given sport and to increase the general work capacity or preserve it.
• To provide active rest, promote restoration after strenuous loading, and counteract the monotony of training.
One solution to GPP is sled dragging. The use of a sled has many benefits:
• The sled is easy to use and doesn't require a special trip to the gym.
• The sled is specific to the development of the special skills necessary for maximal strength. (And by the way, we never run with the sled.)
• Virtually every muscle can be trained with a sled. There are movements for the abdominals, shoulders, hamstrings, etc.
• The sled is a great way to induce active restoration. In many of the upper body dragging movements, the eccentric (negative) is eliminated because of the nature of the sled. This is great for recovery because the tearing down of the muscle is much less in concentric-only movements.
Instead of making this article even longer than it already is, I'll just direct you to my Drag Your Butt Into Shape article here at T-mag, which will give you all the info you need. For a good sled, visit www.elitefts.com.
Nutrition
I'll keep this very short and simple. Yes, nutrition is important and you shouldn't live on junk food. I had to learn this the hard way and feel many of my past injuries are due in some part to poor nutritional habits.
I'm by no means an expert on this and don't feel I'm any type of authority on telling you what to do or what not to do.
There are many sources for this information, most of them right here in T-mag. You should read as much as you can and come up with what you feel is the best system for you. I'm still learning about good nutrition myself, and T-mag is working with me on correcting some bad habits, most notably on increasing meal frequency, upping protein intake, and the use of supplements in general. I do use protein and Tribex from time to time, but I've got a long way to go.
Attitude
"Everything can be taken away from man but one thing, the last of the human freedoms — to choose one’s attitude in any given set of circumstances, to choose one’s own way."
—Victor E Frankl
We all have those times in life I like to call "defining moments." These moments in time can be glorious or disastrous, but always shape the direction and path of who we become. From these moments we grow and become better or worse for it. The difference between better or worse is how the situation is perceived. If something bad happens to you, do you view it as a learning experience and move on, or do you let it tear you up? If something good happens, do you look back to ask why or write it off as luck?
What does all this have to do with strength training? It has everything to do with strength training, powerlifting, sports, and life! There are many qualities needed to succeed in the strength training game. I like to sum them all up with three very simple words: Live, Learn, and Pass On.
Live — The most important quality is to live the life you want to have, not the life you have. In other words, if you're a bottom 100 powerlifter but want to be a top ten lifter, do you live the life of a top ten lifter or a bottom 100 lifter? Do you do the same things the top ten lifter does? Do you think the same way he does? Do you skip sessions? Are you as serious as he is? If not, then how are you ever going to get where he is?
You only go around once so you may as well make the best of your time here by living the life you really want to live! "Well, Dave, I'd like to but…" But what? Do what you gotta do! There are many people out there who live "but lives," "I shoulda lives," "I coulda lives," or "if only lives."
These people are very easy to find. They're the ones we call critics; those who've become masters of the "have not" and love to spend their time telling us what we can and can’t do. They make up 90% of the people I've met. Avoid them! They love to pull you down. If you happen to be one, then fix it fast because it'll affect your training and your life.
Learn — The most successful people spend their time learning from their mistakes and other people. If strength is your game then read about it, talk about it, and do everything you can to make yourself better. Talk to anyone you feel can help you. Steal from the strong and use it in your training. You can never learn too much. Your success may depend on one very small thing you could never have figured out yourself.
Pass On — Many years ago, in a dark stairway in the back of a junior high gym that smelled like sweat stained wrestling mats, was a ninth grade wrestler who'd only won one match in the last two years. This same kid wasn't a very good athlete up to this point. He played many sports and always did okay but was never good enough to start or be a standout.
As he waited for his mother to pick him up he decided to run the stairs instead of just sitting as he'd usually do. After about five minutes he was thinking he'd had enough and would call it a day and sit down to wait for his ride. About this time, the head wrestling coach walked by and asked him what he was doing. The kid replied that he was running the stairs because he was sick of getting beat all the time. The coach then spoke one sentence that stuck in the kid's mind for the rest of his life: "If you work hard enough you can do whatever you want to do."
I ran the stairs for the next forty-five minutes and didn't lose a match during the entire season. I went on to have a very successful career in sports. That one sentence taught me how to run for what I wanted and I've been running ever since. One kid, one sentence and a totally changed life.
Why do I do this? Why do I write these articles? Why do I spend so much time helping people for free? Why do I care so much when I know most lifters and coaches will never listen? The answer is simple. Why did my coach care so much when he knew most of his athletes would never listen? Because I listened. What would I be today if he didn't care? I owe it to him to pass on the great gift he gave me. This is why I try so hard.
I'm sure you have the same type of story. Somewhere, some time, someone took the time to help shape your way. You owe it to them to pass on what you know. When we leave this earth, it's not what we take with us that maters, it's what we leave behind. There have been many people along my path and I can tell you today I'll never forget who they were and what they did. This is the greatest success in life one can have.
Vince Lombardi once said, "I firmly believe that any man’s finest hour — his greatest fulfillment to all he holds dear — is that moment when he has worked his heart out in a good cause and lies exhausted on the field of battle, victorious." Do you want to lie on the ground victorious or with your face in the dirt?

Summary
I went back and reread the first paragraph of the first article in this series. I realized that I'm no better than the guy who wrote the huge instructional guide for the baby crib. To tell you the truth, I just tossed the instructions, looked at the picture on the box and did it the easy way. To stay with the same concept, here's the "picture on the box" for this series:
• One day per week, train the squat with different three-week cycles for 8 sets of 2 reps and maximal speed.
• One day per week, train the bench press with a prescribed percentage for 8 sets of 3 reps.
• One day per week, train using a special max effort movement for the squat or deadlift.
• One day per week, train using a special max effort movement for the bench press.
• Train the hamstrings hard.
• Train the abs hard.
• Train the triceps hard.
• Bring up your GPP.
• Get some good training partners.
• Find a good coach.
• Take an attitude check.
• Don’t eat crap 100% of the time.
General Program Questions
Let me guess, you've got a bunch of questions anyway, right? That's okay, we've answered thousands dealing with this type of training. Some of the same questions keep coming up over and over so I'll address them here.
How long should each training session last?
This really depends on how many people you train with and if you use warm-ups or not. A good general recommendation would be to try and keep the main session under 45 minutes. This doesn't include the warm-up time. Don't use this as a golden rule, though. Get done what you have to get done and then get out of the gym. If it takes you 60 minutes, then so be it.
What if I don’t have a reverse hyper, glute ham raise, chains or bands?
If you don't have chains or bands then use the barbell without chains and bands! Keep in mind the lifters at Westside went without chains and bands for twenty years and still made gains! Then the chains were brought in and they got stronger. Chains were used for two years before the bands were brought it. The better question to ask would be, do you need chains and bands at this time?
If you don't have a GHR or reverse hyper then stick with what you can do (pull-throughs, stiff leg deadlifts, Dimel deadlifts, and other lower back and hamstring work). I do feel the GHR and reverse hyper are better. The lifters at Westside live and die by these two movements and use them both at least twice a week, but this program can be followed without them.
What day should I do each session?
Most lifters will follow this basic template:
Monday — Max Effort Squat/Deadlift Day
Wednesday — Max Effort Bench Day
Friday — Dynamic Effort Squat Day
Sunday — Dynamic Effort Bench Day
What do I do if I can only get in the gym three times per week?
Then use an eight day rotation, then a seven. Here's an example:
Monday — Max Effort Squat/Deadlift Day
Wednesday — Max Effort Bench Day
Friday — Dynamic Effort Squat Day
Monday — Dynamic Effort Bench Day
Wednesday — Repeat cycle
Sample Program
As promised, here's a sample training program for intermediate lifters.
Week 1
Day 1 (max effort squat day)
Good Mornings: Warm up doing sets of three reps until you feel you can no longer perform three reps. At this point drop the reps to one and continue working up to a one rep max.
Glute Ham Raises: 3 sets of 10 reps. Stress the eccentric, try to get a four count on the way down.
Reverse Hypers: 3 sets of 8 reps using the small strap
Pulldown Abs: 5 sets of 10 to 15 reps
Straight Leg Raises: 5 sets of 15 reps
Day 2 (max effort bench day)
Board Press: Warm up doing sets of three reps until you feel you can no longer perform three reps. At this point drop the reps to one and continue working up to a one-rep max.
Lying Barbell Triceps Extensions: 6 sets of 10 reps
Pushdowns: 3 sets of 10 reps
One Arm Press: 3 sets of 15 reps
Day 3 (dynamic effort squat day)
Box Squats: 10 sets of 2 reps with 50% of 1RM, 45 to 60 seconds rest between sets
Reverse Hypers: 3 sets of 8 reps using the small strap
One Leg Squats: 4 sets of 10 with each leg
Dumbbell Rows: 4 sets of 6 reps
Barbell Shrugs: 3 sets of 15 reps
Day 4 (dynamic effort bench day)
Bench Press: 10 sets of 3 reps with 60% of 1RM. Use three different grips, 45 to 60 seconds rest between sets
Lying Dumbbell Triceps Extensions: 4 sets of 8 reps
Dumbbell Side Raises: 3 sets of 10 reps
Bent Over Dumbbell Side Raises: 3 sets of 10 reps
Week 2
Day 1 (max effort squat day)
Good Mornings: Warm up doing sets of three reps until you feel you can no longer perform three reps. At this point drop the reps to one and continue working up to a one-rep max.
Glute Ham Raises: 3 sets of 8 reps. Stress the eccentric, try to get a four count on the way down.
Reverse Hypers: 3 sets of 8 reps using the small strap
Pulldown Abs: 5 sets of 10 to 15 reps
Straight Leg Raises: 3 sets of 20 reps
Day 2 (max effort bench day)
Board Press: Warm up doing sets of three reps until you feel you can no longer perform three reps. At this point drop the reps to one and continue working up to a one-rep max.
Lying Barbell Triceps Extensions: 6 sets of 10 reps
Pushdowns: 3 sets of 10 reps
One Arm Press: 3 sets of 15 reps
Day 3 (dynamic effort squat day)
Box Squats: 10 sets of 2 reps with 54% of 1RM, 45 to 60 seconds rest between sets
Reverse Hypers: 3 sets of 8 reps using the small strap
One Leg Squats: 4 sets of 10 with each leg
Dumbbell Rows: 4 sets of 6 reps
Barbell Shrugs: 3 sets of 15 reps
Day 4 (dynamic effort bench day)
Bench Press: 10 sets of 3 reps with 60% of 1RM, use three different grips, 45 to 60 seconds rest between sets
Lying Dumbbell Triceps Extensions: 4 sets of 8 reps
Dumbbell Side Raises: 3 sets of 10 reps
Bent Over Dumbbell Side Raises: 3 sets of 10 reps
Week 3
Day 1 (max effort squat day)
Good Mornings: Warm up doing sets of three reps until you feel you can no longer perform three reps. At this point drop the reps to one and continue working up to a one-rep max.
Glute Ham Raises: 3 sets of 8 reps using the small strap
Reverse Hypers: 3 sets of 8 reps using the small strap
Pulldown Abs: 5 sets of 10 to 15 reps
Straight Leg Raises: 3 sets of 20 reps
Day 2 (max effort bench day)
Board Press: Warm up doing sets of three reps until you feel you can no longer perform three reps. At this point drop the reps to one and continue working up to a one-rep max.
Lying Barbell Triceps Extensions: 6 sets of 10 reps
Pushdowns: 3 sets of 10 reps
One Arm Press: 3 sets of 15 reps
Day 3 (dynamic effort squat day)
Box Squats: 10 sets of 2 reps with 56% of 1RM , 45 to 60 seconds rest between sets
Reverse Hypers: 3 sets of 8 reps using the small strap
One Leg Squats: 4 sets of 10 with each leg
Dumbbell Rows: 4 sets of 6 reps
Barbell Shrugs: 3 sets of 15 reps
Day 4 (dynamic effort bench day)
Bench Press: 10 sets of 3 reps with 60% of 1RM, use three different grips, 45 to 60 seconds rest between sets
Lying Dumbbell Triceps Extensions: 4 sets of 8 reps
Dumbbell Side Raises: 3 sets of 10 reps
Bent Over Dumbbell Side Raises: 3 sets of 10 reps
Week 4
Day 1 (max effort squat day)
Low Box Squat: Warm up doing sets of three reps until you feel you can no longer perform three reps. At this point drop the reps to one and continue working up to a one-rep max.
Glute Ham Raise: 5 sets of 5 reps
Partial Deadlifts: 3 sets of 20 reps
Reverse Hypers: 3 sets of 8 reps using the small strap
Pulldown Abs: 5 sets of 10 to 15 reps
Day 2 (max effort bench day)
Floor Press: Warm up doing sets of three reps until you feel you can no longer perform three reps. At this point drop the reps to one and continue working up to a one-rep max.
JM Press: work up to 2 sets of 3 reps
Incline Dumbbell Press: 2 sets of 10 reps
Seated Dumbbell Cleans: 4 sets of 8 reps
Straight Leg Raises: 5 sets of 15 reps
Day 3 (dynamic effort squat day)
Box Squats: 10 sets of 2 reps with 60% of 1RM, 45 to 60 secondsw rest between sets.
Note: After your sets of box squats, work up to a heavy double. This isn't a maximum attempt so don't miss the lifts.
Reverse Hypers: 5 sets of 8 reps
Chest Supported Rows: 4 sets of 8 reps
Glute Ham Raises: 3 sets of 6 reps
Pulldown Abs: 5 sets of 10 reps
Day 4 (dynamic effort bench day)
Bench Press: 10 sets of 3 reps with 60% of 1RM, use three different grips, 45 to 60 sec rest between sets
Close Grip Bench Press: work up to 2 sets of 3 reps
One Arm Dumbbell Extensions: 3 sets of 10 reps
Front Plate Raises: 3 sets of 10 reps
Week 5
Day 1 (max effort squat day)
Low Box Squat: Warm up doing sets of three reps until you feel you can no longer perform three reps. At this point drop the reps to one and continue working up to a one-rep max.
Glute Ham Raises: 5 sets of 5 reps
Partial Deadlifts: 3 sets of 20 reps
Reverse Hypers: 3 sets of 8 reps using the small strap
Pulldown Abs: 5 sets of 10 to 15 reps
Day 2 (max effort bench day)
Floor Press: Warm up doing sets of three reps until you feel you can no longer perform three reps. At this point drop the reps to one and continue working up to a one-rep max.
JM Press: work up to 2 sets of 3 reps
Incline Dumbbell Press: 2 sets of 10 reps
Seated Dumbbell Cleans: 4 sets of 8 reps
Straight Leg Raises: 5 sets of 15 reps
Day 3 (dynamic effort squat day)
Box Squats: 10 sets of 2 reps with 50% of 1RM, 45 to 60 seconds rest between sets
Speed Deadlifts: 8 sets of 2 reps with 50%
Reverse Hypers: 5 sets of 8 reps
Chest Supported Rows: 4 sets of 8 reps
Glute Ham Raises: 3 sets of 6 reps
Pulldown Abs: 5 sets of 10 reps
Day 4 (dynamic effort bench day)
Bench Press: 10 sets of 3 reps with 60% of 1RM, use three different grips, 45 to 60 seconds rest between sets. Note: After your sets, work up to a heavy single. This isn't a maximum attempt so don't miss the lift.
Close Grip Bench Press: work up to 2 sets of 3 reps
One Arm Dumbbell Extensions: 3 sets of 10 reps
Front Plate Raises: 3 sets of 10 reps
Week 6
Day 1 (max effort squat day)
Low Box Squat: Warm up doing sets of three reps until you feel you can no longer perform three reps. At this point drop the reps to one and continue working up to a one-rep max.
Glute Ham Raises: 5 sets of 5 reps
Partial Deadlifts: 3 sets of 20 reps
Reverse Hypers: 3 sets of 8 reps using the small strap
Pulldown Abs: 5 sets of 10 to 15 reps
Day 2 (max effort bench day)
Floor Press: Warm up doing sets of three reps until you feel you can no longer perform three reps. At this point drop the reps to one and continue working up to a one-rep max.
JM Press: work up to 2 sets of 3 reps
Incline Dumbbell Press: 2 sets of 10 reps
Seated Dumbbell Cleans: 4 sets of 8 reps
Straight Leg Raises: 5 sets of 15 reps
Day 3 (dynamic effort squat day)
Box Squats: 10 sets of 2 reps with 52% of 1RM, 45 to 60 seconds rest between sets
Speed Deadlifts: 8 sets of 2 reps with 55%
Reverse Hypers: 5 sets of 8 reps
Chest Supported Rows: 4 sets of 8 reps
Glute Ham Raises: 3 sets of 6 reps
Pulldown Abs: 5 sets of 10 reps
Day 4 (dynamic effort bench day)
Bench Press: 10 sets of 3 reps with 60% of 1RM, use three different grips, 45 to 60 seconds rest between sets
Close Grip Bench Press: work up to 2 sets of 3 reps
One Arm Dumbbell Extensions: 3 sets of 10 reps
Front Plate Raises: 3 sets of 10 reps
Week 7
Day 1 (max effort squat day)
Good Morning Squats: Warm up doing sets of three reps until you feel you can no longer perform three reps. At this point drop the reps to one and continue working up to a one-rep max.
Glute Ham Raises: 5 sets of 5 reps
Lunges: 4 sets of 10 reps (each leg)
Reverse Hypers: 3 sets of 8 reps using the small strap
Pulldown Abs: 5 sets of 10 to 15 reps
Day 2 (max effort bench day)
Ball Press: 3 sets of 20 reps (average rest period = 5 minutes)
Seated Dumbbell Shoulder Press: 5 sets of 10 reps
Incline Barbell Triceps Extensions: 5 sets of 6 reps
Face Pulls: 5 sets of 15 reps
Day 3 (dynamic effort squat day)
Box Squats: 10 sets of 2 reps with 54% of 1RM, 45 to 60 seconds rest between sets.
Note: After your sets, work up to a heavy double. Again, this isn't a maximum lift so don't miss the attempts.
Reverse Hypers: 4 sets of 8 reps
Pulldowns: 3 sets of 8 reps
Glute Ham Raises: 4 sets of 15 reps
Day 4 (dynamic effort bench day)
Bench Press: 10 sets of 3 reps with 60% of 1RM, use three different grips, 45 to 60 seconds rest between sets. Note: After your sets, work up to a heavy double. Again, this isn't a maximum lift so don't miss the attempts.
Dumbbell Triceps Extensions: 4 sets of 6 reps
Reverse Grip Pushdowns: 3 sets of 15 reps
Front/Side/Rear Delt Combo Raise: 2 sets of 60 reps (20 each raise)
Pulldown Abs: 5 sets of 10 reps
Week 8
Day 1 (max effort squat day)
Good Morning Squats: Warm up doing sets of three reps until you feel you can no longer perform three reps. At this point drop the reps to one and continue working up to a one-rep max.
Glute Ham Raises: 5 sets of 5 reps
Lunges: 4 sets of 10 reps (each leg)
Reverse Hypers: 3 sets of 8 reps using the small strap
Pulldown Abs: 5 sets of 10 to 15 reps
Day 2 (max effort bench day)
Ball Press: 3 sets of 20 reps (avg. rest period = 5 min)
Seated Dumbbell Shoulder Press: 5 sets of 10 reps
Incline Barbell Triceps Extensions: 5 sets of 6 reps
Face Pulls: 5 sets of 15 reps
Day 3 (dynamic effort squat day)
Box Squats: 10 sets of 2 reps with 62% of 1RM, 45 to 60 seconds rest between sets
Speed Pulls: 8 sets of 1 rep with 60%
Reverse Hypers: 4 sets of 8 reps
Pulldowns: 3 sets of 8 reps
Glute Ham Raises: 4 sets of 15 reps
Day 4 (dynamic effort bench day)
Bench Press: 10 sets of 3 reps with 60% of 1RM, use three different grips, 45 to 60 seconds rest between sets
Dumbbell Triceps Extensions: 4 sets of 6 reps
Reverse Grip Pushdowns: 3 sets of 15 reps
Front/Side/Rear Delt Combo Raise: 2 sets of 60 reps (20 each raise)
Pulldown Abs: 5 sets of 10 reps
Week 9
Max day near end of week
Box Squat: work up to a 1 rep max
Bench Press: work up to a 1 rep max
Deadlift: work up to a 1 rep max
Note: These maxes will be used as the 1RM for the next eight-week cycle.
Closing
Wow! I can’t believe this is finally finished! I tried to cover all the information and questions we've been asked on the internet and in seminars over the past three years. I'm sure I've left many things out but feel over 90% of what you need is here.
Thank you, Know that there are a lot of listeners out here that respect the knowledge you and Elitefts put out,along with Legendary Louie Simmons.