


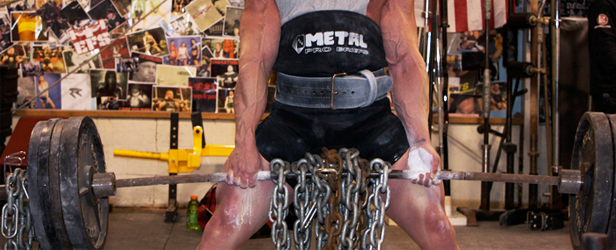
Everyone who has been serious about moving around heavy weights knows what the hip hinge is. Hinging at the hip puts our posterior chain muscles in a position of advantage so that we can work the shit out of them. This movement is key in developing strong and powerful hamstrings and glutes, which carries over to improved athletic movement.
The hip hinge isn't a squatting movement. Being able to separate these two patterns is very important. Hip hinging is emphasized in deadlifts, Romanian deadlifts, Olympic lifts, swings, and even in some upper body rowing and scapular stabilization movements.
Anybody who has ever tried to teach or learn the hip hinge knows just how hard it can be for people to pick up. Most people don't know how to separate the squatting movement from this hinging movement, and if you’re like me, this results in urges to rip your hair out and scream until your lungs are sore.
First and foremost, we need to accept that the hinge is a basic movement that all athletes need to be able to master. As athletes develop, they learn to run, land, jump, skip, squat, push-up, tumble, and change directions, among other things. We need to make it a priority to learn the hip hinge, as this will set up athletes for success and safety in the long run.
Just like the name states, the hip hinge, put simply, is your hip acting as a hinge for your lower and upper body. Sounds pretty easy, right? Having worked with athletes ranging from nine years old to college seniors, I can tell you that it’s anything but. It’s incredible to see how difficult it can be for all levels of athletes to perform this movement. For all of us with a ton of experience using hinging exercises, we often take for granted how “easy” it is to hinge.
So, what do we do when someone can’t hinge? We cue the hell out of them!
"Push your hips back. Keep your back flat/neutral. Don’t let your knees track forward—press them back. Pull your chest forward. Create horizontal separation from your hips and shoulders."
We cue these athletes until we’re blue in the face, and the athlete just doesn't get it. It's very hard for inexperienced athletes to exhibit the correct body position and motor pattern of the hinge. They don’t have the connection of how their body moves, operates, and feels in this kind of movement setting. So they tend to flex (round) their spines, flex their necks, or use a squatting pattern. They don't get their posterior chain involved.
Why do they do this? Because it's easier for them to do. Heck, we, as well-trained professionals, round our backs when picking up things off the ground because it's easier than keeping a flat/neutral spine. Inexperienced athletes also lack the ability to perform a proper hip hinge because they lack strength, mobility, stability, and like we touched on, proper education of their body to perform these movements.
While it's difficult to teach, it's also essential that we take the time and effort to ingrain this movement in young athletes, as it becomes so important later in their lives. Below, I give my favorite progression to teach the hip hinge, which I've been using with success.
It takes proper progression, adequate reps, and patience for it to become permanent. We would all like to fly through these progressions and start adding some weight so we can really load the posterior chain, but we need to slow down and perfect this movement first.
Dowel Romanian deadlift (RDL):
The dowel RDL involves the athlete holding a dowel behind his back. We place the hands behind the small of the neck and the small of the back. The dowel must make contact with the athlete's butt, upper back, and head. This needs to be emphasized! The athlete is instructed to maintain all three points of contact throughout the entire movement. Because the dowel must remain in contact with those three points, the hip hinge movement will come naturally. This is great because it gives the athlete self-feedback, and he develops the knowledge of how to self-correct his movement. For example, if the dowel loses contact with his butt, he flexes his spine. He then teaches himself how to fix that and really learns how to perform the movement correctly.
We will stay with this progression for as long as we feel the athlete needs. I will throw this exercise into our warmup, rest periods, and cool downs as a way to get lots of reps in to instill this pattern.
Here are the mistakes you're looking for when using the dowel RDL:
- If the dowel comes off the butt, the athlete is flexing his spine.
- If the dowel comes off the back, the athlete is squatting too much.
- If the dowel comes off the head, the athlete is exhibiting cervical flexion.
Dowel extension with wall touch:
The next progression is called the dowel extension with wall touch. We now have the athlete hold the dowel behind his back but parallel to the ground. We externally rotate his arms so that his palms are facing down. This automatically gets him in scapular retraction and makes it difficult for him to round the thoracic spine. From there, we set the athlete up eight to ten inches from a wall and tell him to keep the dowel pressed up against the wall.
We cue him to touch the wall with his butt and to pack his neck. This forces him to press his butt back, and because he's in external rotation, it keeps his spine neutral.
Good morning with wall touch:
The next progression involves a good morning with a wall touch. The good morning, again, externally rotates the shoulders and promotes a big chest and flat back. But this progression makes it easier for the athlete to flex his spine. So we use it as a check mark. If he has learned to retract his scaps, pack his neck, and maintain a neutral spine, he will show it here. If not, we know that we need to keep working on the earlier progressions.
Snatch grip RDL:
We then move to the snatch grip RDL. The load is now placed anteriorly, and the athlete's arms aren't externally rotated or pulled behind the body to assist in correct positioning. To help with this, we take a snatch grip to naturally pull and pack the scaps and assist in better positioning. This is the true test to see if the athlete has mastered the hip hinge. Often, we will see relapses in technique here. If this happens, we'll take a step back and keep working on good mornings or earlier progressions.
Kettlebell swings with object between the legs:
Finally, once the RDL is mastered, we start loading it. We've established proper technique, motor control, and strength in the hinge movement. So what’s next? It's time to progress to dynamic hip hinging! This could be Olympic variations or dynamic deadlifts, but my favorite is the swing. The swing is a dynamic hinge movement that allows for greater speeds to overload the eccentric portion and really stress the stretch shortening cycle for great dynamic hip power.
When first learning the swing, I like to start with a progression that involves placing an object between the athlete's legs. This prevents a squatty swing and fixes a mess of technique errors that commonly occur in the swing.
Depending on the height of the athlete, we want the object to come up to the tibial tuberosity. So this could be a cone, yoga block, or medicine ball. Use whatever works for you. I often use a dumbbell, but I recommend using something like a cone or yoga block so that if the athlete hits it, there won’t be any chance of injury or damage to equipment.
Another article could be written on swing technique, but for the sake of time, here's our technique overview:
- Attack your zipper/crotch on the downswing. It's an active movement, not a passive one (great advice from Dan John).
- Snap your hips and glutes to drive the weight back up.
- After the hips and glutes drive the weight out of the hole, the torso should be tight and stable like in a plank.
- Don’t let the weight come above shoulder level.
- It's an RDL but with more speed.
After finishing all of these progressions, the athlete will be very proficient in the hip hinge. He can now safely move on to higher loads and greater speeds of movements.
This is a great basis for learning Olympic lifts, deadlifts, good mornings, and RDLs. If you work with youth athletes or even higher level athletes who can’t hip hinge, this progression is key. The hip hinge technique will allow these athletes to progress to later exercises that will build the foundation of their lower body strength, especially the glutes and hamstrings. So grab a dowel and get teaching. Until next time, go get ‘em!
Like? Dislike? Agree? Disagree? World changing? Or a big turd? Whatever you feel, leave a comment below and let me know!