


In all sports, not just baseball, having a strong posterior chain is an integral piece to performance and injury prevention. The pelvis and surrounding musculature act as a base of support for all athletic movements. Helping your athletes develop the proper strength in this complex will go a long way in helping to stabilize their lumbar spine and limit unnecessary pelvic/lumbar injuries during a competitive season. One of the more popular exercises utilized in baseball to help achieve this goal with our athletes is the hip thrust.
Hip thrusts have been a go-to exercise for me in minor league baseball to improve lifting performance in the squat and deadlift in the weight room. I believe it has even helped players achieve enhanced acceleration when sprinting around the bases and to the ball. When performed correctly and prescribed efficiently, the hip thrust can help young athletes “feel” their posterior chain fire correctly and help them achieve that neutral spine feeling. Where guys get in trouble is when they attempt to play superman and load this exercise without proper progression and coaching. This can lead to disastrous results, including some severe lumbar discomfort which can result in some significant loss in playing time. If you’re not a top prospect and are coming up through the minor leagues, this is the last thing you want as you NEED to be on the field and performing at a high level every day.
RELATED: A Peek Inside Minor League Baseball S&C
For this reason, I wanted to take some time to briefly outline a typical progression that I have utilized and had success with during my time in the minor leagues. I am not stating that this is the only way to progress this exercise, just simply providing a simple outline for what I have seen success with during my career. For each exercise outlined below, I will briefly touch on some keys to proper execution and provide some coaching points.
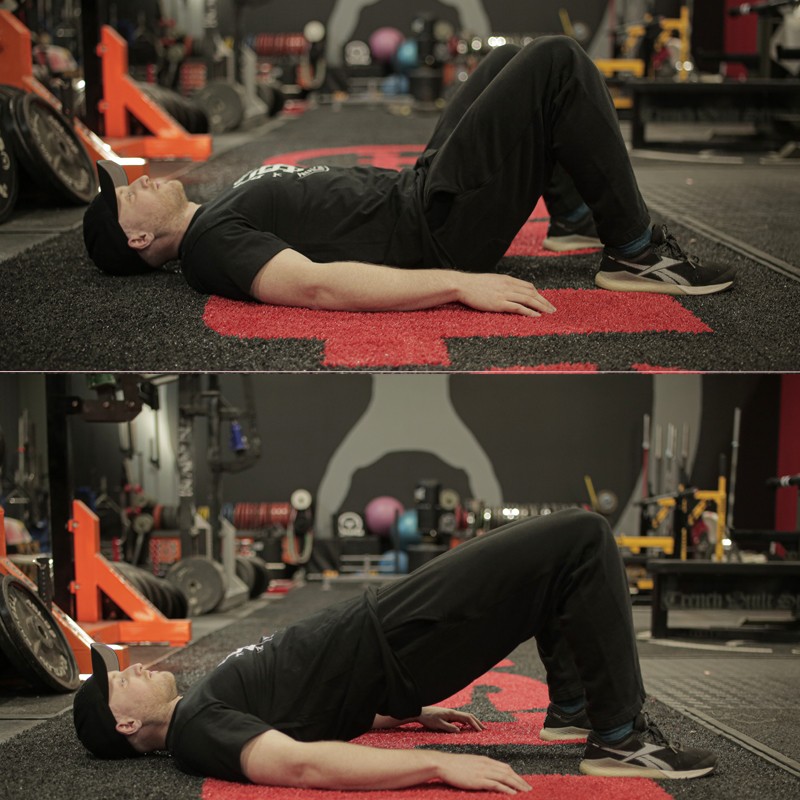
Glute Bridge
The first exercise in the progression is designed to teach athletes the basic neuromuscular movement pattern required to perform a hip lift. Proper foot placement and spinal alignment are keys to performing this basic bridging exercise and are common throughout the progression.
The athlete starts by lying on the floor in a supine position with the knees bent and feet flat on the floor. Both arms should be along the sides with palms down. The feet should be no wider than hip-width, and the toes should be pointed straight or slightly turned out. Turning the feet slightly outward will ensure greater recruitment of the glute muscles. Maintaining proper spinal alignment (pelvis tucked and core braced), the athlete pushes into the ground through his feet to lift the hips off the ground in a bridge position until the knees, hips, and shoulders form a straight line. The bridge should be held for a couple of seconds before slowly returning to the starting position. Avoid over-extending the hips, as this can increase the pressure in the lumbar region, especially when performing weighted bridges.
Coaching Points:
- The power from all progressions of this exercise should come from the glutes. Be sure to contract them at the top of the movement.
- Keep your feet underneath your knees in double-leg versions and foot underneath the knee in single-leg versions throughout the exercise. Avoid placing the feet or foot too far out in front of the body.
- Keep core tight and the heel(s) firmly pressed into the floor throughout the movement.
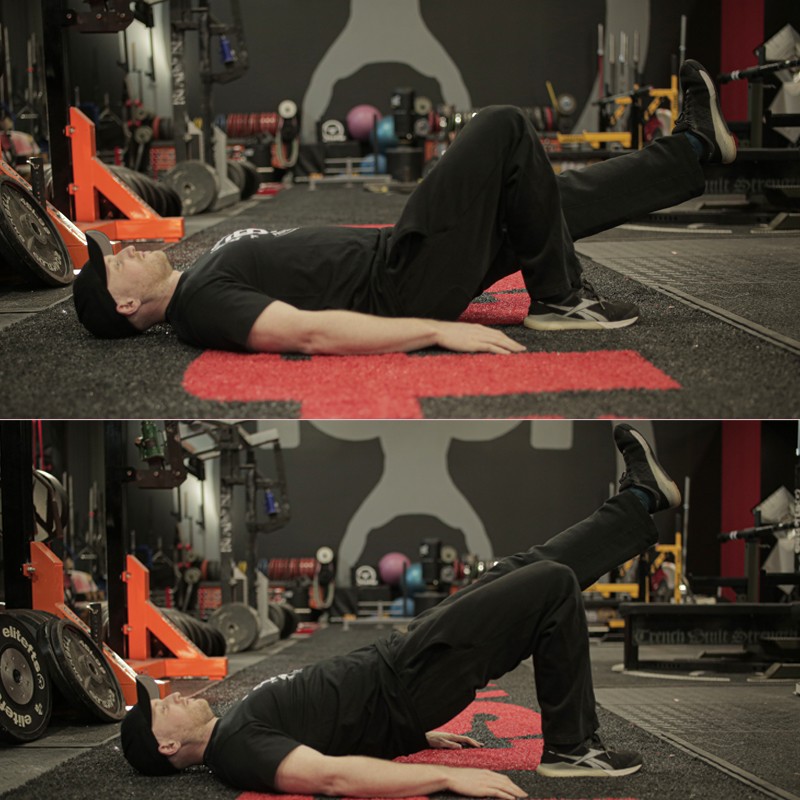
Single-Leg Hip Lift
The cues for the single-leg variant remain the same as the Glute Bridge, except that the athlete performs the exercise with a narrower single-leg base of support. This exercise provides the stimulus needed to increase strength in the glutes, hamstrings, and core needed to progress to weighted versions of the exercise.
The athlete starts by lying on the floor in a supine position with the left knee bent and the right foot flat on the floor. The left leg is raised so that it is in line with the right thigh or placed straight up in the air. After setting the core, the athlete keeps the left leg elevated and pushes through the hips until there is a straight line through the right knee, hips, and shoulders. The hip lift should be held for a couple of seconds before slowly returning to the starting position. After performing the prescribed number of reps, the athlete switches legs and repeats the exercise.
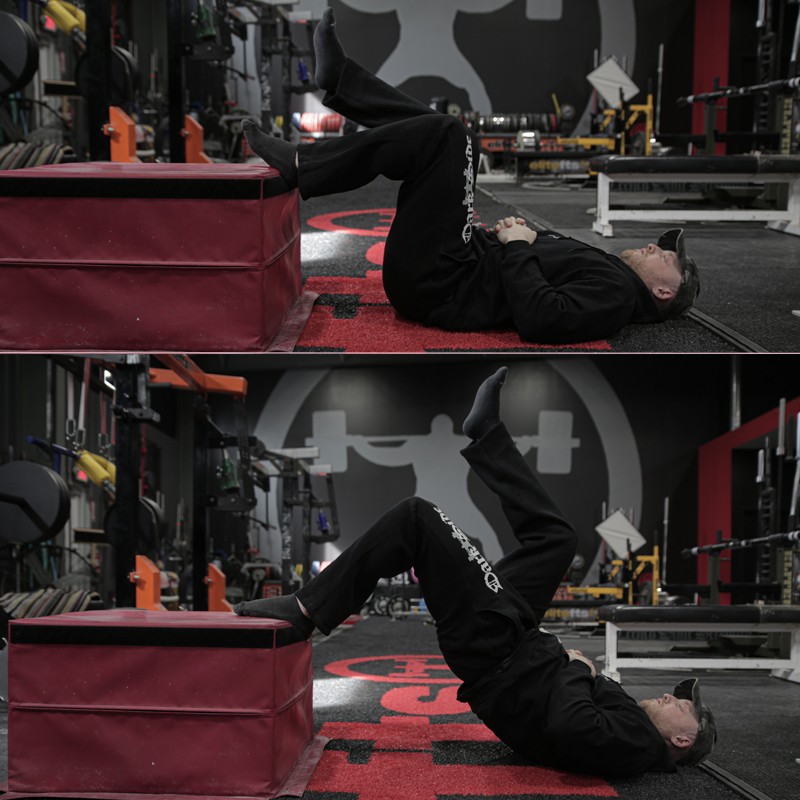
Elevated Hip Lift (Double- and Single-Leg)
The next two progressions are performed with both or one foot elevated. Elevating one foot or both feet increases the difficulty of the exercise by placing more stress on the glutes and hamstrings. The athlete starts by lying supine on the floor with both feet placed on a small six-inch step or box. Set the core, squeeze the glutes and push through both feet at the same time to raise the hips until there is a straight line from the knees to the hips to the shoulders. Pause, then return to the starting position and repeat for the prescribed number of reps. Keep the pelvis tucked and the spine straight throughout the movement because it is relatively easy to overextend the spine when the feet are elevated. Keeping your core tight makes it harder for you to arch your back, minimizing the stress on your spine. Trade the bench for a stability ball or TRX to increase muscle recruitment throughout the body to maintain stability and balance. When an athlete can perform the double-leg version with perfect technique, he/she can progress to the single-leg version.
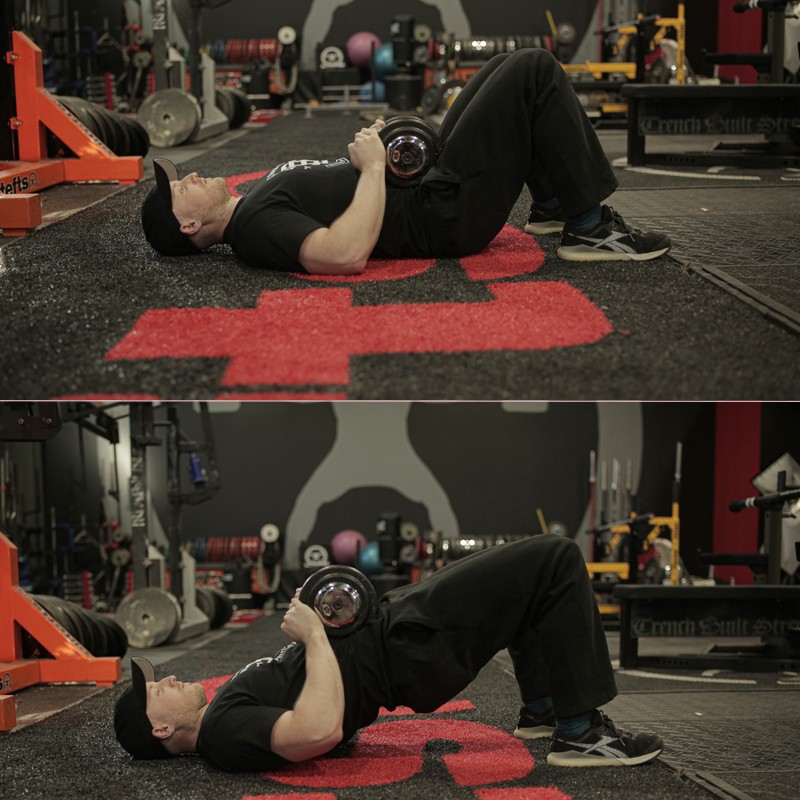
Weighted Double and Single Leg Hip Lift
Start in a supine position on the floor with a five- to 10-pound weight plate across the hips and held in place by both hands. Once the athlete is comfortable with the weight plate, he/she can use a dumbbell for additional resistance. The athlete starts the movement just like the non-weighted double leg variant, except that a dumbbell is placed with the handle facing the athlete in a comfortable place at the top of their hips. Holding the dumbbell with one hand on each side to ensure safety, the athlete performs a series of hip lifts. Keep the core tight to prevent overextending at the hips.
The single-leg version differs from the double-leg version primarily in the placement of the dumbbell. The dumbbell is placed onto the top of the hip that will be performing the movement and held in place with one hand on top.
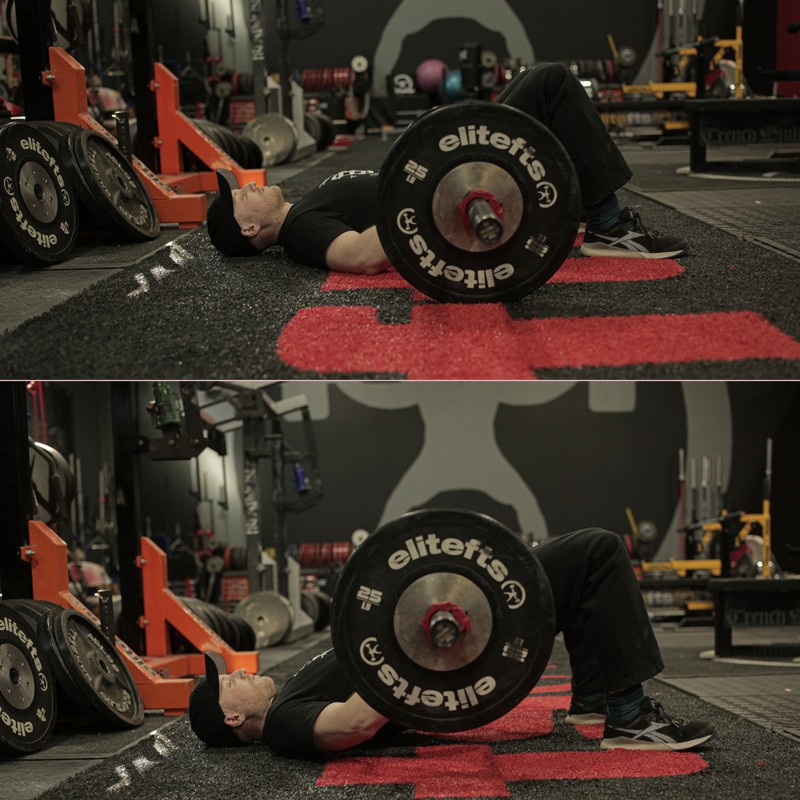
Weighted Double Leg Hip Lift (Barbell)
The last exercise in the hip lift progression is the barbell hip lift. Once an athlete has demonstrated the ability to efficiently perform each previous exercise and developed the necessary glute, hamstring, and core strength, he/she can progress to using a barbell for added resistance. Because a barbell can place a significant amount of pressure on the hips, an Airex pad should be placed under the bar to remove pressure and make the movement more comfortable for the athlete. The movements in this exercise are similar to those in the unweighted glute bridge.
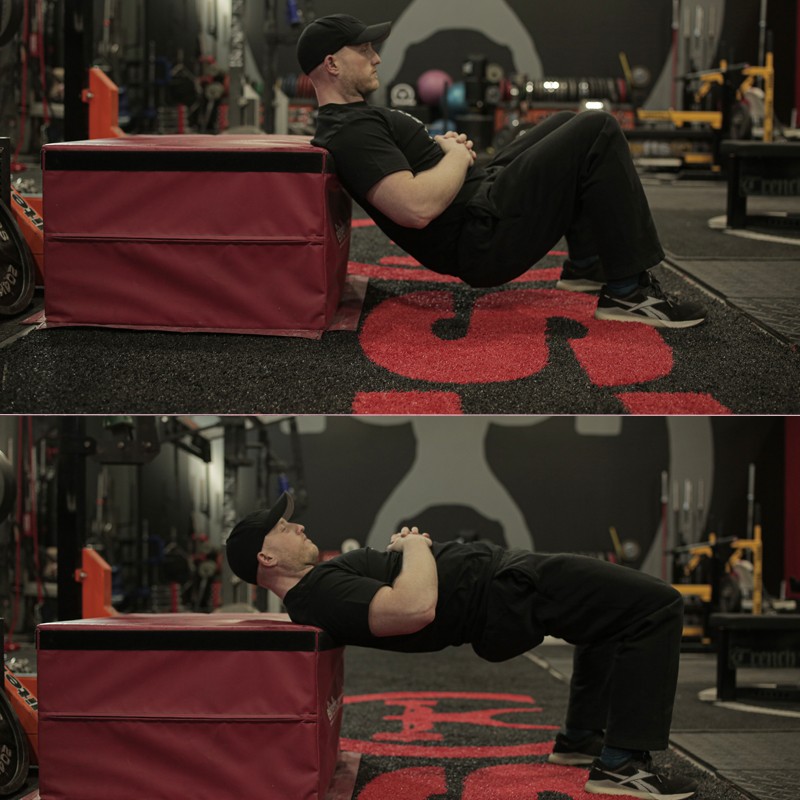
Bodyweight Double-Leg Hip Thrust
This is an advanced bodyweight exercise with the shoulders elevated by a bench or padded box and both feet flat on the floor. Elevating the shoulders allows for a greater range of motion than the hip lift, and when resistance is added, can significantly improve development in the posterior chain. The athlete starts in a seated position in front of a bench, ensuring that he/she is in a position where the edge of the bench is pressing in the thoracic region of the upper back. The feet should be no wider than hip-width and pointed straight or slightly turned out. The feet should be flat on the floor and positioned so that the knees are over the heels and not the toes at the top of the exercise. Proper spinal alignment is imperative because the shoulders are elevated which makes it easier to overextend the hips. Once the athlete is in position, he/she starts by pressing the feet into the ground and driving the hips upward, until the spine is properly aligned and there is a straight line from the knees through the hips and to the shoulders.
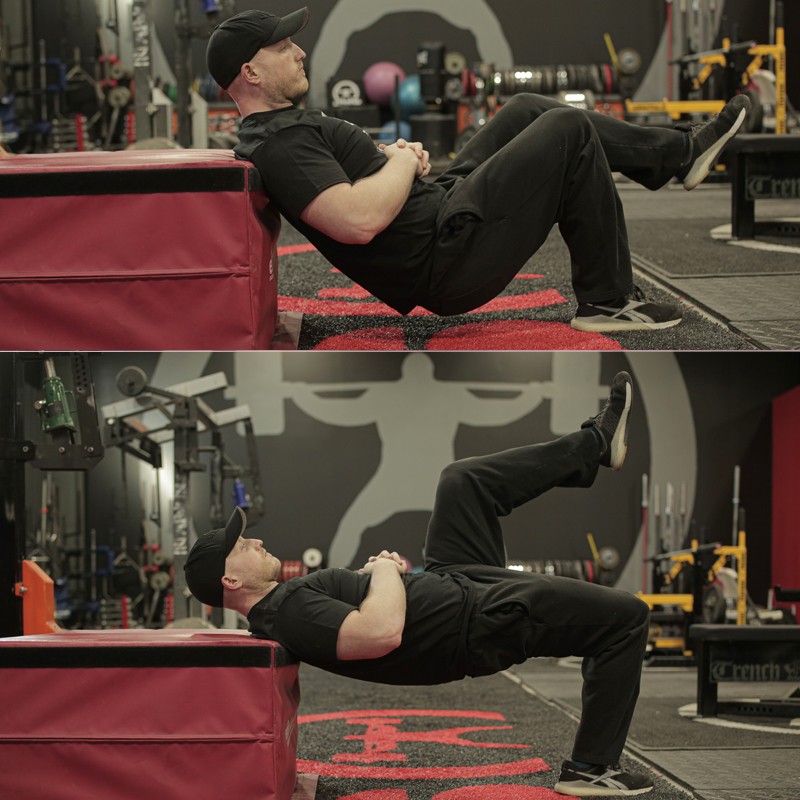
Bodyweight Single-Leg Hip Thrust
This exercise is similar to the double-leg exercise in setup and execution except that the exercise is performed with one leg. The non-support leg can be in an extended position or bent at a 90-degree angle. Progressing to a single-leg version of this exercise increases the strength required in the muscles of the posterior chain.
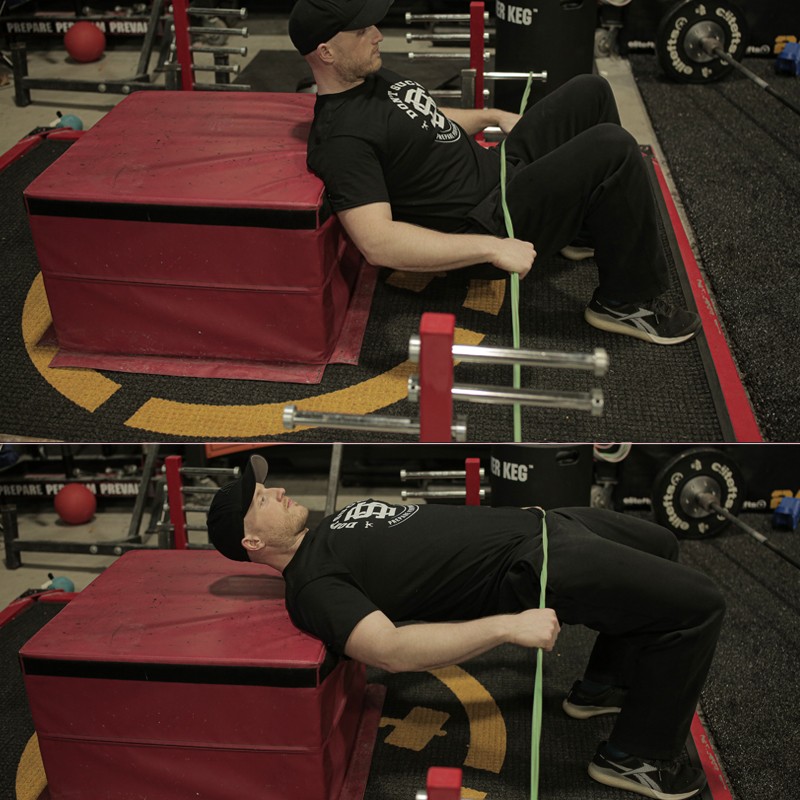
Band Resisted Hip Thrust
The next progression is to add resistance to the exercise using a resistance band. Depending on what equipment is available, the setup will differ with regard to how the band is attached. A piece of equipment that is becoming more common in some weight rooms is the hip thruster. The hip thruster is made specifically for this exercise and has pegs on each side on which the band can be attached. Athletes who do not have access to the hip thruster can attach the band to heavy dumbbells placed on each side of the body. The setup remains the same as in previous versions except that a band is placed across the top of the hips. As an athlete progresses in strength, the resistance can be increased by using thicker and heavier bands and/or progressing to a single-leg version of the exercise.
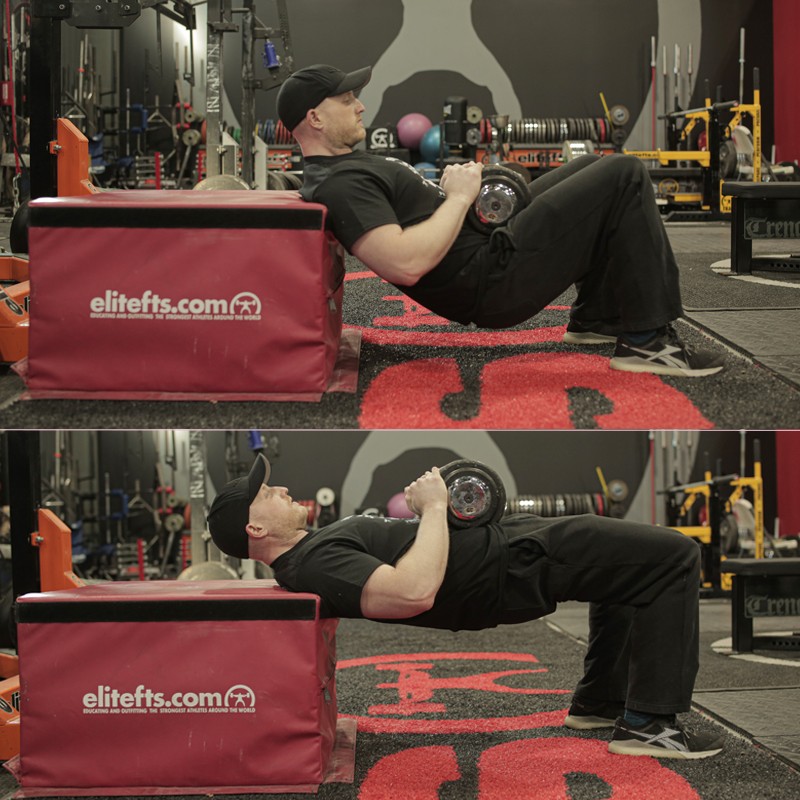
Weighted Hip Thrust (Double and Single- Leg)
For more resistance, the exercise can be performed with a plate or dumbbell. The weight is placed in a comfortable position on the top of the hips (double-leg) or hip (single-leg). Holding the plate or dumbbell in proper position, the athlete performs a hip thrust with proper spinal alignment. With resistance added, it is important that the athlete does not over-extend at the top of the movement to avoid placing unnecessary stress on the lumbar region.
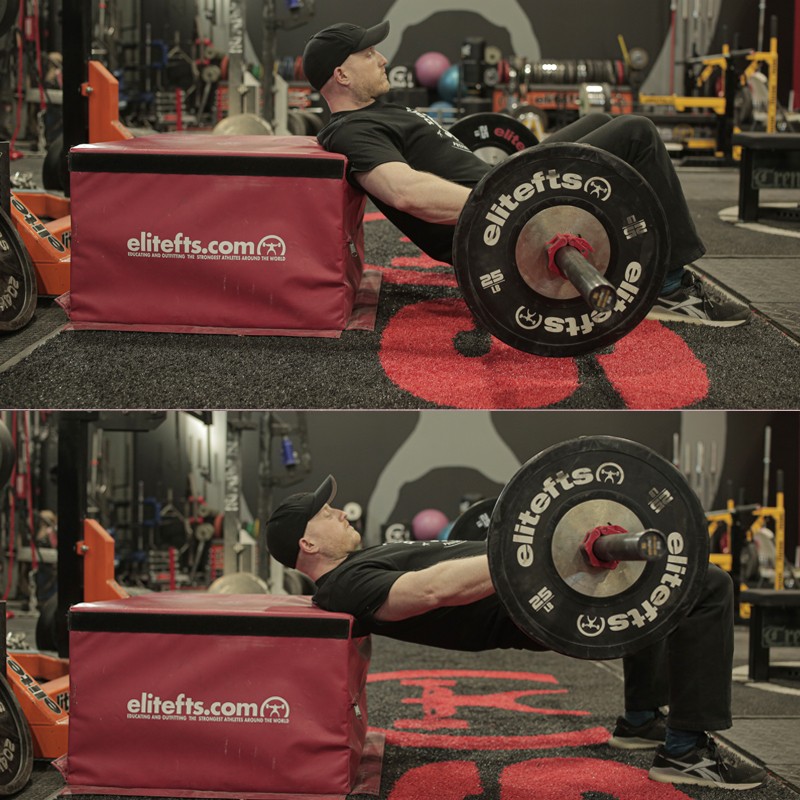
Barbell Weighted Hip Thrust
The most advanced version of the hip lift/hip thrust exercise is the barbell hip thrust. This is similar to the barbell hip lift except for that range of motion is increased because the shoulders are elevated. An Airex pad should be placed under the barbell to ensure comfort throughout the movement. As more weight is added, the pressure across the top of the hips can create a significant amount of discomfort if proper precautions are not taken. This exercise requires a significant amount of posterior chain strength and core stability and strength. For this reason, I have listed this as the final exercise in the progression and highly recommend taking your athlete through some sort of progression to ensure they have achieved the strength levels required to perform this exercise safely and efficiently.
Header image credit: mtaira © 123rf.com
Dwayne Peterson has worked in professional baseball for eight years. Six of those years were spent working as a minor league S&C with the Houston Astros, where he worked as an S&C at every level in the minor leagues from short season to AAA—fortunate enough to be a part of the organization during the 2017 World Series Championship Season. Dwayne currently is the AAA S&C coach for the San Fransisco Giants organization. He completed his undergraduate degree in exercise science and MBA at Northern Kentucky University and is in the process of obtaining his Ph.d. Dwayne spends his offseason at home with his wife and three dogs in Erlanger, Kentucky.
6 Comments