For online coaching, consults or on-site clinics on the Conjugate Method and proper strength training for your athletes please email nateharvey2600@gmail.com
Phase III
Below is the third phase of a four-week training block for baseball. I am leaving Phase 1 and Phase 2 numbers in so we can see the progressions phase to phase.
The changes will be bolded and separated with a "/." Phase 3 sets and reps will be in bold.
FRESHMAN AND MAX EFFORT WORK:
When we have athletes who haven't trained in this system before we DO NOT put them in max effort training from the start. Our progression usually looks like this:
Week 1- teach squat, bench and pulls on respective days. Then get some sets in with a weight we feel they can move with acceptable speed and form.
Week 2- Speed sets on both max and speed days. The weight is slightly increased from week 1. Form and bar speed are priority.
Week 3 - same as week 2.
Week 4 - this is the week we typically introduce some sort of max effort work. It is usually the same protocol as the returners but we are more cautious working them up and shut them down when form breaks.
Position Players (Fielders and Catchers)
Day 1, Phase 3: Max Effort Lower — Position Player
- Rolling/Soft Tissue Work
- Back Extension or Reverse Hyper: 2x20/3x20
- Seated Weighted Footslam Box Jump: 4x5 or 20 Total with 10-Pound Dumbbells or 20-Pound Medicine Ball /6x5 or 30 Total Reps
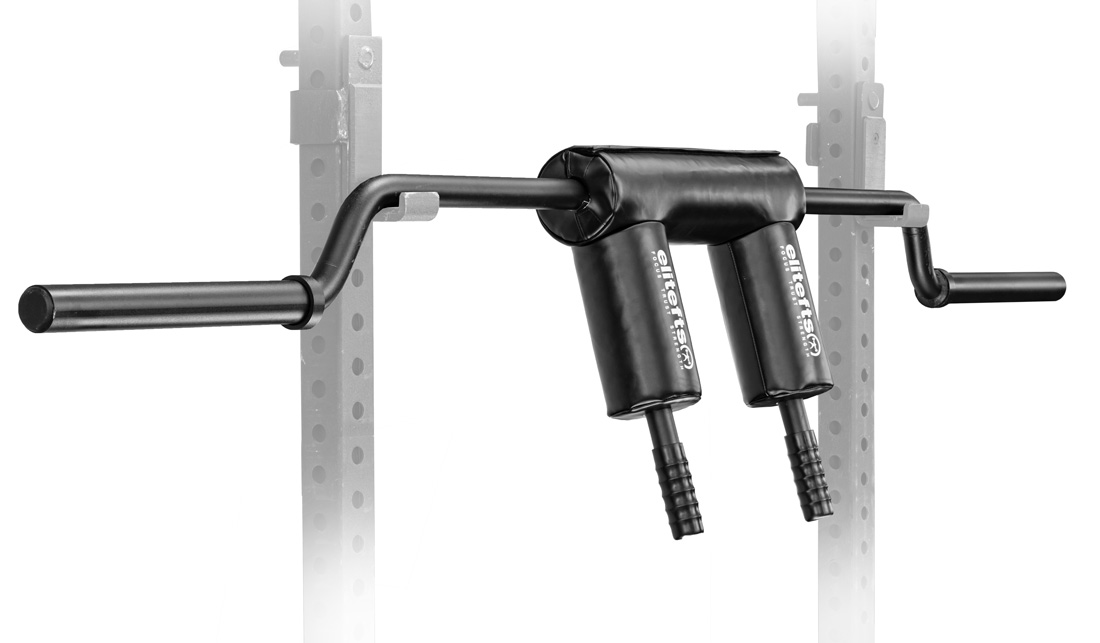
- SS Yoke Bar Medium Stance Squat with Two Chains for 3RM /Cambered Bar Wide Stance with Doubled Mini Bands for 1RM / Conventional Pin 3 pull - 1RM
- Reverse Lunge with SS Yoke Bar: 3x6/Cambered Bar Against Bands: 3x6/ no second exercise - pin pulls are taxing as is, no point crushing them with another barbell movement today
Perform accessories in any order.
- Single-Leg Back Extension: 3x10/4x10/ 4xfail
- GHR: 3xFailure/4xFailure/ 4 x fail
- Rollout Abs: 4xFailure/ 4x fail
- Chin-Ups: 3x6-8/4x8 Dead Hang in Bottom (to traction shoulders and spine)/ 4x fail - Hang in Bottom (to traction shoulders and spine)
- Banded Hip Mobility
Day 2, Phase 3: Speed Upper — Position Player
- Rolling/Soft Tissue Work
- External Rotations: 60 Total Reps/80 Total Reps/ 100 total reps
- Dumbbell Bench with 10% (300-Pound Bench=30-Pound Dumbbells)/Pull-Aparts 4x25
- Speed Bench with One Chain: 10x3 with 40%, One Failure Set/8x3 with 40% and Two Chains/ 6x3@ 40% and 2 chain, 2 sets of fail with speed wgt and chain
- Underhand Inverted Row: 3x12/4x12/ 5x12
- Overhead Banded Side Bend: 4x25 (no rest, just alternate sides)
- Biceps and Tricep Superset, Athlete Choice: 3xFailure/4xFailure/ 5 by failure
- Banded Shoulder Traction
Day 3, Phase 3: Speed Lower — Position Player
- Rolling/Soft Tissue Work
- Back Extension or Reverse Hyper: 2x20/ 3x20
- Weighted Box Jump: 4x5 or 20 Total with 10-Pound Dumbbells or 20-Pound Medicine Ball/ 8x5 or 40 total
- SS Yoke Bar Speed Squat with Two Chains: 10x2 with 50%/Cambered Bar with Double Minis: 8x2 with 50% of Day One/ SS Yoke Bar Speed Squat with Two Chains: 6x2 with 50%
- Speed Pull from Pin 1 with Two Chains: 10x2 with 60% Max Squat/Speed Pull from Pin 1 with Mini Bands: 10x2 with 60% Max Squat/ Speed Pull from Pin 1 with Mini Bands: 10x2 with 60% Max Squat- sumo stance
Perform accessories in any order.
- Bull Kicks: 3x20/4x20 (AKA Snoop Dogg Sets)/ 4x30 use light band
- Prone Banded Hamstring Curl: 100 Total Reps/150 Total Reps/ 200 total reps
- GHR Sit-Ups: 4xFailure/4xFailure with Band/ 4 x fail with wgt
- Wide Grip Lat Pulldown: 3x12, Slow Eccentric/4x12/ 5x 12
- Groiners: 100 Total Reps/ 140 reps
- Banded Hip Mobility
Day 4, Phase3: Heavy Upper — Position Player
- Rolling/Soft Tissue Work
- Blackburns: 30 Seconds Each Position/40 Seconds/ 30 seconds each position with 2.5lb plates
- Overhead Medicine Ball Slam: 3x5/4x5/ 5x5
- Reverse Band Bench: 3RM (Bar x 20, 95x5 then triples)/Two-Board Fat Bar Press with One Chain: 1RM/ fat bar floor press w/ 2 chain each side - 1RM, then 2 x fail at 80% of 1 RM
- One-Arm Dumbbell Row: 3x8/4x8/ 5x8
- Chest Supported Y Raise: 3x20/4x20/ 4x 30 same wgt as last week
- Seesaw Abs: 4x25 (no rest, just alternate sides)/Use Cambered Bar
- Zottman Curl: 3x12/4x12/ 4x fail
- Skull Crusher Push-Up: 3xFailure/4xFailure/ 5 x fail
- Banded Shoulder Traction
Pitchers
Day 1, Phase 3: Max Effort Lower — Pitcher
-
- Rolling/Soft Tissue Work
- Back Extension or Reverse Hyper: 2x20/3x20
- Seated Weighted Footslam Box Jump: 4x5 or 20 Total with 10-Pound Dumbbells or 20-Pound Medicine Ball /6x5 or 30 Total Reps
- SS Yoke Bar Medium Stance Squat with Two Chains for 3RM /Cambered Bar Wide Stance with Doubled Mini Bands for 1RM / Conventional Pin 3 pull - 1RM
- Reverse Lunge with SS Yoke Bar: 3x6/Cambered Bar Against Bands: 3x6/ no second exercise - pin pulls are taxing as is, no point crushing them with another barbell movement today
Perform accessories in any order.
- Single-Leg Back Extension: 3x10/4x10/ 4xfail
- GHR: 3xFailure/4xFailure/ 4 x fail
- Rollout Abs: 4xFailure/ 4x fail
- Chin-Ups: 3x6-8/4x8 Dead Hang in Bottom (to traction shoulders and spine)/ 4x fail - Hang in Bottom (to traction shoulders and spine)
- Banded Hip Mobility
Day 2, Phase 3: Speed Upper — Pitcher
- Rolling/Soft Tissue Work
- External Rotations: 60 Total Reps
- Dumbbell Bench with 10% (300-Pound Bench=30-Pound Dumbbells)/Pull-Aparts 3x20/Pull-Apart 4x20
- Speed Bench with One Chain: 10x3 with 40%, One Failure Set/8x2 into Airex Six-Inch Wide Foam Pad/ 6x3 into airex six inch wide foam pad
- Underhand Inverted Row: 3x12/4x12/ 5x12
- Overhead Banded Side Bend: 4x25 (no rest, just alternate sides)
- Biceps and Tricep Superset, Athlete Choice: 3xFailure/4xFailure/ 5x12
- Banded Shoulder Traction
Day 3, Phase 3: Speed Lower — Pitcher
-
- Rolling/Soft Tissue Work
- Back Extension or Reverse Hyper: 2x20/ 3x20
- Weighted Box Jump: 4x5 or 20 Total with 10-Pound Dumbbells or 20-Pound Medicine Ball/ 8x5 or 40 total
- SS Yoke Bar Speed Squat with Two Chains: 10x2 with 50%/Cambered Bar with Double Minis: 8x2 with 50% of Day One/ SS Yoke Bar Speed Squat with Two Chains: 6x2 with 50%
- Speed Pull from Pin 1 with Two Chains: 10x2 with 60% Max Squat/Speed Pull from Pin 1 with Mini Bands: 10x2 with 60% Max Squat/ Speed Pull from Pin 1 with Mini Bands: 10x2 with 60% Max Squat- sumo stance
Perform accessories in any order.
- Bull Kicks: 3x20/4x20 (AKA Snoop Dogg Sets)/ 4x30 use light band
- Prone Banded Hamstring Curl: 100 Total Reps/150 Total Reps/ 200 total reps
- GHR Sit-Ups: 4xFailure/4xFailure with Band/ 4 x fail with wgt
- Wide Grip Lat Pulldown: 3x12, Slow Eccentric/4x12/ 5x 12
- Groiners: 100 Total Reps/ 140 reps
- Banded Hip Mobility
Day 4, Phase 3: Heavy Upper — Pitcher
- Rolling/Soft Tissue Work
- Blackburns: 30 Seconds Each Position/40 Seconds
- Overhead Medicine Ball Slam: 3x5/4x5
- Reverse Band Bench: 3RM (Bar x 20, 95x5 then triples)/Dumbbell Floor Press with Mini Band Around Back: 6RM for Two Sets/ fat bar floor press vs 2 chain - 1RM
- Mini Band Push-Ups:2-3xFailure
- One-Arm Dumbbell Row: 3x8/4x8
- Chest Supported Y Raise: 3x20/4x20/ 4x30 w/ same weight as last week
- Seesaw Abs: 4x25 (no rest, just alternate sides)/Use Cambered Bar
- Zottman Curl: 3x12/4x12
- Skull Crusher Push-Up: 3xFailure/4xFailure
- Banded Shoulder Traction
Equipment Used:
Elitefts 3x3 Collegiate Power Rack
Micro Mini Band
Mini Band
SS Yoke bar
Chains
GHR
Back Extension


