


As an educator in the gym, you’ll at some point in your career abruptly realize that not every client arrives thrilled to exercise. Outside a child’s diagnosis or negative association toward movement, a child stands before you beyond your degrees and countless acronyms following your last name.
What do you do at this defining moment when your clipboard plan is crumpled and thrown in the trash can?
I’ve had my share of these moments where I’m grabbing for alternative options to appease a child. Somewhere between a child eloping, having a meltdown, or worse, associating everything miserable with training, I’ve always circled back to play to move efforts forward.
RECENT: Year One with Men’s Aspirations — Developing Social Skills with Substance
Through play, you can mask basic movements into imaginative fun, creating an environment rich in engagement, self-regulation, and reward.
To illustrate my point, here are 18 exercises your child wants to do. Observe how a single attribute transformation changes the presentation of a basic exercise or game that otherwise would be perceived as strenuous and painful.
Modify each exercise or game to engage the child. Realize these modifications may seem reactive (as you’re trying to learn more about the child on the spot) but will eventually become habitual.
Reframe your role as an educator as someone willing to do everything to provide a positive experience to yield training momentum and consistency.
Enjoy!
18 Exercises Your Child Wants To Do
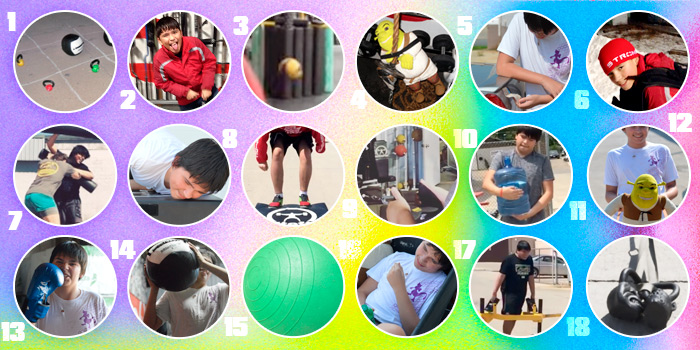
1. Weighted Tic-Tac-Toe
Equipment Needed: Gym Chalk, Medicine Balls, Kettlebells
- Create a 3x3 grid with gym chalk on an outside or gym floor surface. Using actual objects as markers will force the game piece (chalk and concrete) to use a significant amount of space (approximately 10x10 feet).
- Amongst the two of you, decide who will be X and O.
- Collect your pieces (medicine balls and kettlebells) and place them aside from the game piece.
- Taking turns, the player who successfully places three respective “marks” in a horizontal, vertical, or diagonal row wins the game.
Purpose:
A great way to make tic-tac-toe strength-based and action-packed is to have the X's and O's be medicine balls and kettlebells and stretch the game board over a large block of the cemented floor. A sedentary game that once had you sitting and inactive (great for rest periods or brain breaks) now can have you bend over, squat, pull, and press.
Modifications:
- Adjust the odd object to secure good pick-up form.
- Consider using everyday home objects (clothes basket, toys, video games, a blanket, etc.) to reinforce body awareness in and away from the gym.
- Pay attention to the cues you use now, as they’ll transfer greatly to deadlifts once those are included within the training program.
- Progressively increase the loads in future challenges.
2. Silly Sandbag Measure and Carry
Equipment Needed: Silly Bands, Sand, Sandbag, Scale, Cones
Application:
1. Begin by mixing silly bands within sand in the main holding bin.
2. Specify how many pounds of sand the sandbag will hold.
3. Locate the empty sandbag inserts.
4. Fill each insert with sand to its maximum capacity.
5. Measure each insert using a scale to check weight.
6. Once the bag is stuffed with the weighted inserts, begin the carry.
7. For the carry, specify the distance and have the course labeled with cones.
8. Switch roles once he or she carries the bag across the desired distance. Therefore, instead of returning the sandbag to the original starting position, carry the child back.
Purpose:
Handling and transferring sand from one location to another is great for grip and fine motor work. Adding silly bands makes this transfer fun and adds expectancy and surprise. Including the measuring and weighing aspect provides an opportunity to incorporate problem-solving, estimation, subtraction, and addition skills. Carrying the bag will increase grip strength and improve overall strength and endurance while moving. Sharing the load after the child completes the carry is motivating for the child in two ways: 1) The child will perceive it to be fair by seeing you exert the same amount of effort, and 2) this provides a great time to model form, intensity, and attitude while completing a set.
Modifications:
- Use coins instead of silly bands.
- Use rice instead of sand.
- Rather than carrying the child back, roll them on a scooter using a rope attachment.
- Change the course route each time.
Error: No videos found.
Make sure this is a valid channel ID and that the channel has videos available on youtube.com.
3. Angry Bird Hangs
Equipment Needed: Chin Bar, Stuffed Angry Birds, Chalk
Application:
- Place a bench underneath the chin bar to aid in reaching the bar.
- With a solid grip, the child will grip the bar, straighten arms and legs, and hang.
- The partner will ensure to have at least seven to 10 Angry Birds in a bin nearby. Standing at least eight feet away, he or she will aim and throw each bird to the hanger's chest, stomach, and legs. Note: Stuffed Angry Birds are soft and plush.
- Communicate that the game's goal is to have every Angry Bird fired before the hanger can return to solid ground.
Purpose:
This game aims to have all the Angry Birds fired before grip fails. The aiming and chalk mess is what occupies the mind instead of hanging from a bar as grip is slipping, especially in the case if the child thinks his or her grip is weak. This game has excellent pull-up implications once pull-ups are added to the training program.
Modifications:
- Over time, use more Angry Birds to elongate the hanging time.
- Instead of Angry Birds and chalk, use water balloons.
- Allow the child to use a Bosu ball as a means to sit on or kneel and slowly transition to hanging without restriction.
- Lessen or elongate the space between the bin and hanger.
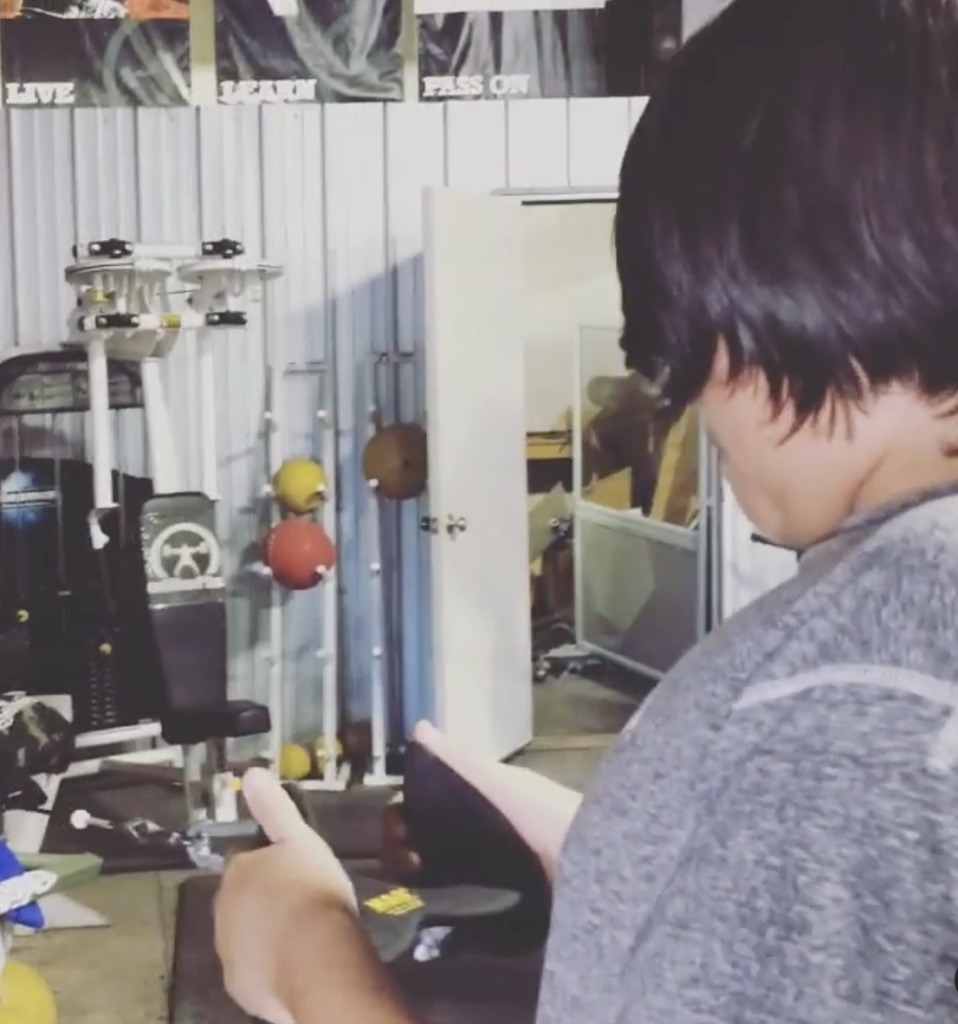
4. Brass Ball Holds
Equipment Needed: Iron Shot, Stopwatch
Application:
1. Once the shot is placed in hand, the stopwatch begins.
2. The goal is to out-grip your partner.
3. Once the shot drops to the ground, the dropper has been defeated.
4. Stop the watch after the champ drops his or her shot to the ground.
5. Record the time and strive to beat this time in the next round.
Purpose:
This is a great opportunity to use the Iron Shot as an implement that may otherwise not be utilized as intended. Therefore, what you do for grip and the tools associated (farmer’s carry, plate pinchers, Captains of Crush hand grippers) are continuously expanding. Plus, many of the attachments you’ll find on our site have balls on the end, allowing this feature to be familiar when using a cable variation of rows, pulldowns, pushdowns, and carries. It’s pretty exciting to see who loses grip first, as this is secondary to the sound of cast iron hitting a cemented floor.
Modifications:
- Play for a couple of rounds.
- Change form each round (one hand only for time, transferring between both hands, remaining stationary or in motion).
YouTube

5. Foam Roller Bowling
Equipment Needed: (10) Foam Rollers, (2) PowerMax Medicine Balls
Application:
- Set up ten foam rollers, vertically, in a typical bowling pin formation: four pins in the back row, then three, then two, and finally one in the front and centered.
- Approximately 15 feet away from the foam rollers, draw a line to show the minimum distance the ball must travel.
- Using a medicine ball, each player will take turns standing behind the line and roll it toward the foam rollers. The goal is to hit as many foam rollers as possible.
- Following the same rules as traditional bowling, each player will have two chances to hit as many foam rollers as possible.
- Take turns setting up pins and clearing pins mid-frame. For example, if you’re up to bowl, your partner will adjust and/or clear the pins as needed.
- Designate a scorekeeper to keep track of points. Use a typical bowling score system.
- Play for a total of 10 frames.
Purpose:
I love this variation of bowling because it requires physical movement throughout. Regardless if it’s your turn to bowl or not, there is no inactivity due to the constant setup of the foam rollers. Aside from this aspect, this game also promotes aim and hand-release skills.
Modifications:
- Use bumpers on the side of the “lane” to keep the medicine ball in lane.
- Shorten or lengthen the throwing distance.
- Label each foam roller with a number (one through 10). This visual may help in the aiming aspect.
- Adjust the throwing technique. Use bounces, roll from various positions (standing, seated, kneeling), and use a one- or two-handed release.
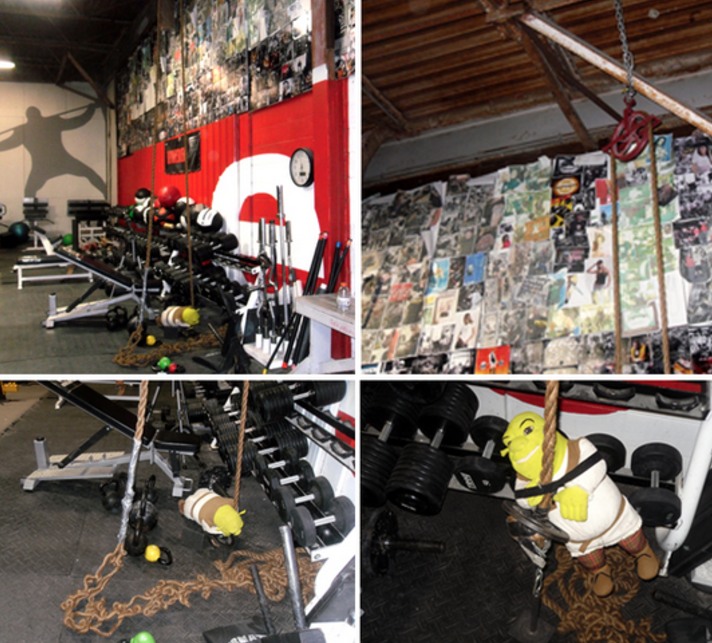
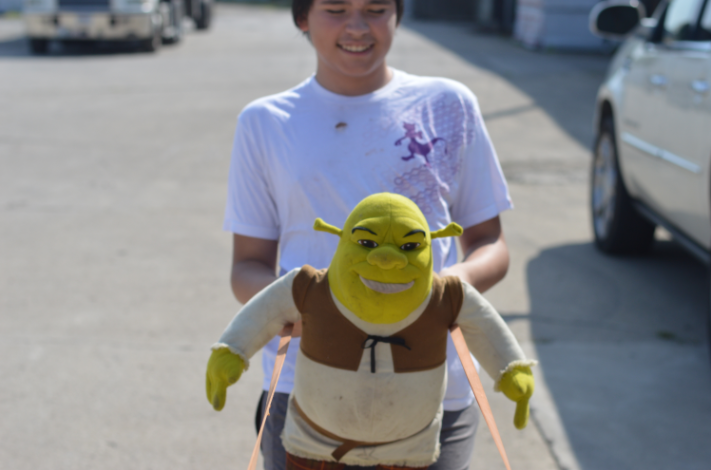
6. Shrek Slams
Equipment Needed: (1) Pulley System (affixed from the ceiling), (1) Stuffed Shrek, Plates, (1) Plate Holder, (1) Rope
Application:
- Based on the visual, create a similar setup to mimic this pulling system.
- Place the desired amount of plates on the plate holder.
- Have the child grasp the rope with both hands.
- On the command to go, have the child use a hand-over-hand technique to hoist Shrek up to the ceiling.
- Once Shrek hits the ceiling, have the child reverse the hand-over-hand technique until Shrek reaches the ground.
- You may count reps as the amount of times Shrek reaches the ceiling or have it that Shrek going up and down is considered one rep.
- Add weight each set.
Purpose:
A great way to change up the benefits of pull-ups, pulldowns, rows, and tug-of-war, is to use this variation. It’s an exercise that has a clear beginning and end, by the visual aspect of Shrek getting higher, reaching the ceiling, and then finally making it back to the ground. I love how this setup forces the child to isolate one arm and hand at a time, allowing hand control and grip to play a big role.
Modifications:
- Designate a speed. I suggest modeling controlled rows to learn form and technique. For fun, change the speed of each pull by going extremely slow for a round, and then extremely fast for the next. Don’t let form break, though.
- Decide how far back the child should bring down his or her elbow. Just as a row and pulldown, highlight the fact that you want them to drive their elbow down. Specify if the elbow should stop as it reaches his or her side, or if you want them to accentuate the pull by surpassing their side.
- Change the name based on the figure the child chooses to hoist.
- If a ceiling design is not feasible for your gym setup, eliminate the slam aspect, attach a stuffed figurine on a sled, add weight, and perform rope rows. Come up with a new name!
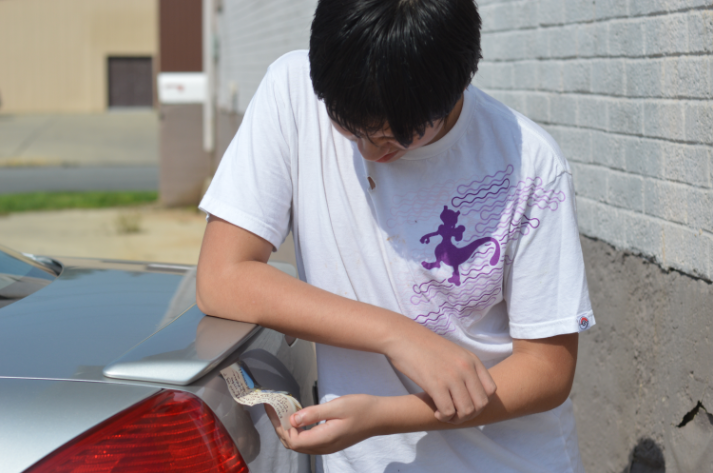
7. Sticky Note Find
Equipment Needed: (5) Sticky Notes, (1) Sharpie Marker, (1) Supportive Pull-Up Machine, (1) Medicine Ball, (1) Medicine Ball Rebounder
Application:
- Choose five exercises you’d like completed within a circuit setup (one placed after the other).
- Using sticky notes and a Sharpie marker, write the desired amount of reps for each exercise and the exercise name on each sticky note.
- Choose five locations to stick each sticky note.
- On the schedule, label this circuit as Sticky Note Find. Underneath the title, write, "Locate each sticky note in the following areas."
- Follow the instructions, find the sticky note at each location by walking, read the sticky note, and then perform the exercise.
- Continue until all sticky notes are found, and the exercises are completed.
Purpose:
If you incorporate circuits frequently in training or circuit training is something new you’d like to try, this is a great spin on the setup, as it creates direction with directions. I usually choose three exercises (exercises that have been previously mastered in isolation) and place them in sequential order. You’ll find this setup adds a little bit more active recovery time since you have to travel to various sticky note locations to get your next exercise rather than having three exercises in very close proximity.
Modifications:
- Lessen the workload by cutting reps, decreasing weight, or minimizing the amount of exercises. Increase the workload by adding reps, poundage, and the amount of exercises.
- Instead of walking between exercises, run, hop, or crawl.
- Choose exercises based on a variety of themes: aerobic, leg dominant, upper body dominant, alternate bodyweight exercises with added resistance, accessory work, etc.
- If the child cannot read, read the directions to him or her or provide visuals instead of written directions.
8. Rope Roller Ride
Equipment Needed: (1) Rope, (1) Rage Rolling Bumper Stand, Plates
Application:
- Have the child sit on the rage rolling bumper stand with legs crossed.
- Secure an end of the rope in their hands. Secure the other end of the rope in your hands.
- Losing all slack within the rope, begin pulling.
- Use a large, open space to pull fast and slow, in circles, backward, forward, on smooth surfaces and bumpy surfaces. Be sure to model exactly how you expect the child to pull.
- Time the ride for three minutes. Once three minutes have elapsed, switch roles.
Purpose:
Encompassing the benefits of dragging a sled, this pull variation uses the weight of another instead of the weight of plates (initially). Benefits of this exercise include grip strength (while riding or dragging), stabilization (trying to remain upright while seated), leg drive, endurance, hypertrophy, and increased work capacity. What I love about this variation is that the child looks forward to this exercise because they see this as a joy ride. As it’s more work to be the dragger, it’s quite motivating to know that a ride is coming soon.
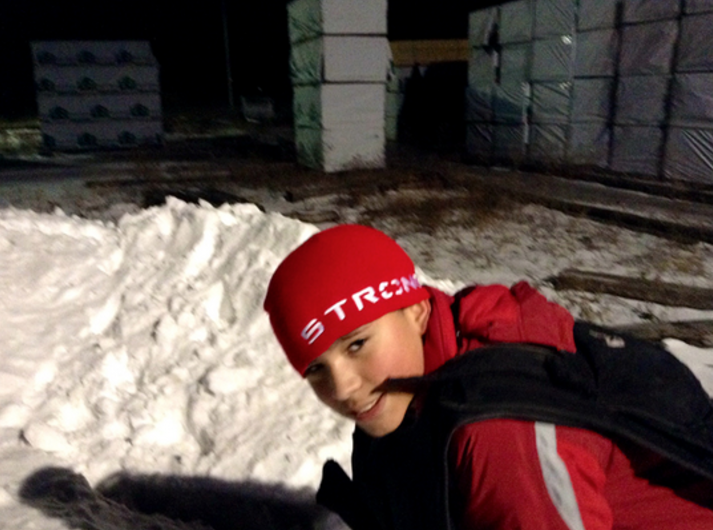
I like the rolling stand because it works well with various indoor or outdoor surfaces (matted or cemented floors, concrete, gravel, dirt, snow, and grass). The ability to be versatile on a variety of surfaces, which may change at a rapid pace, is a must! The rollers also make this challenge something the child can accomplish, regardless of role. Whether it periodically serves as a substitute for the sled or Prowler®, it can also be used as a great tool to gradually transition to pulling a sled or pushing a Prowler®.
Modifications:
- Use a variety of pulling methods: Forward Walking/Running, Backward Walking/Running, Walking Chest Press (Single or double arm), Walking Triceps Extension (Single or double arm), Walking Pull-Throughs
- Add weight to the stand by placing plates on it. Then sit on top of the plate(s).
- Increase or decrease the amount of dragging and riding time.
- If the child cannot drag your body weight, use someone similar to their size instead. If this is not possible, use a favorite stuffed animal of theirs as a replacement.
- Use a variety of pulling attachments.
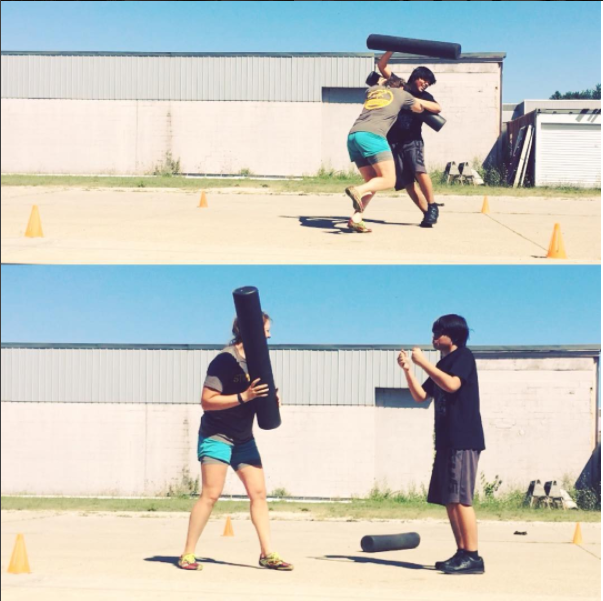
9. Foam Roller Jousting
Equipment Needed: (2) Foam Rollers, Chalk
Application:
- Create square boundary with chalk.
- Each player secures the end of the foam roller in hands.
- Begin in the center of the boundary with foam rollers touching.
- Make contact with another player (below neck) and foam roller by striking the opponent with foam roller with the goal of moving the opponent outside of the chalked boundary.
- The first person to step outside of boundary line loses.
- Play best of three rounds.
Purpose:
This is a great way to incorporate contact sports into the mix — a game that requires strategy, awareness of self and opponent in limited space, and sportsmanship. I like to begin this game without foam rollers in hand and place the child in a staggered athletic stance. Much like footwork for boxing, demonstrate how to move forward, backward, and side-to-side maintaining a staggered stance. The opponent striking area is based on consensus (where it’s safe to hit) and again this can be practiced separately from footwork, much like mitt work for boxing.
Modifications:
- Take as long as you need to segment footwork, separately from the striking component until habitual.
- Begin with a large area boundary at first and minimize playing field through each round to increase difficulty.
- Minimize striking targets and add additional targets through the course of play.
- Use a variety of foam roller densities.
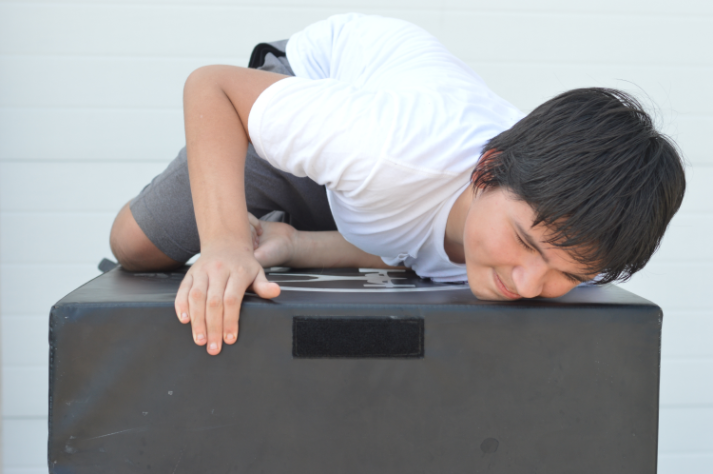
10. Plyobox Stay On!
Equipment Needed: Plyoboxes and Risers
Application:
- Stack plyoboxes and secure with velcro strips.
- The child will climb on top of the plyobox. He or she can sit or kneel as you tip the box, switching between the positions and stances to stay atop.
- If the child falls off, he or she shouldn’t be too high off the ground that injury becomes a factor. As a guide, the child should be able to get on and off the boxes without assistance.
Purpose:
The point of this game is for the child to stay on top of the stacked boxes by changing body position to counteract the direction in which the box is tipped. The pace of the game and the need to stay atop the boxes will challenge grip, motor timing, balance, coordination, weight transfer, and strategy. In sessions to come, the positive association created by using plyoboxes will have transfer when using plyoboxes for box squats, step-ups, jumps, and other movements.
Plyobox Stay On provides tactile and proprioceptive input similar to that of a crash pad. The child jumps onto the plyobox and constantly repositions his/herself to stay on as the box moves in multiple angles from slow to fast. Deep pressure against skin and joints is constant.
Modifications:
- Change the pace of game based on the time between tips.
- Alter height by adding or minimizing the amount of plyoboxes stacked.
- Alter difficulty by minimizing or adding tipping points where the child has to maintain position or change position to combat tip.
11. Mag Grip Plane Control
Equipment Needed: Selectorized Cable Crossover Machine, MAG Grip
Application:
- Attach MAG grip attachment to cable.
- Choose appropriate weight to complete desired reps.
- Stand square to the machine and back up just enough so that when arms are fully extended resistance remains on the pulley.
- Fully extended or as the attachment is close to the body, pretend to be flying a plane using the controls. Watch out for the birds!
Purpose:
Based on the shape of attachments, it’s easy to immediately think of something in the real world or fantasy world that the design mimics. Use this to your advantage! In this case, the attachment resembles a controller you’d see in a cockpit. As reps are completed in good form, pretend to be flying a plane. This added twist gives the exercise new purpose other than “we’re doing this exercise to get your back stronger to bench press more weight.” Obviously getting stronger in the gym is the primary goal, but how can we do that with some imagination? This creates a new language referring to equipment that becomes something unique and personalized. It’s also important that what ever you choose to do that form doesn’t negate from the intended purpose.
Modifications:
- Create plane sounds.
- Pretend to dodge birds.
- Pretend to fly a plane after a certain amount of reps were complete in good form (demonstrated in the video).
- If one of the reps were sloppy within the set (shoulders up, looseness) then the flight mission failed and another set (at a lower weight or with modified form) has to be performed.
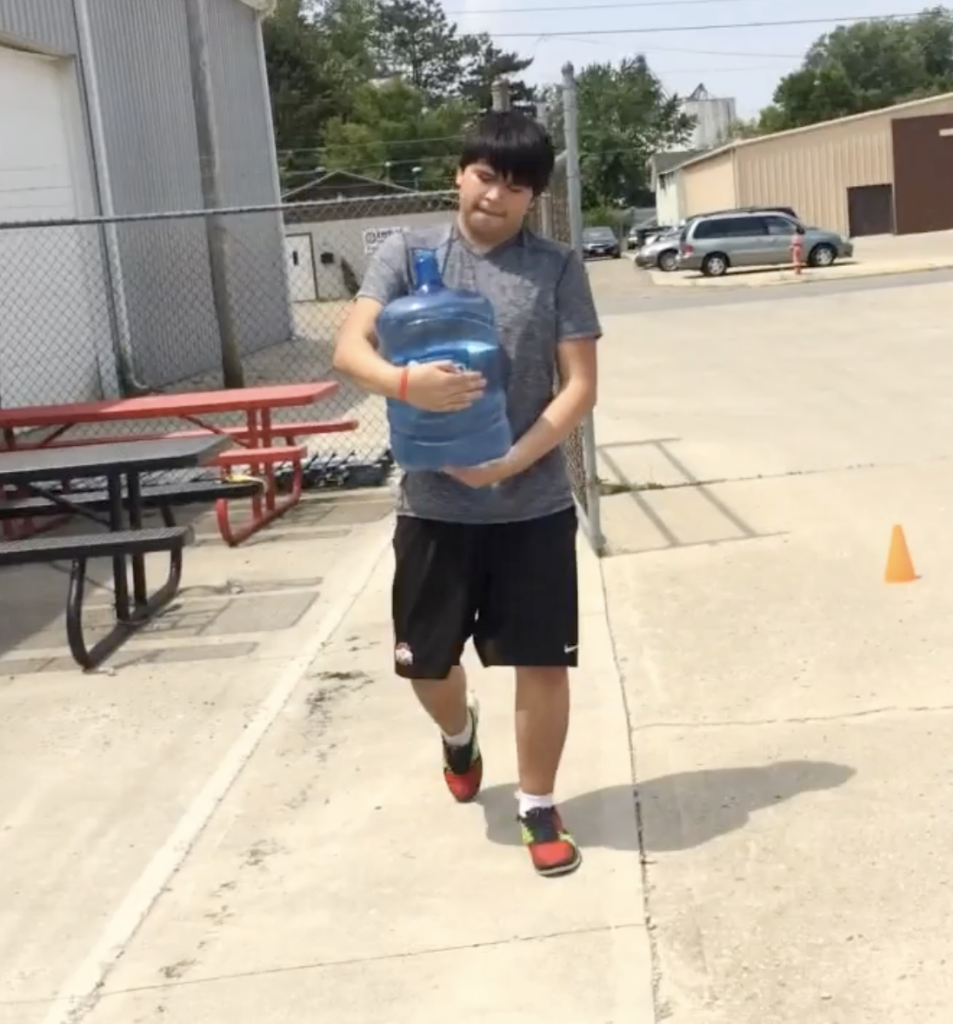
12. Water Barrel Fill and Carry
Equipment Needed: (2) Empty 10-Gallon Plastic Water Barrels, Permanent Marker, (2) Drinking Cups, Water, Stopwatch
Application:
- Place two empty plastic water barrels side by side on a table.
- Mark the desired water level with permanent marker on both barrels.
- With cups in hand, walk to the closest sink and fill the cup with water.
- Return to the table and pour water into the jug.
- Continue process until barrel reaches desired level.
- Once level is reached, carry barrel to cone.
- The first one to reach the cone wins.
Purpose:
This is a fun way to incorporate strongman events into your training. The spin is elongating the event by filling the barrel with water (cup by cup). This takes patience and diligence to keep working to fill the jug and to also be aware of our walking form in order to not spill water en route. Just like strongman implements, the water component and distribution of weight is likely a new stimulus that takes getting used to and again continues to expand our working definition of strength.
Modifications:
- Allow the route to the sink be much like an obstacle course (up stairs, through a hallway, down the stairs, around the building, and to the table).
- Increase or decrease the amount of water needed to alter the course work and weight of the implement.
- Add another component to the course.
- Place the barrels on the floor to increase the difficulty in leverage when filling barrels and eventually picking up.
- Instead of walking, run.
13. Band Tug of War
Equipment Needed: Orange Pro Band, Chalk
Application:
- With chalk, create a line to mark the starting point. This will also serve as the line that each player is trying to avoid stepping over once the war begins.
- Center the orange band over the chalked line. Step inside the band and secure one end around the waist.
- Use the excess band to secure around the waist of the child (face each other).
- On command, each player will step backward, trying to move the other player to step over the chalked line.
Purpose:
If you love rope tug of war and use it frequently as a way to train grip and engage muscles involved in the eccentric, concentric, and isometric action, it’s nice to use a band to get a similar effect. The elasticity of the band causes these movements to be exaggerated and unpredictable; therefore balance and coordination become the main players as resistance fluctuates throughout the game. Band tug of war simulates the sensory feedback of a rebounder.
Modifications:
- Change up the game and its emphasis by facing opposite directions.
- Consider bands with varying resistances. Start light and progressively move to bands with stronger resistance.
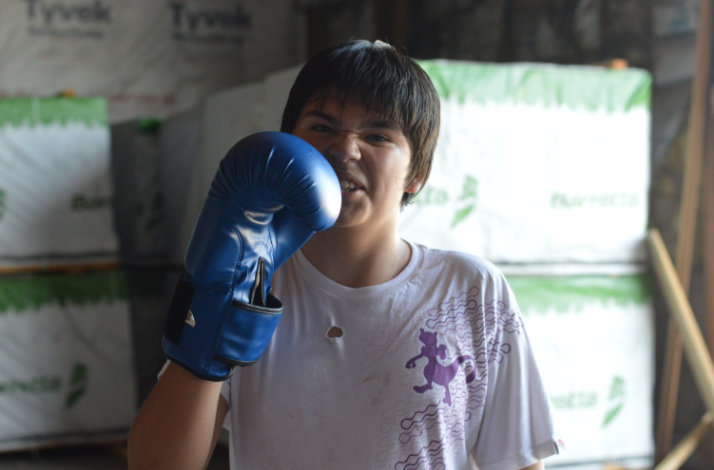
14. “I Decline” Sit-Ups with Punch
Equipment Needed: Decline Bench, Boxing Gloves, Mitts
Application:
- Have the child sit down on decline bench.
- Secure boxing gloves on their hands.
- After each standard decline sit-up, use mitts to block their punch once child returns to upright position.
- Complete desired amount of reps in sit-up/punch fashion.
Purpose:
This is your standard decline sit-up. The title itself is something that my clients laugh at. This automatically lightens the mood and therefore the child is more apt to do it because they’re focused on the formality of the exercise rather than the abdominal discomfort felt after a few reps. So, the title itself gets us to the exercise (in which some days is a huge thing). Once we get to the bench, the second tweak is providing the child with punching gloves. For each rep, the child has the chance to punch the block at the top end.
This particular exercise includes two tweaks because there are two crucial points that have an effect on whether or not the exercise will be completed. In each case, the emphasis changes, therefore there are more pros than cons that end up making this exercise “worth it.” The purpose of this exercise is for the child to complete the sit-up (as the punching adds the fun factor that may have further implications down the road). For example, eventually, the sit-ups can be loaded using a medicine ball, separate from the punches. A punching bag or boxing match may then be a follow-up activity. What is built is the association between the two, which gives us more options at play once progression is suitable.

The component of punching the block is a great opportunity to provide the proprioceptive input that the child may crave. I've found that this opportunity lessens what would appear to be aggressive behavior if otherwise not attended to. In this case, punching the block or another pair of gloves is appropriate behavior rather than the child punching another not intending to be hit.
Modifications:
- Punch the block every other rep.
- Create a combination of punches at the top that will elongate the time under tension.
- Minimize the length of the sit-up portion by placing a support structure behind the child to control how far they lean back for each rep.
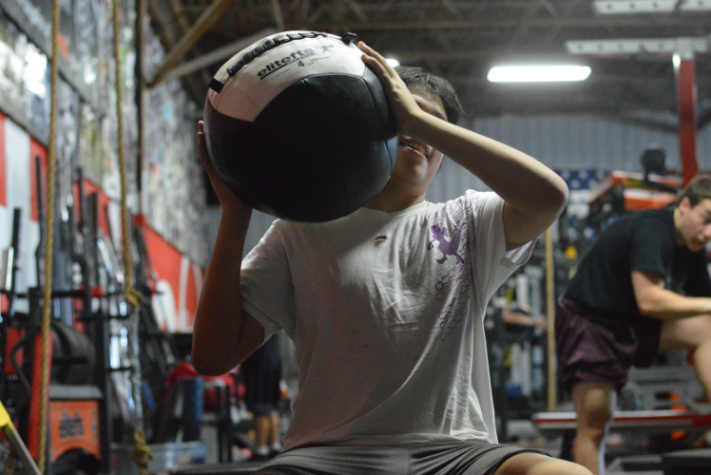
15. Medicine Ball Eagle Juggling Act
Equipment Needed: (2) Medicine Balls
Application:
- Have players sit foot to foot in a spread eagle stance.
- Each player has a medicine ball in hand.
- Begin with a non-weighted ball until a weighted ball is appropriate for use (once pushing small of back into the ground through descent and ascent becomes natural).
- Each player leans back with a ball on the chest until the lower and upper back rests on the floor. As the players return to the seated upright position, each player throws their ball to the other player.
- Before throwing, decide who will make the high pass and who will make the low pass.
- Switch roles.
- Repeat the leaning back, sitting up, throwing, and catching sequence for the desired number of sets and reps.
Purpose:
This is another variation I like to use that can be done anywhere, indoors or outdoors. It’s a great opportunity to remain engaged, as both players have to work efficiently and together to allow the set to continue. Keep distance between players close so each player completes pass without excessively leaning forward. Each time the medicine ball is caught, it provides pressure against the body as is it rolls from the stomach to the chest, chest to stomach, potentially making contact with the skin of the legs, forearms, neck, and chin. Similar to the decline sit-ups, this coupling (ab work mixed with juggling) provides immediate positive reinforcement.
Modifications:
- Elongate space between players to increase throwing distance.
- Change throwing form (from the side, overhead, chest pass, single hand) each set.
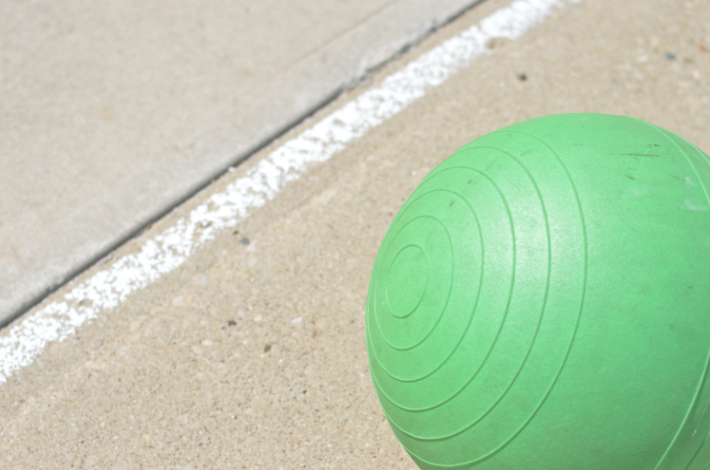
16. Big Two Square/Big Two Square Soccer
Equipment Needed: Chalk, Rubber Kickball
Application:
- Use chalk to create two large squares side by side.
- Follow the standard Two Square rules.
- Two players (one opponent in each square) will face each other.
- One player will serve the ball to the other by bouncing the ball one time in his or her square and then hitting the ball underhand to the opponent's square.
- The other player will underhand hit the ball once to return the ball in the opponent's square.
- Continue this back-and-forth play until the ball lands on the line or out of the chalked square.
- The player who hits the ball on the line or out receives an out. The opponent receives a point.
- Play until a player receives five points.
Purpose:
This game has been used as a session warm-up and also as a game mid-session. It’s a great way to include some competition, especially if this is something you’re working on: keeping score, winning, losing, and acceptance of each. This game hones in on force control, awareness of space, speed, game strategy, footwork, agility, and aim.
Modifications:
- Changing the rules up a bit, Big Two Square Soccer follows the same rules (omitting the underhand pass) above but the ball is passed using the head, shoulder, chest, knees, and foot. This game forces the child to remain in a defensive position with attention to ball control.
- Minimize or enlarge the size of the squares each play to change ball speed and range of motion.
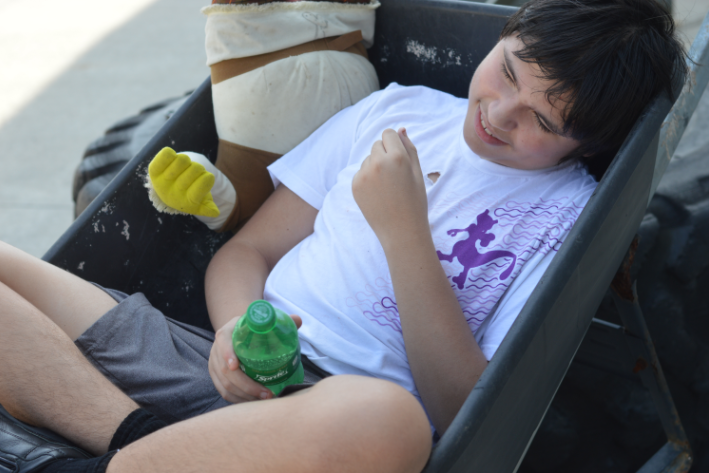
17. Wheelbarrow Carry and Ride
Equipment Needed: Wheelbarrow, Plates, (2) Cones
Application:
- Use cones to mark the start and end point.
- If appropriate, add the desired amount of weight inside the wheelbarrow.
- Model to the child how to set his or her feet, grip handles, stand up, and walk forward from one cone to the other.
- After the child carries the wheelbarrow for the desired length (forward or backward), have the child climb inside the wheelbarrow as you carry the wheelbarrow along a path or in multiple directions (rock back and forth, spin in circles, etc.).
Purpose:
One day, this exercise came to fruition when a client was especially sensitive to the Prowler — the screeching sound of metal sliding against the pavement. Flexibility gave us permission to find an alternative exercise without sound effects, try something new, and sparked an idea to then end the exercise with a ride. The ride became quite the motivator to listen to directions and move the load from cone to cone. This exercise will have future implications when moving a load off the ground, as cues include: get feet set, grip the handles, keep upright while pushing hips back, bring your hips, and lift.
The wheelbarrow ride (the rocking, spinning, and sliding) simulates sensory input as a swing, spinning disk toy, and sled.
Modifications:
- Feel free to exchange the wheelbarrow carry with another exercise but then couple the exchange with the wheelbarrow ride.

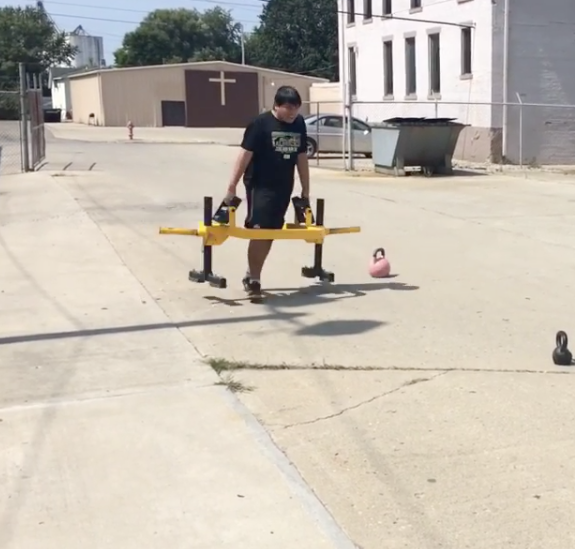
18. Monkey Head Sled Drag
Equipment Needed: Onnit Primal Bell, Short Band, Belt, Spud Strap, (2) Carabiners
Application:
- Attach a short band to the bell handle.
- Connect Spud strap to the belt and short band with carabiners.
- Secure belt on the waist of the child.
- Walk desired distance dragging monkey head.
Purpose:
Just like the previous exercise, this exercise was created one day when a client was ultra-sensitive to the sound of pulling a sled over cement. Again, flexibility within our schedule gave us the opportunity to find an alternative exercise, quickly. Note: It’s important to make changes quickly so that the association of pulling something using a strap attached to a belt is not completely muddled with screeching negativity. Believe it or not, dragging a kettlebell with a monkey head carved on one side is quite the motivator! Comparatively, dragging a Primal Bell is a silent endeavor.
This exercise includes all the benefits of sled pulls. I particularly like the conditioning, no eccentric loading, and movement coordination features.
Modifications:
- Add more bells to increase the weight of load as long as pulling form remains intact.
- As familiarity ensues, use a variety of dragging positions (lateral, forward, backward).
- Instead of securing the Spud strap to a belt, attach to towel straps or cable handles for dragging face pulls, chest press, upright triceps extensions, etc.
Special thanks to Blaine Tate, as most of these exercises were derived from his creativity and curiosity.
Originally written in August of 2017
Author of The Power of a Note, Sheena Leedham earned her master’s degree in education at Edinboro University with a concentration in elementary education and recreation administration. Through the Ohio State University’s Nisonger Center, she coordinates Men’s Aspirations, a social support group event for teens and young adults with autism to experience the Greater Columbus Area. As a licensed teacher, Sheena serves as an education consultant for OSU’s Autism College Experience (ACE!) and Postsecondary Access to Transition after High School (PATH) programs, where she educates college students with autism on the importance of habitual fitness and proper nutrition. Sheena is also the Senior Content Manager at elitefts.com—educating and outfitting the strongest athletes around the world.
3 Comments