Pull-ups are known as a staple exercise in the strength and conditioning industry. They may also be beneficially prescribed in the physical therapy realm for rehab and a challenging dynamic scapulohumeral rhythm exercise. However, a critical exercise such as the pull-up must be carefully evaluated to ensure proper execution and avoid compensation.
RELATED: Improved Back Recruitment for a Bigger V-Taper
When teaching the exercise, many strength coaches routinely coach with novice technique demonstrations at the pull-up bar. Although this can be advantageous, coaches must strive to properly ensure a basic neuromuscular connection occurs through correct anatomical position, neurologic comprehension, and sensory awareness before attempting a pull-up. As a result, three main objectives should be sought after when coaching the pull-up: seek to provide a proper initial thoracic position, understand correct versus incorrect pull-up start position, and provide awareness of sustaining adequate positional tension during execution.
1. Develop Scapulo-Thoracic Position and Relationship
Prior to beginning a pull-up, proper relationship should be established between the scapula and rib cage. A PRI-Modified all fours belly lift with an added stability ball is a great tool to form the congruency of these anatomical structures. Not only will this exercise introduce thoracic flexion to the extended population, but it will also utilize the serratus anterior to aid in optimal thoracic positional adjustments. These positional adjustments will help bias advantageous mechanics to occur at the glenohumeral joint during the given range of motion.
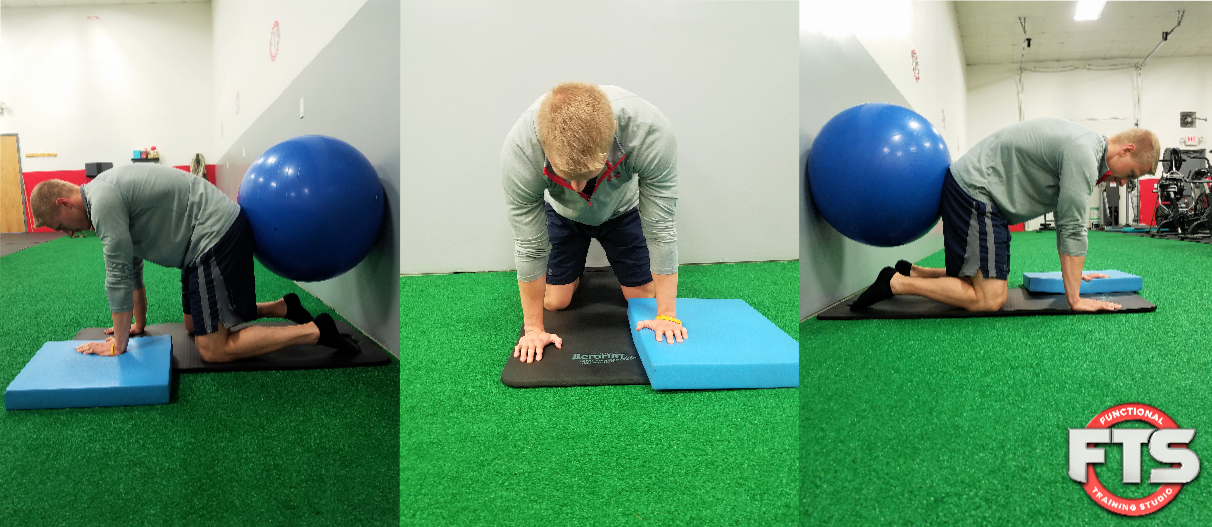
Begin the exercise by inhaling through your nose and exhaling through your mouth to allow the thoracic spine to fall into a flexed (rounded) position. If needed, imagine pressing away from the floor as you feel separation occur between your shoulder blades. As a precautionary measure, ensure ribs are not forced down, which may give a false sense of thoracic flexion. Additionally, the tailbone should fall into a posterior pelvic tilt (belly button drawn in) as the outer obliques begin to activate. Once this is accomplished, slowly push back into the stability ball to sense more oblique activation while sustaining the aforementioned posture. With the obliques engaged, elevate your left hip slightly to bias your left obliques while obtaining a depressed pelvis on the right. Sustain this position and use two different variations that are slightly deviated from the normal PRI exercise. For the first set, exhale and gradually press the right arm into the floor to feel the right serratus anterior engage. Conversely on the second set, as you inhale, gradually press into the left arm to engage the left serratus anterior. Complete both sets with four breaths with a pause between each inhale and exhale.
2. Optimize Starting Position
If problems occur during the pull-up and structural position of the thorax has been cleared, check the initial starting position. It’s not uncommon to see an over-exaggerated shoulder shrug pulling on the shoulder. Starting in this position will risk potential injury to the glenohumeral joint as well as unnecessary recruitment of leveraged accessory muscles. Instead, utilize bands to give the ability to demonstrate, comprehend, and differentiate between appropriate and incorrect starting position. This will provide more direct neuromuscular feedback from the increasing tension throughout the desired movement.
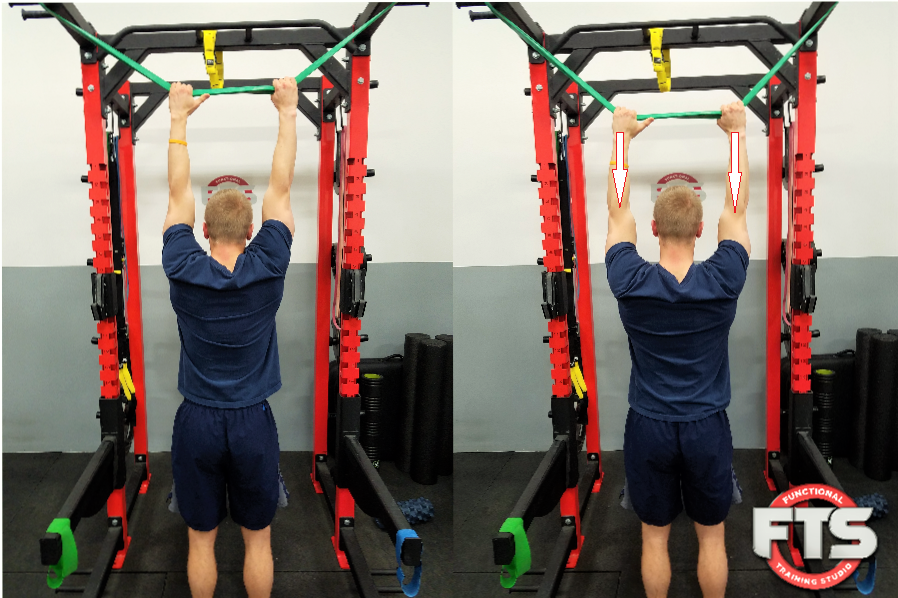
When using bands, begin by allowing the scapula to get pulled into a shrugged and upwardly rotated position. This is the improper position that all too common becomes a patterned starting point of the pull-up. This dysfunction creates an increased chance of acute or chronic shoulder pathomechanics. The over-exaggerated shoulder shrug is a pivotal period to illustrate to the patient or athlete the sub-optimal position and the reasoning behind it. This should be their first “ah-ha” moment in their new pull-up paradigm. Next, initiate downward rotation and retraction of the shoulder blades by moving the arm as one unit. Pay close attention, as many patients or athletes will bend their arms from the lack of sensory awareness. Encourage them to restart the movement ensuring arms remain in a neutral position (not hyperextended) and the motion is initiated from the lower traps. When the desired movement is achieved, allow the patient or athlete to pause and ensure that they feel the lower traps guiding the shoulder blades appropriately.
3. Comprehend Neuromuscular Tension
Now that the thorax and starting position have been attained, teaching non-compensated dynamic movement is the remaining step. Movement is challenging enough, but adding in the force of gravity and requirement of abdominal control imposes new demands on the body. Tension created by the proper starting position must be maintained throughout the duration of the pull-up. For a second time, bands will aid in neuromuscular tension development for the concentric, eccentric, and isometric phase.
Similar to the second exercise, the patient or athlete is pulled into the familiar improper shoulder shrug start position. At this point, they should already understand how to retract and better position the scapula into a downwardly rotated position. Once this is accomplished, the patient or athlete should begin to move their arms in the same fashion they would during a pull-up. Elbow flexion will occur until the end point of the rib cage is reached. During elbow flexion, direct constant feedback from the band exhibits the need to sustain proper scapulo-thoracic position. However, failure to maintain this results in a decrease in band tension, improper muscle engagement, or a loss of control of the band. If this occurs, pause on the bottom of the movement to make any adjustments necessary to continue. As the band raises back towards the starting position, eccentric control may be taught as the ascending band is slowly controlled. Continue this pattern until the patient or athlete feels that they have a full understanding of the recruitment necessary for the dynamic phase of the pull-up.
Summary
Teaching a pull-up should take into consideration the multi-factorial demands that are imposed. Ensuring the patient or athlete is in an overall good anatomical position, both initial- and intra-pull-up, is essential for maximum benefit. In addition, creating a neuromuscular foundation will aid in the further development of these important factors. Once the necessities are mastered, pull-ups will be able to be performed in a non-compensatory and comprehended fashion.
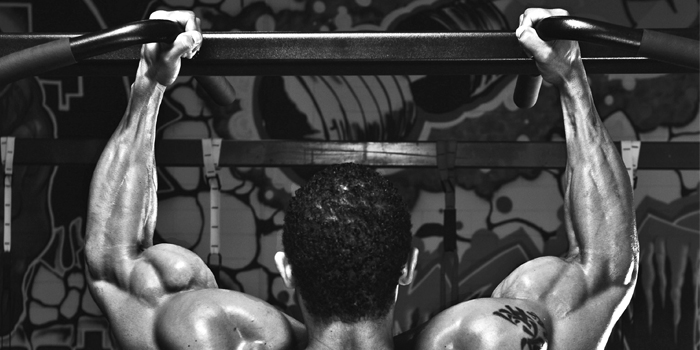
Header Image courtesy of Jeffrey Sygo at www.symiphotography.com
Brian is an up-and-coming strength and conditioning coach. He is the owner of Functional Training Studio in Charlotte, North Carolina. At a young age, Brian has been training clients for over six years and is always looking for ways to improve his technique. He utilizes positional asymmetries that exist within the body to help clients and athletes improve their function and overall performance capacity. Brian has a degree in exercise science and is a certified strength and conditioning coach through the NSCA. Additionally, he plans to continue his education in 2017 in a doctorate of physical therapy program. For additional questions, Brian can be reached at FTStudio130@gmail.com.