


The BB for PL series describes how you can incorporate bodybuilding exercises into your powerlifting training for big benefits in strength and aesthetics. So far, this series has covered some special exercises for your abs, glutes, rear delts, and adductors. This next installment explains the benefits of a wide-grip partial deadlift variation, which places increased emphasis on the upper back, making it a great exercise for both powerlifters and bodybuilders who struggle to activate their lats properly.
The deadlift might be last lift in a powerlifting meet, but it shouldn’t be the last lift in your training program. Unfortunately, that’s often the case, because heavy deadlifts can be very difficult to recover from. Many athletes only deadlift once a week, and some programs recommend pulling even less frequently than that.
RECENT: Bodybuilding Exercises for Powerlifters — Adductor Work for Added Gains
For bodybuilders, building a big and wide back is essential to building a winning physique, but that’s a difficult task. Many lat exercises, like chins and rows, make it easy to use your biceps, rather than your back, to complete the movement. Pullovers avoid that problem, but plenty of great gyms still don’t have a good pullover machine.
And both powerlifters and bodybuilders often struggle to activate their lats properly. It’s difficult to even know when you’re using them correctly since other muscles can compensate for weak lats and you can’t see your lats moving without some tricky mirror angles.
The Wide-Grip Partial Deadlift
Enter the wide-grip partial deadlift, which I’m going to call the WGPDL. The WGPDL lets you train the deadlift without stressing your hips, legs or lower back nearly as hard as pulling from the floor, so it’s a great accessory for powerlifters who struggle to recover from two heavy deadlift sessions per week but want to up their training frequency a bit. And for bodybuilders, the WGPDL crushes your upper back, with heavy loads, and without the possibility of using the biceps, making it a great exercise to help build a thick, wide back. Maybe best of all: practicing the WGPDL can help you learn to activate your lats, one of the keys to a successful deadlift that many lifters struggle to implement, and an essential part of perfect posing.
Performing the WGPDL
Before you get started, make sure you have access to the right equipment. You’ll need a bar, plates, and a set of good, sturdy blocks or a power rack. You might also want a pair of lifting straps.
- Set up by positioning the bar just below knee height. You can do this by placing it across the safety pins in a power rack, or by using blocks designed for supporting the bar (make sure they’re flat and sturdy). I prefer blocks because you don’t have to worry about the power rack’s pins or posts pinching your fingers.
- Find your grip by picking the empty bar up with both hands pronated and bringing your hands out until the bar rests in the crease of your hip. (If you’ve ever done any Olympic lifting, this should be almost identical to your snatch grip width.) Then bring your hands in about one hand width. The slightly narrower grip allows you to use a bit more weight, and, incidentally, it’s why this exercise is called a “wide grip” rather than “snatch grip” deadlift. You’ll probably find that it’s more difficult to hold on to the bar this way, and if so, you might benefit from using a hook grip or lifting straps to secure the bar. Make sure you use some kind of a double-overhand grip!
- After you’ve found your grip, you’re ready to perform the lift. Start with a very light load, about 25% of your one-rep max. Position yourself exactly as you’d be in a regular deadlift, with your shoulders directly over the bar.
- While you’re still standing straight up, flare your lats as hard as you can and pull your scapula back and down. Your upper and middle back should feel incredibly tight, and that’s the position you need to maintain throughout the lift. If you’re having trouble flaring your lats, try putting your hands on your hips and pushing your elbows forward as far as you can. That movement should help you feel the appropriate tightness.
- Grab the bar with the wide grip you found in step 2 by pushing your hips back, while keeping your back tight and shoulders over the bar. Don’t round your back! If you need to bend your knees a bit to reach the bar in that position, that’s fine. Personally, I prefer to use a more stiff-legged style to place more focus on my lats.
- Lift the bar by squeezing your glutes and bringing your hips forward while keeping your back as tight as you possibly can. Your lats should be fighting to pull the bar back throughout the entire range of motion, and you should feel them helping to support the weight even at lockout.
- Lower the bar under control by pushing your hips back again.
Check the video above to see how it should look when you put everything together.
Programming the WGPDL
The WGPDL works best with medium or high reps. It’s definitely not an exercise you should ever max out on. Still, there are plenty of good ways to incorporate it into your training.
- As a lighter deadlift training day.
In this case, you’ll want to use a set and rep scheme that fits your overall programming schedule. I recommend using sets of at least five reps on the WGPDL, and, for a light day, you’ll want to start with approximately 50-60% of whatever you could deadlift for a comparable number of reps. For example, if your 5RM deadlift is 405, start out using about 225 for sets of 5 on the WGPDL. Because the WGPDL isn’t great with low reps, you’ll probably want to rotate it with other good deadlift variations, like deficit deadlifts, Romanian deadlifts, or whatever other movements you prefer.
- As an upper-back exercise.
The WGPDL is a fantastic mass builder for the upper back when performed with high reps for multiple sets. Choose a weight you can use for about 10 reps and perform 3-4 sets of 8 reps, with about four minutes between sets. Finish off with two sets of 15-20 reps on the pullover and you’ve got a killer upper back workout that you can complete in about thirty minutes or less.
- To improve your deadlift technique.
If you’re struggling to properly activate your lats in the deadlift, the WGPDL might help you. While you should never try to flare your lats in a regular deadlift from the floor, you should always use your lats to help support the weight. To practice that, try setting up for a WGDPL using about 25% of your one-rep max deadlift. Put a second bar on the floor nearby, and load it to about 40-50% of your 1RM. Perform one set of 8-12 reps of the WGDPL, and really focus on the feeling in your lats throughout the entire set. As soon as you finish the set, move to the second bar and perform two or three singles using your best competition technique, again focusing on your lats. Repeat for three total rounds.
One word of caution: do not flare your lats in a regular deadlift. In a regular deadlift, you should pull your lats and scapula back and down, and externally rotate your shoulders. The WGPDL can help you feel your lats working, but you should not try to use the same technique when pulling from the floor.
Using the Lats in the Deadlift
Note: this is a short excerpt from my deadlift technique ebook:
Your upper back is a prime mover in the deadlift, but most lifters fail to use it to their advantage. You must lock your lats into the proper position so that they stabilize your torso as the bar leaves the floor, and stay in the proper position to assist during lockout.
Instead, most lifters don’t activate their lats at all, but let the weight of the bar pull their lats down. This does have one advantage: it puts the athlete’s shoulders closer to the bar, giving them more power off the floor. Unfortunately, once the bar is off the floor, the athlete is in a terrible biomechanical position and has to fight the weight all the way to lockout. Usually, lifters who begin in this position usually pull very quickly to around knee height, but then end up with their shoulders far behind the bar. With truly maximal efforts, locking out from this position isn’t possible without hitching or resting the bar on the thighs unless you have very unique proportions (like Bob Peoples).
To properly engage the lats, begin by raising your arms as far above your head as possible as if you were stretching. Try to feel your lats extend, pushing your hands closer to the ceiling. While keeping your lats in that tight position, drop your arms so that your hands are pointing directly at the ground. Keep your arms straight the entire time. Your lats should feel like you’re doing a pullover (and, if your gym has a pullover machine, that’s another great way to strengthen your lats and learn to activate them properly).
Pulling your arms down like this will also engage your traps. Be sure not to shrug your traps at the top of the lift — that’s not helping your lockout and may lead to red lights if the bar descends after the top of your shrug.
If you’re having difficulty activating your lats properly, try doing some very light straight arm pushdowns or regular lat pulldowns before you deadlift. Focus on initiating the movements by driving your elbows back and down, and not pulling at all with the biceps. That should help you feel the lats working. Again, this just takes practice. Don’t get discouraged if it doesn’t feel natural the first time you try it.
RELATED: Long Arms, High Hips, Strong Deadlifts
The Results
Just as we saw with the adductors, activating the lats properly in the deadlift can dramatically improve your pull. Check out this back angle and hip position, from when I first started powerlifting:
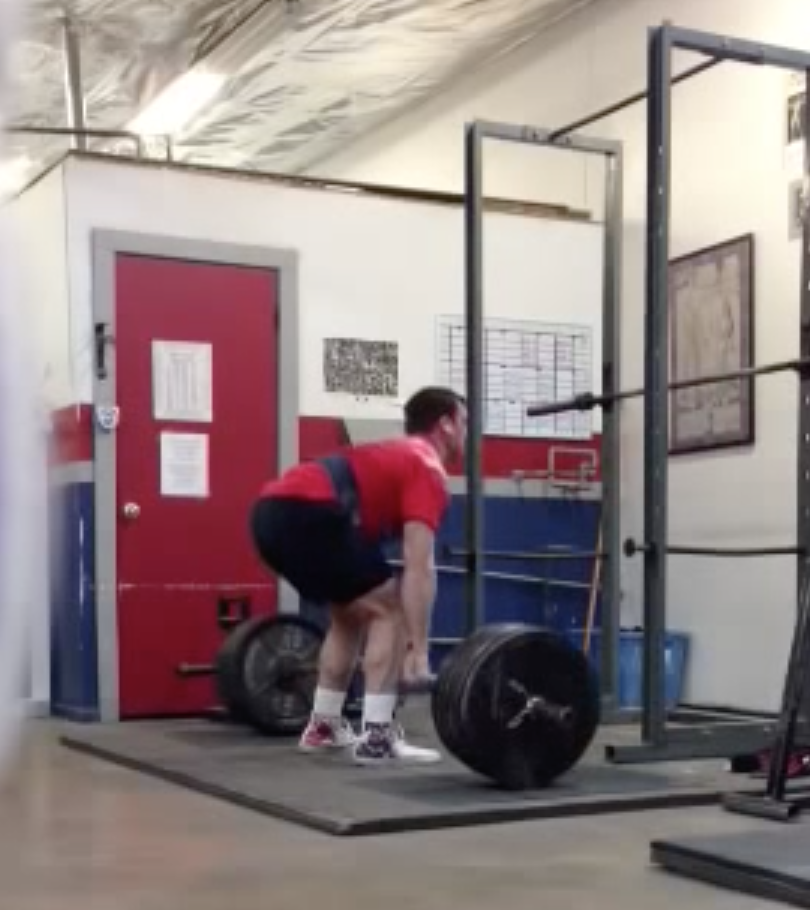
Then compare it to this video, three and a half years later, after I learned to use my lats properly.
Granted, I’m bigger and stronger overall in the second video, but if you compare the position of my hips relative to my knees, and the angle of my torso relative to the floor, it’s pretty obvious that I’m in a much more advantageous position in the second video. My bar path is straighter and shorter, and I can engage my hips off the floor, instead of just at the end of the movement.
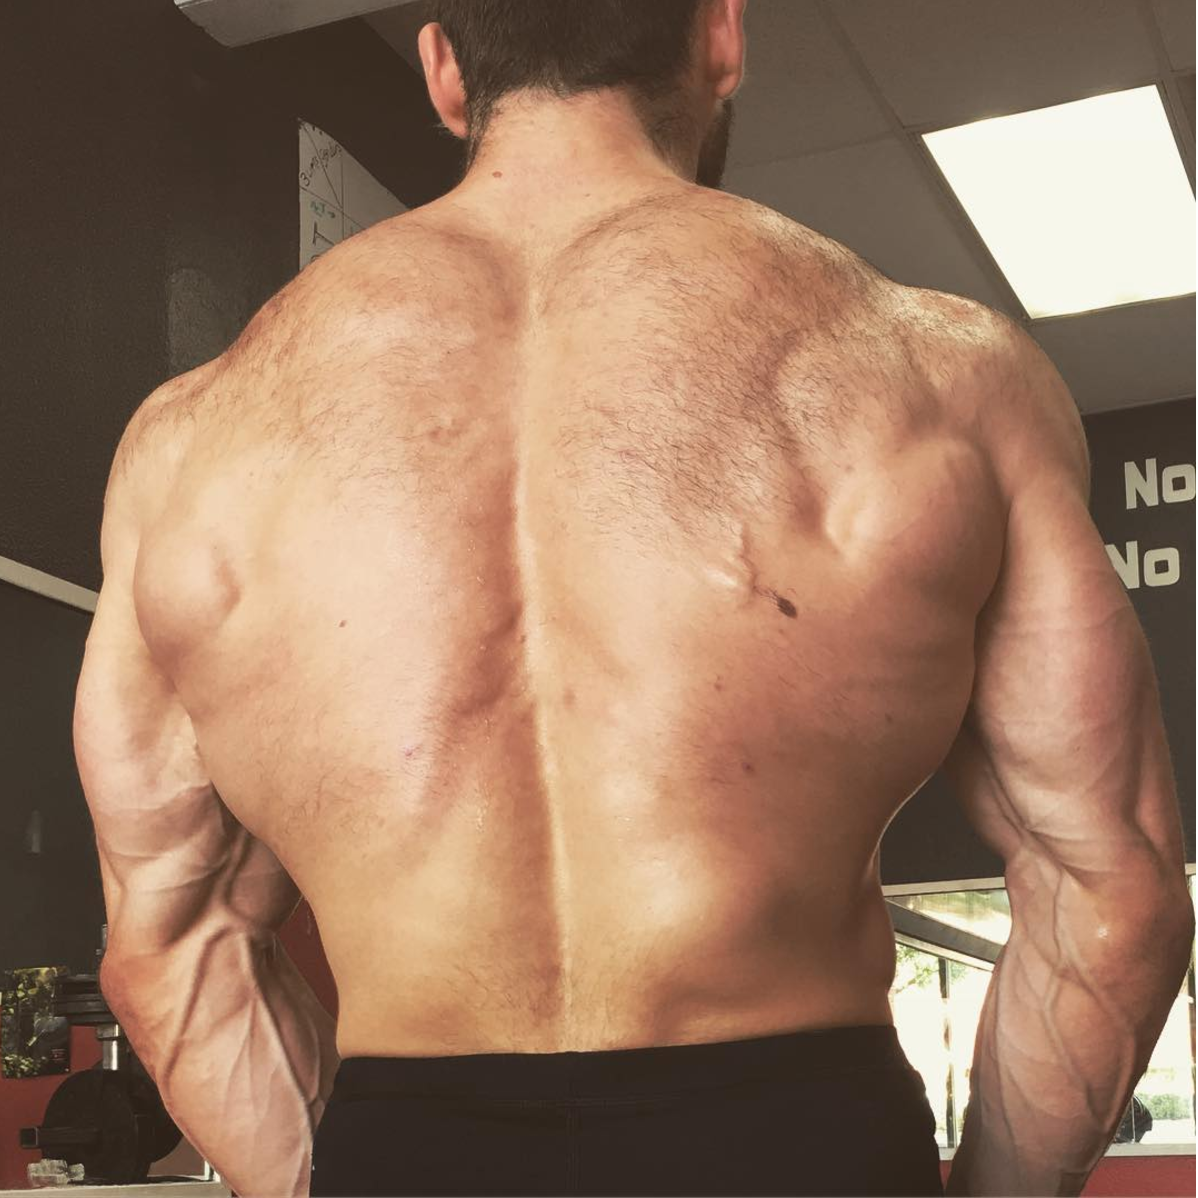
As far as size gains go, I think my back is one of my biggest muscle groups, thanks in part to this movement.
I’ll Be Back
I really encourage everyone to give the WGPDL a try — it’s a fun movement, easy to learn, and extremely effective. Best of all, it gets better as you do: the more you’re able to activate your lats, the more you’ll get out of this exercise, which makes it very rewarding to stick with and improve on.
This series has been a fun one, and I’m really excited to get back into bodybuilding now that the CETC US Open is complete. In the meantime, if you’ve got other lagging body parts or lifts that you’d like some suggestions on, let me know in the comments, or send me an email at ben@phdeadlift.com!

3 Comments