Manual resistance is often an underestimated method in the coaching toolbox. This technique can be used with a wide variety of clients to learn correct form, neuromuscular awareness, force development, and sustaining tension. In addition, it can be used with nearly any lower body, upper body, or core exercise for these purposes. For this article, the half-kneeling y-raise is used to demonstrate four key points when utilizing manual resistance. This exercise is great at showing athletes correct scapulo-humeral rhythm without the common compensations of the over-dominant accessory muscles of the neck and back. Here are four tips that can be utilized throughout the athlete’s program when using manual resistance.
1. Establish Position
Beginning the exercise in the proper position is necessary to achieve success in manual resistance. Athletes often have the right intentions but are placed in a position that causes compensation, frustration, and positional weakness. To attain proper position for the specific patterns of the athlete, a proper assessment should answer these common questions:
- Can the athlete rotate?
- Can the athlete shift?
- Is there pain in a given motion?
- Can they breathe?
- Do they have normal range of motion?
- Do they prematurely fatigue?
Once these questions are answered, small deviations to the individual programs can be made. For example, if you’re working with an extremely lordotic athlete, place emphasis on a small posterior pelvic tilt to neutralize the pelvis.
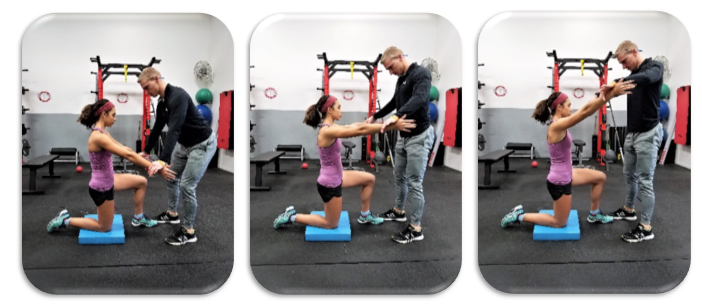
From the assessment, the coach determines the athlete’s most appropriate starting position for the half-kneeling y-raise. Hip and knee should be bent a 90/90 angle with a relatively vertical tibia. A neutral thorax is desired without excessive lumbar and cervical lordosis or associated kyphosis in the thoracic spine. In addition, the chin should be reasonably neutral without too much cranial deviation. Failing to successfully establish these optimal positions may lead to injury or learning improper neuromuscular mechanics.
2. Think “Dimmer Switch”
Dimmer switches allow for a gradual variance of desired brightness or darkness. Conversely, light switches permit only two settings: on or off. Develop the proper manual resistance technique from the former, while the latter creates sympathetic tone, over-active muscle activation, and dysfunctional breathing. Also, take special note for athletes that are already sympathetically driven. The light switch environment could be their norm and is frequently seen in neck breathers and high-stress people.
Remind you of anyone?
A decrease or increase of manual pressure creates the art of manual resistance. Until this is understood, a coach may not want to utilize manual resistance due to possible negative effects on the athlete. For example, too much resistance can create a situation of over-activation of any local or global muscle that is willing to help. On the other hand, not enough resistance fails to give the appropriate stimulus needed for adaptation and neuromuscular mechanics to occur.
RELATED: Identifying Hip Impingement Causes and Solutions
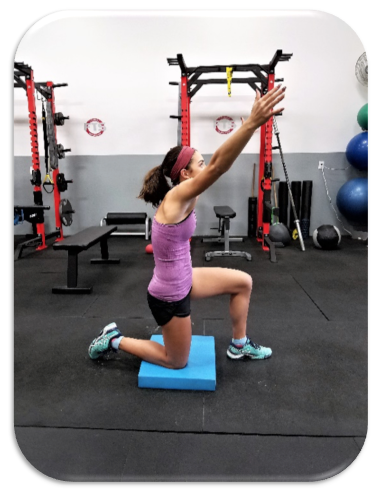
Instead, think like a dimmer switch and utilize a number scale in replace of the variance in brightness and darkness. Describe the use of a number scale such as the number one representing that the athlete does not feel anything and 10 being an uncomfortable muscle burn. Next, instruct the athlete to start their tension at a one out of 10. Slowly, bring them to a two out of 10, three out of 10, four out of 10, etc. Typically, we will try to reach a seven out of 10, which represents sufficient sensory awareness of the correct activated muscle, slight discomfort, and no compensations. For example, when elevating the arms in the half-kneeling y-raise, enough recruitment of the shoulder should be activated to inhibit the neck from compensating. If the neck is activated, regress back to step one, check position, and ensure you’re not taking the light switch approach.
3. Start at the Top
The end range or top of the exercise is where the athlete will sense maximum muscle contraction. Additionally, it can be used to sustain tension as the muscle eccentrically lengthens. This can benefit the athlete to learn proper deceleration, movement mechanics, and eccentric strength.
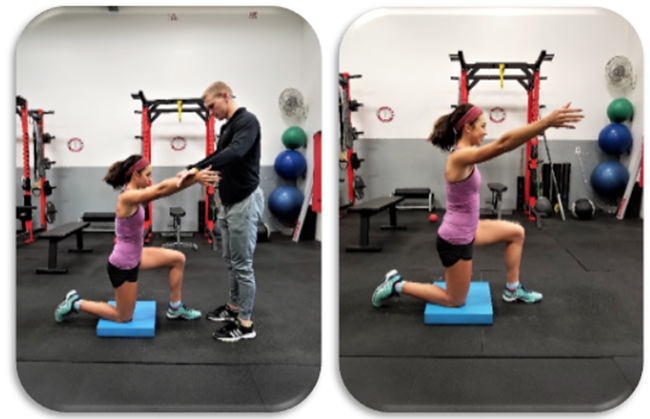
At the top of the half-kneeling y-raise, utilize steps one and two to ensure the proper position is established. Next, gently place your hands in the appropriate location and think “dimmer switch.” Proper location of the coach’s hands is typically going to be slightly above the wrist. Gradually build up enough tension by pressing down while instructing the athlete to not push upwards, but instead sustain tension without observable movement. If the dimmer switch approach is followed, they should experience an isometric contraction in the proper muscles. When the athlete feels shoulder activation, use caution with the next set of coaching cues. If they are instructed to simply bring their arms down, they most likely will lose their tension. Instead, instruct them to slowly lower your hands. This will require them to keep a constant fluctuation of “upward” pressure to maintain the decelerating eccentric contraction. Once they reach the bottom range of motion, they should have enough sensory awareness to “flip” the dimmer switch and begin to raise your arms with ample tension.
4. Have Awareness
Manual resistance requires many moving, in sync, smooth, and effortless parts. With that said, you must always be aware of your surroundings. The coach must have an internal awareness of persistent pressure with simultaneous reductions in compensations. Additionally, there must be an external awareness of watching the moving and non-moving parts. These parts will help determine the next appropriate cue that may or may not need to be clarified.
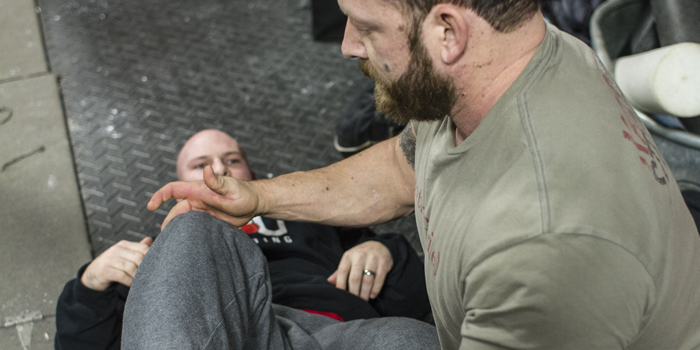
Increased Thoracic Kyphosis and Cranial Extension
During the half-kneeling y-raise, some moving and non-moving parts to consider are as follows: gripping toes, deviated knees, anterior/posterior pelvic tilt, improper thorax position, teeth clenching, and holding of the breath. While these are not the only motions to look for, it’s a starting point to remind you to continuously monitor your surroundings. Manual resistance should help improve these compensations by providing proper correction and stability throughout the kinetic chain.
What Is the SLAB?
Brian is the owner of Functional Training Studio in Charlotte, North Carolina. At a young age, Brian has been training clients for over six years and is always looking at ways to improve his technique. He utilizes positional asymmetries that exist within the body to help clients and athletes improve their function and overall performance capacity. Brian has a degree in exercise science and is a certified strength and conditioning coach through the NSCA. Additionally, he plans to continue his education in 2017 in a doctorate of physical therapy program. For additional questions, Brian can be reached at FTStudio130@gmail.com.