
It still amazes me how the squat, along with other training movements, can be so subjective in teaching and techniques. It AMAZES me. Something fundamental is very screwed up at the lower levels and even higher levels of strength programs, coaches, personal trainers, high schools, weight training classes, etc. I truly am dumbfounded at times by how student-athletes are not taught how to lift properly and how anyone could believe the squat is subjective or can be done many ways.
This is not going to be an article deconstructing angles and biomechanics with diagrams, lines, and bullshit. I’m just going to focus on some of the key mistakes made by many walks of life, mainly athletes for me, and how I go about fixing them. Like everything else I do in life, I want to make this simple.
RECENT: Laying Out the Groundwork to Prevent Injuries
Have you ever seen a baby squat? If you have kids, yes, you have. Have you ever really paid attention? If you are the average Joe or Jane, probably not. If you are someone who analyzes movement patterns, then hopefully you have. Here is a great example:
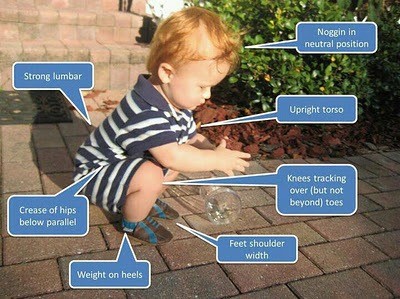
Notice as the labels clearly indicate the weight on the heels, depth as deep as they can go, keeping neutral spine, feet shoulder width apart, knees tracking forward due to great ankle mobility, upright torso, and neutral head. Babies do not know how to do the squat wrong. Biomechanically, this is how your body is supposed to squat. This hasn’t been coached; it’s natural. So if this is biomechanically correct, how should we move within the squat? Why are we not making our athletes get back to the way things were before they got all messed up?
Skeletons grow, muscles get stronger, and rigidity happens for many reasons. One reason is we put our kids into sports really early nowadays. Within any sport, our bodies adapt to the movement patterns the sport requires the body to move through. If that is soccer, we will see more rigidity within the hips and ankles due to the nature of a quick change of direction. Basketball is pretty much the same deal.
Every sport requires overdevelopment of certain muscle groups, and unless counteracted by strength training, an underdevelopment of the opposing muscle groups. So we have a lengthening and weakening in some muscles and a shortening and strengthening in others. Over time this will compound itself as the body develops, and we end up with multiple asymmetries of the body and immobility of skeletal joints.
So, how do we counteract this from happening or after it has already happened? By using proper movement patterns in the weight room to correct these issues. We have these asymmetries when we get the individual into the weight room, and we have to overcome and correct these issues. Why can’t we squat like the baby we used to be? Because we didn’t counteract the training effect we get from playing sports.
Here are three things I see with the squat and how I go about fixing them.
1. Neutral Upper Torso
When doing a front or kettlebell squat, you have a natural counterbalance going on, which allows an individual to sit back on their heels better and keep a more upright torso. As soon as you put the bar on your back, you deal with changing the position of the load and shoulder mobility. With the load now being directly or slightly behind your center of gravity (COG), naturally, you will need more of a forward lean to get into the proper position for the squat in the hole (if your hips move back, your chest has to stay forward, or you’ll fall backward). Thoracic spine mobility and shoulder mobility become very important here in maintaining a neutral upright torso position.
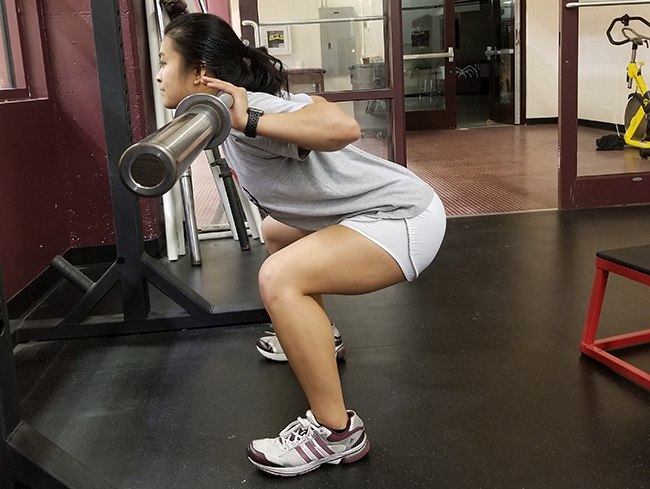
As you see with the above picture, the athlete’s position is one of a round upper back, loading the neck more, and ultimately, it puts more strain on the spine due to poor alignment. Without diving too much into corrective work, there is one key thing I tell my athletes who struggle with this neutral position: Drive your elbows forward.
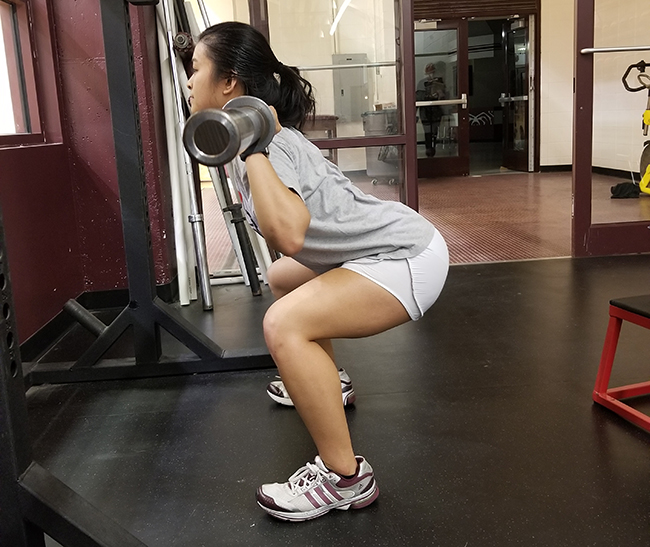
As you can see, when dropping the elbows under the bar and pushing them forward, we create a better position for the thoracic spine and keep the torso upright so that we are loading the hips more and not the spine. Elbow position will dictate body position. And no, this is not an acceptable depth. This was done for demonstration purposes only. That is a shitty depth in my opinion, and she squats a lot deeper than that. There are exercises we do to improve shoulder mobility and thoracic spine mobility, but this is an easy thing to start with first.
2. Valgus Knee Tracking (Knees Caving In)
Seeing the knees track in, especially when loads get heavier, is pretty common. Typically, though not always, it’s due to motor pattern issues. A lot of athletes will really activate their adductors as opposed to abductors (groin compared to glutes). Here, I will dive into some exercise we do to help with changing the firing pattern of the muscles to improve the squat position. Coaching cue-wise, I stay very general, screaming in their ear: “Drive the knees out, push the knees out!” The louder I am, the better the results, but that doesn’t fix it. That just reminds them and sometimes scares the crap out of them.
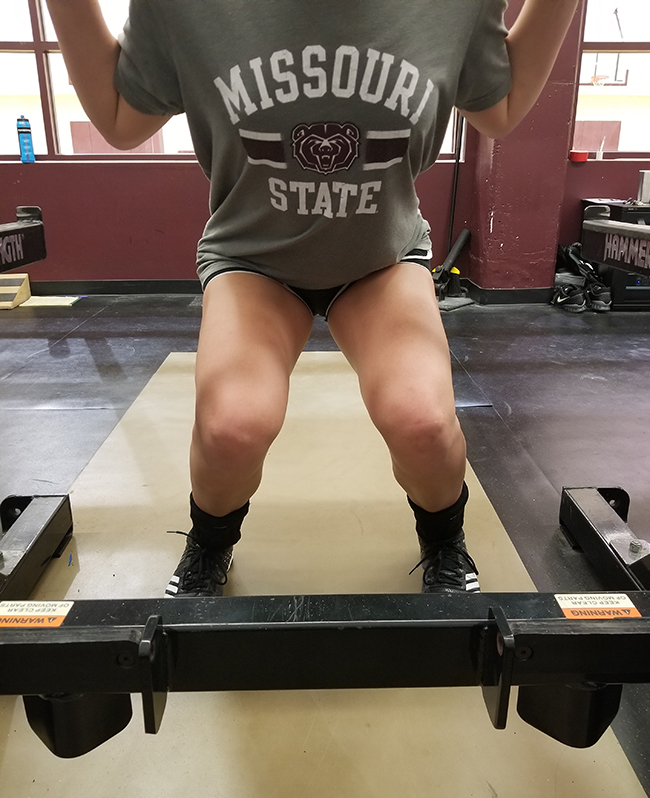
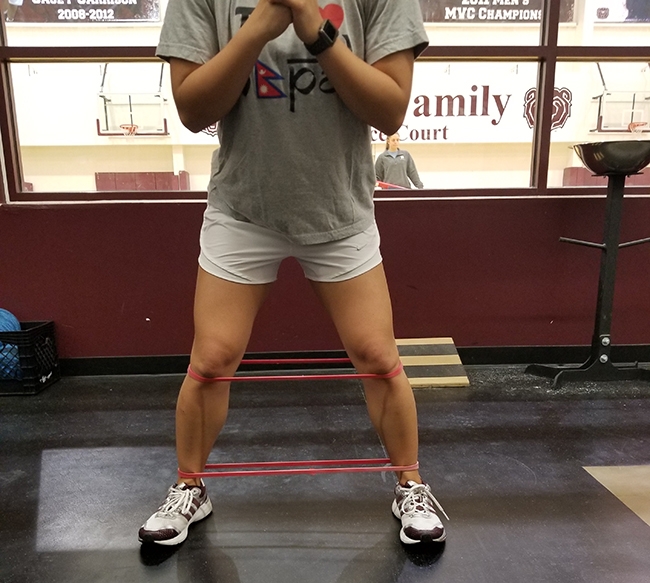
Above you see the knees tracking in. Again, this is a common occurrence in a lot of athletes when using heavier loads. We do not want this.
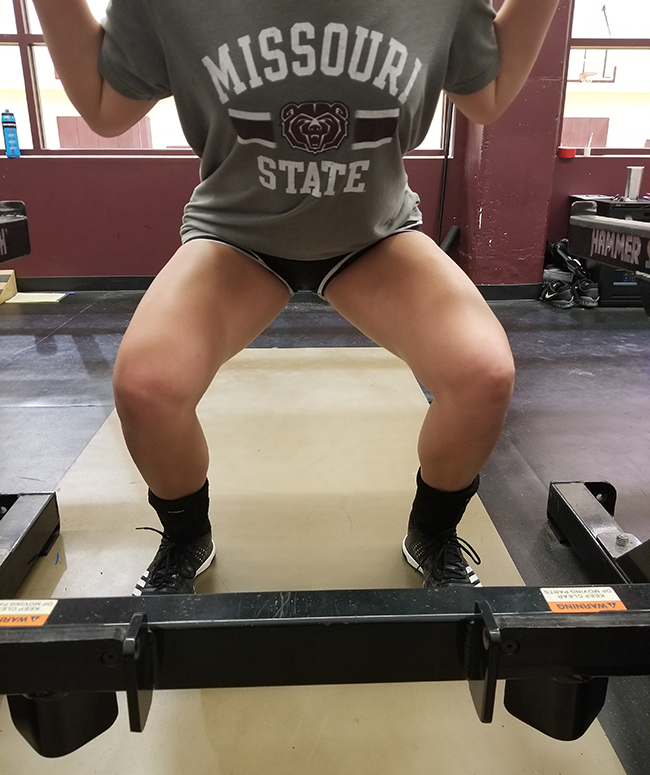
We want the athlete’s knees to be driven out to match the toes. Typically, we see this on the concentric phase of the squat. Besides coaching cues, we need to get the glutes to fire. Here are some exercises I do to help.
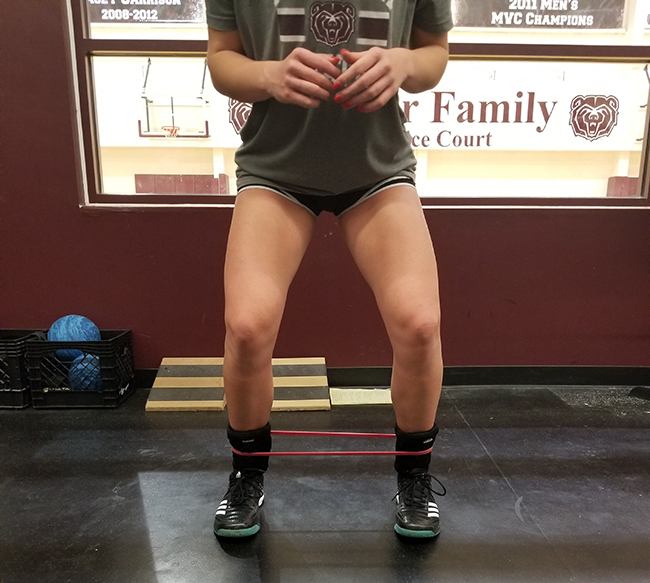
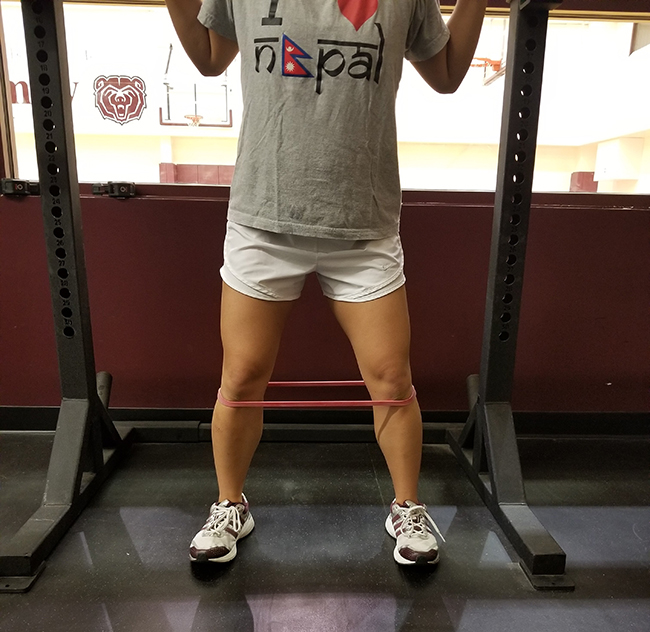
We do a Lateral Band Walk. Place an elitefts Pro Short Mini Band around the ankles. Start in a quarter to half squat position back on the heels. Take a lateral step to the right or left, keeping the knees driven out as you step, and return to the starting position. Typically, I do this movement as a pre-training activation exercise before we perform the squat motion. We want to get the abductors to fire. Do not let the knees cave in as you step out to the side. A couple sets of 12 to 15 reps will get these to fire up.
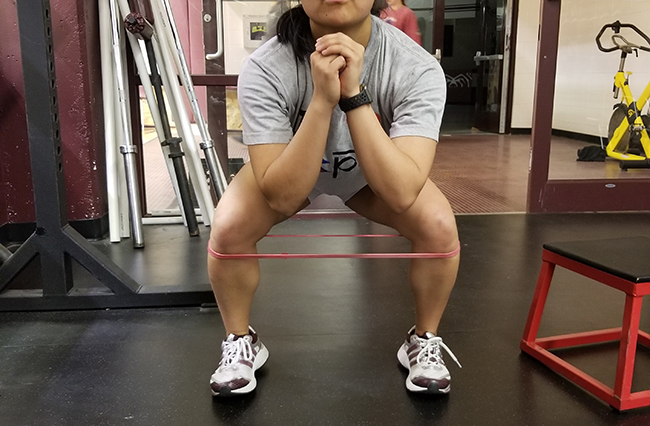
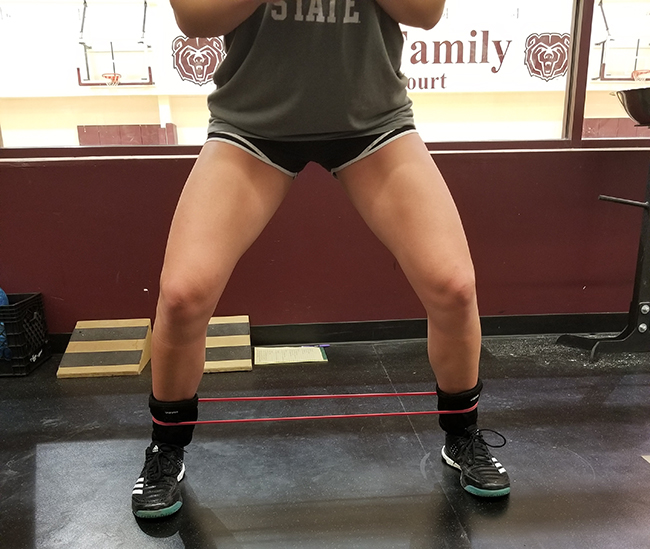
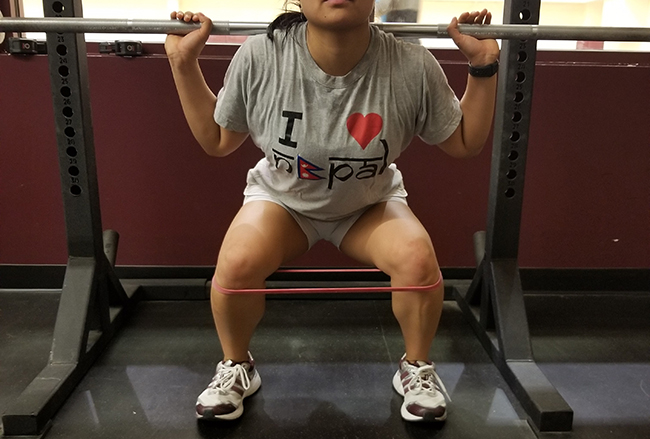
We do Bodyweight Band Squats. Place an elitefts Pro Short Mini Band around the knees, just under the patella. You want the athlete to drive their knees out while squatting to their best depth. In the picture above, you will notice the athlete is driving out so much that she is on the outside of her feet. This does not need to be the case. Keep your feet flat on the floor and weight back on your heels. We will perform this movement as pre-training work and also with kettlebell or dumbbell weight as an accessory movement.
Once we have mastered both of the above movements, we can step it up a notch with a Lateral Band Walk/Squat. Place an elitefts Pro Short Mini Band around both the ankles and knees. Start with a shoulder width stance. Step out to either the right or left. In the lateral position, perform a squat to depth. Return to standing position and shoulder width position. The lateral movement this time is performed stiff-legged. Typically, we will perform these movements as a post-work movement and corrective exercise.
We will also perform the regular squat with a band around the knees. This is done the same way as the Bodyweight Band Squat but now with the bar and regular weight. I would do this movement mostly with the squat warm-up sets before working sets are performed. There are times in the program where the athlete will wear the band for all sets. This would be done during a phase in which we are working on corrective work and at lower loads. The band is a distraction, so we do not want to use significant loads with this movement.
We want to get the athlete to emphasize firing their abductors and utilize them during the squat and other movements as well.
3. Loading the Hips (Staying on the Heel)
The strongest muscles in the human body are wrapped around the hips. We call it the posterior chain: low back, glutes, and hamstrings. Force production and power are driven by these muscles, so it is very important that we load this area. With this squat, that means pushing the hips back away from your COG to take the load you are trying to overcome.
Anything that moves away from your COG will take the load you are trying to overcome. So, if your knees move forward to the point of your knees or over top of or in front of your toes, that means your knees will take the brunt of the load. You do not want this. To load the hips, we want to push the hips back away from our COG so that the strongest muscles in your body take the brunt of the load. Remember, biomechanically, this is how your body wants to load, anyway (refer back to the baby picture).
There are many ways to make sure we reestablish this motor pattern. I usually start off by teaching a kettlebell or dumbbell squat where we are holding the weight at chest level, out in front of the body. Again, this helps with counterbalancing the movement of pushing your hips back and staying on the heels of your feet. Once mastered, I move onto teaching the front squat. Again, load out in front, but we are now working with the barbell. Once this is mastered, I move the athletes onto a regular back squat.
Most times going through this simple progression, you can get the athlete into a position where they are loading the hips and moving through a good range of motion. From there, we will look at all the other aspects of perfecting the movement with depth and lumbar and thoracic spine positioning. But if you are still having problems with loading the hips, this is where I utilize the box squat.
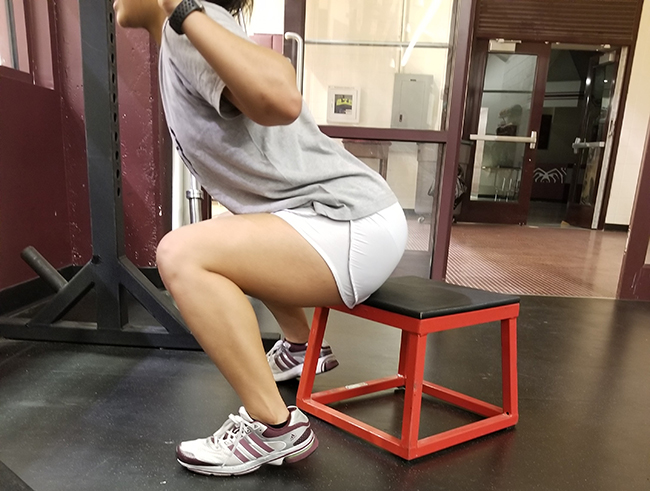
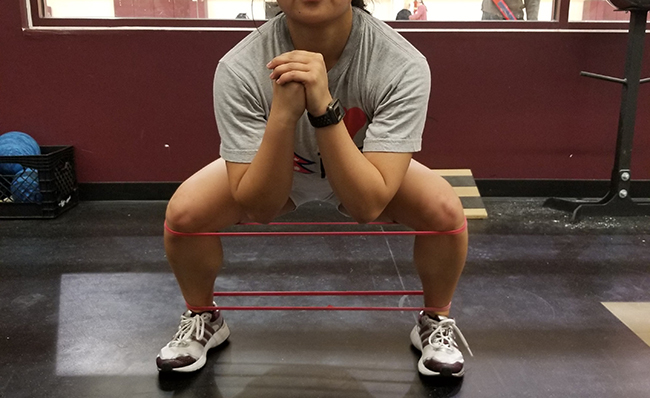
In the picture above, the athlete is having trouble sitting back with the weight on their toes.
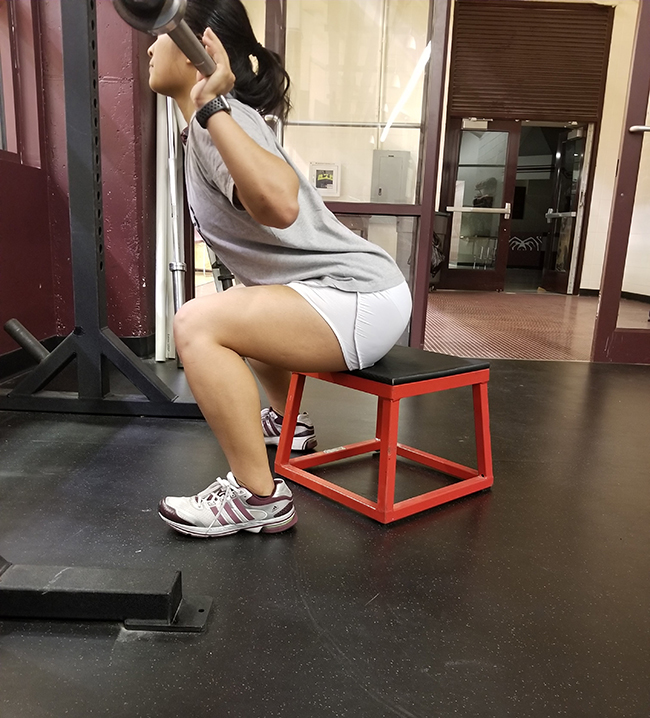
We see here the athlete sitting back on their heels with their knee still tracking forward, but their hips are loaded properly. Giving the athlete something to reach back for helps them to sit back further without them being afraid they may fall. Make sure the box is only used as an instrument to sit back to, not fully sit on. We do not want to lose core tightness or body position, which can happen when you fully relax on the box. You should instruct them only to put about a quarter of their weight on the box and not fully sit. This is really the only time I ever use a box squat: to teach the squat position and sitting back. Other than that, the box squat is not a part of my programming.
We can dissect the squat and the biomechanics surrounding it all day. There are many individuals who have done so. My purpose here is to talk about the main problems I see with athletes and the squat and explain how to make simple corrections to get them into better positions that are loaded properly and activated correctly.
Remember that you are not training lifters. You are training athletes who love their sports and do lifting as a way to improve their performance output. They will not be perfect, and perfection is not something that should always be sought after. Keep your athletes healthy and load them properly by taking the necessary steps to correct movement patterns and activate the proper muscles. It’s a simple take; that is all!