


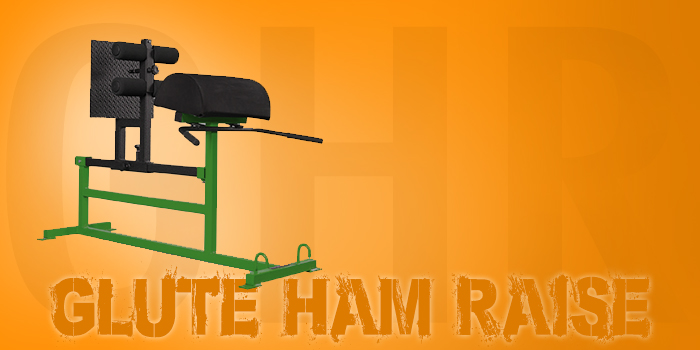
The Glute Ham Raise
We have known for years that the Glute Ham Raise (GHR) was regarded as one the best movements for the posterior chain (lower back, glutes, hamstrings and calves). All GHRs felt great at the start of the movement but lost the training effect as you reached the top. In many cases, you could not pull yourself into the top (peak) position without falling off the machine. We went to work and discovered that the pad design and angle had to change. After many designs we finally got it right and the EliteFTS GHR became an industry leader.
Why did we do this?
This is simple. We understand the GHR is one of the most important movements of any training program. Very few movements train the hamstrings at both joint angles (hip and knee). This is critical because this is how your body works when it runs, jumps, squats and pulls. If you’re going to do the movement we believe you should get maximal results. Think of the difference that could be made by strengthening these muscles with the right movement.
- You would add weight to your squat.
- You would pull more weight in the deadlift
- Your clean would go up.
- You would be able to run faster.
- You would be able to jump higher.
The benefits are endless. When it is all said and done (emphasis on the word “done” as you will have to do the work), you will have more strength, in the right places, than you ever had before.
Now for the selfish reason and it is not what you think. You would think this is all about making the best GHR so we can sell more. Well some things are worth more than money, like a big squat. My main reason for redesigning the unit was because my hamstrings were holding my squat back. My squat was always between 780-840lbs for many years. I tried pull throughs, Reverse Hyperextensions, leg curls, band legs curls and many other things. Yes, they all worked to some degree but nothing was fixing my problem. I began messing around with the pad design of the GHR and had one sent to my house. I would go in the garage 2-4 times per week and knock off a couple sets. I knew right away this was going to help because I sucked at them. I really sucked! For one week, all I could manage was 3 reps on my sets.
Almost one year later I squatted 935. Nothing else changed in my training. I was still doing box squats (with bands), pulldown abs, pull throughs, Reverse Hyperextensions and all the different max effort movements. All I did was change the pad on the GHR and trained it 2-4 times per week.
Please understand I was doing GHR before this. I was able to do 20 reps per set with a light band behind my neck. They did work for me, but only to a point. But, when you go from 20 reps with a band to 3 bodyweight reps to failure there has to be more isolation going on.
This is what has lead me to this belief. If you do a sit up while lying on the floor (knees straight or bent) what happens? You get past the mid point and the movement gets very easy. Now what happens if you do the same sit up on a steep incline bench? It becomes much harder and more stress is placed on the muscles. This is what I wanted with the GHR.
The top portion on all GHRs was easy but the top of the deadlift that was the hardest for me to do. So we fixed it and have never looked back. Even today we are still tweaking it to make it better. I should point out that many equipment manufacturers have actually worked harder to make the top portion of the GHR easier. This is insane. You might as well just give your athletes a pacifier and baby them some more.
I guess when you do a movement 2-4 times a week for over 10 years you begin to figure a couple of things out.
Okay, enough with the rant. I am sure you have had enough of it. This was not intended to be a sales letter but more a “How To” article for all those who have an EliteFTS GHR. So let’s get down to business.
How to do a standard GHR
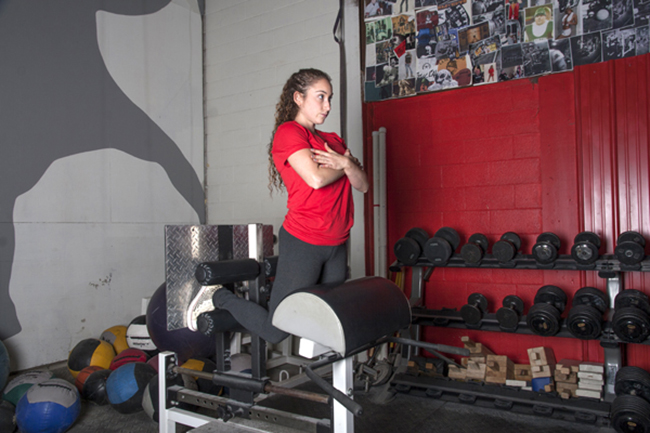
To do a GHR, you'll start with your body in a horizontal position on the bench with your toes pushed into the toe plate. Your knees will be set two inches behind the pad and your back will be rounded with your chin tucked. You then push your knees into the pad and curl your body up with your hamstrings while keeping the back rounded. As you approach the top position, squeeze your glutes to finish in a vertical position.
GHR Methods
There is more to a GHR then just popping up and down. There are many methods and suggestions on how to get the most from the machine and the movement. I will compile a short list below to get you started but feel free to experiment with new stuff. This is usually the stuff that will yield the highest return.
Three sets to failure - Very basic but still works. Try to get more reps every session. The best way to do this is to add up all of reps done throughout the workout. Start with a reasonable number (based on your strength) and work from there.
100 total reps – Have fun with this one. This is not suggested if you suck at GHRs. You will be there all day. This is an optimal session for those who are very good at them. One of the best ways to cycle this is to go by time. Time how long it takes you to do 100 reps and try to knock it down each session for a few weeks and then move onto another method. You will use as many sets as needed.
Weight held on chest – This is a great strength builder. You will want to cycle for 3-6 sessions and then switch to another method. Many will have to do 1-2 warm up sets before the heavier sets. Perform 3 sets of 5-6 reps.
Weight behind head – Same as the last method except it will be much more demanding. Perform 3 sets of 5-6 reps.
Back end inclined. – This is one of my all time favorites. With this there will not be a need to hold weights. You bodyweight will become the weight. Don’t be afraid to take the bench up as high as you can. Trust me you will know if you have gone too high. To do this, place a box underneath the back end. You can go as low as 4” and as high as 30”. Perform 3 sets of 5-6 reps. I would highly recommend that you begin with a very low incline and progress from there.
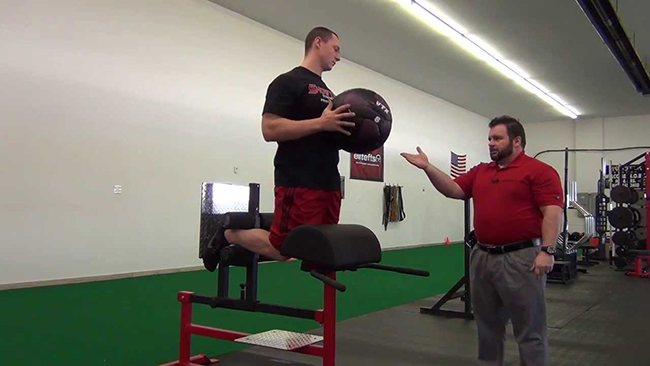
Dynamic GHR – On this movement, get to the top position and drop fast and rebound out of the bottom with as much force as you can. You can use a heavy medicine ball or weight to lower faster. Be sure to drop the plate or the ball once you get to the bottom. This is very difficult and not recommended for the beginner.
Static-Dynamic GHR — Start at the horizontal position and have a training partner place his hands on your back for a three to five-second count. While doing this, drive into your partner’s hands as hard as you can. After the five seconds, your partner will pull away and you should fire up as fast as you can to finish the rep. This is best preformed with 5 to 6 sets of 3 reps.
Yielding GHR — For this version you'll break the movement into three holding positions, each for 5 to 10 seconds. Start at the horizontal position and hold for 10 seconds, raise halfway and hold for another 10 seconds, then rise to the top and hold for 10 more.
Timed GHR — In this version you'll give yourself a set time and do as many reps as you can. For example, you use five minutes and end up with 70 reps the first time you do it. The next time you'd use the same time and try to beat the 70 reps.
GHR with bands — This is a movement for the more advanced lifter. Strap each of the bands around the bottom of the GHR and place the other end around your upper traps. The bands will add heavy resistance at the top.
Forced GHR with heavy eccentric — This is a good version for those who aren't strong enough to get one rep. With this version the training partner will help the lifter get to the top and then he'd lower the rep on his own. Enough assistance should be applied to help the lifter get the concentric rep with good form. Sets of 3 to 5 reps are best with this style of the GHR.
Three Day Blitz – This is a great method and one I have used numerous times when trying to bring up an athlete’s weak hamstrings.
- Day 1: 3 max sets of GHR. Each set is taken to failure with a 2 minute rest between sets. Let’s assume the athletes gets 15 reps on the first set, and 10 reps on the subsequent sets. The next day you will prescribe three sets of GHR’s at 60% of the first day’s reps.
- Day 2: On this day, the athlete would do 9 reps on the first set, followed by 6 reps on the 2nd and 3rd set.
- Day 3: The athlete would perform 6 reps on the first set followed by 2 sets of 4 reps.
- Day 4: off
- Day 5: Repeat cycle but try to have the athlete achieve a new max number of reps on each set. By using the rule of 60% you are adding a recovery element to the process.
The Warm Up Method – This is one that Jim taught me years ago. Basically all you do is one or two sets of GHR as part of your warm up. These sets should not be hard (say 60% effort) but should be done at the beginning of every training session. You will also still do GHR as part of your main training session.
Pre-Exhaust – This is a method Louie used to have me do to bring up the top part of my deadlift. You first hit one set of failure on band leg curls with the reps ending in the 15-20 range. Then without rest you do one set to failure on the GHR. I did find with this method I had to cut the sets down to 2-3 per workout and had to keep my second GHR session very easy. This one blasted me and was hard to recover from.
One Leg GHR – I have heard of these but never seen it done on our machine so I will only speak of it like it is Bigfoot. This movement is exactly as it reads; do the GHR with only one leg. Good luck
The Manual Leg Curl – To do this move the GHR pad forward so your knees are just behind the pad. Start rounded over the pad like you are going to do a back raise. Without coming up, arch your back as hard as you can. From this position, and without focusing on your back, drive your heels into the pad as hard as you can and leg curl your way up. If done correctly you will only get a few inches higher than the pad. When you get to this point, hold for 2 seconds and return. This will also fire your hamstrings up. I can’t give you recommendations on sets and reps other than just do what you can do. When done right this is not an easy movement. As a guideline though, stick with 5-6 reps.
I could go on for pages with different methods of GHR training but will cut it off for now. Maybe in the future there will be a part two. I will be adding many of these methods and more to our Exercise Index in the Q and A section over the year.
Other Uses
Here is a quick list of other uses for the GHR. These will also be added to the EFS Exercise Index over the next year. Many of them are already there. You can also see many of these exercises demonstrated on our EFS DVD – Exercise Index for the Squat/Deadlift.
- Back Raises
- Straight Leg Sit Ups
- Bilateral Leg Lifts
- One Leg Back Raises
- Side Bending Torso Training
- Russian Twists
- Standing Inclined Triceps Extensions
- Standing Inclined Dumbbell Presses
- Standing Sit-ups with bands (attached to foot plate)
- Upper Back Stretching
- YTML’s (shoulder work)
How to order your NEW GHR?
You can order online at www.EliteFTS.com or call us at 888-854-8806.