


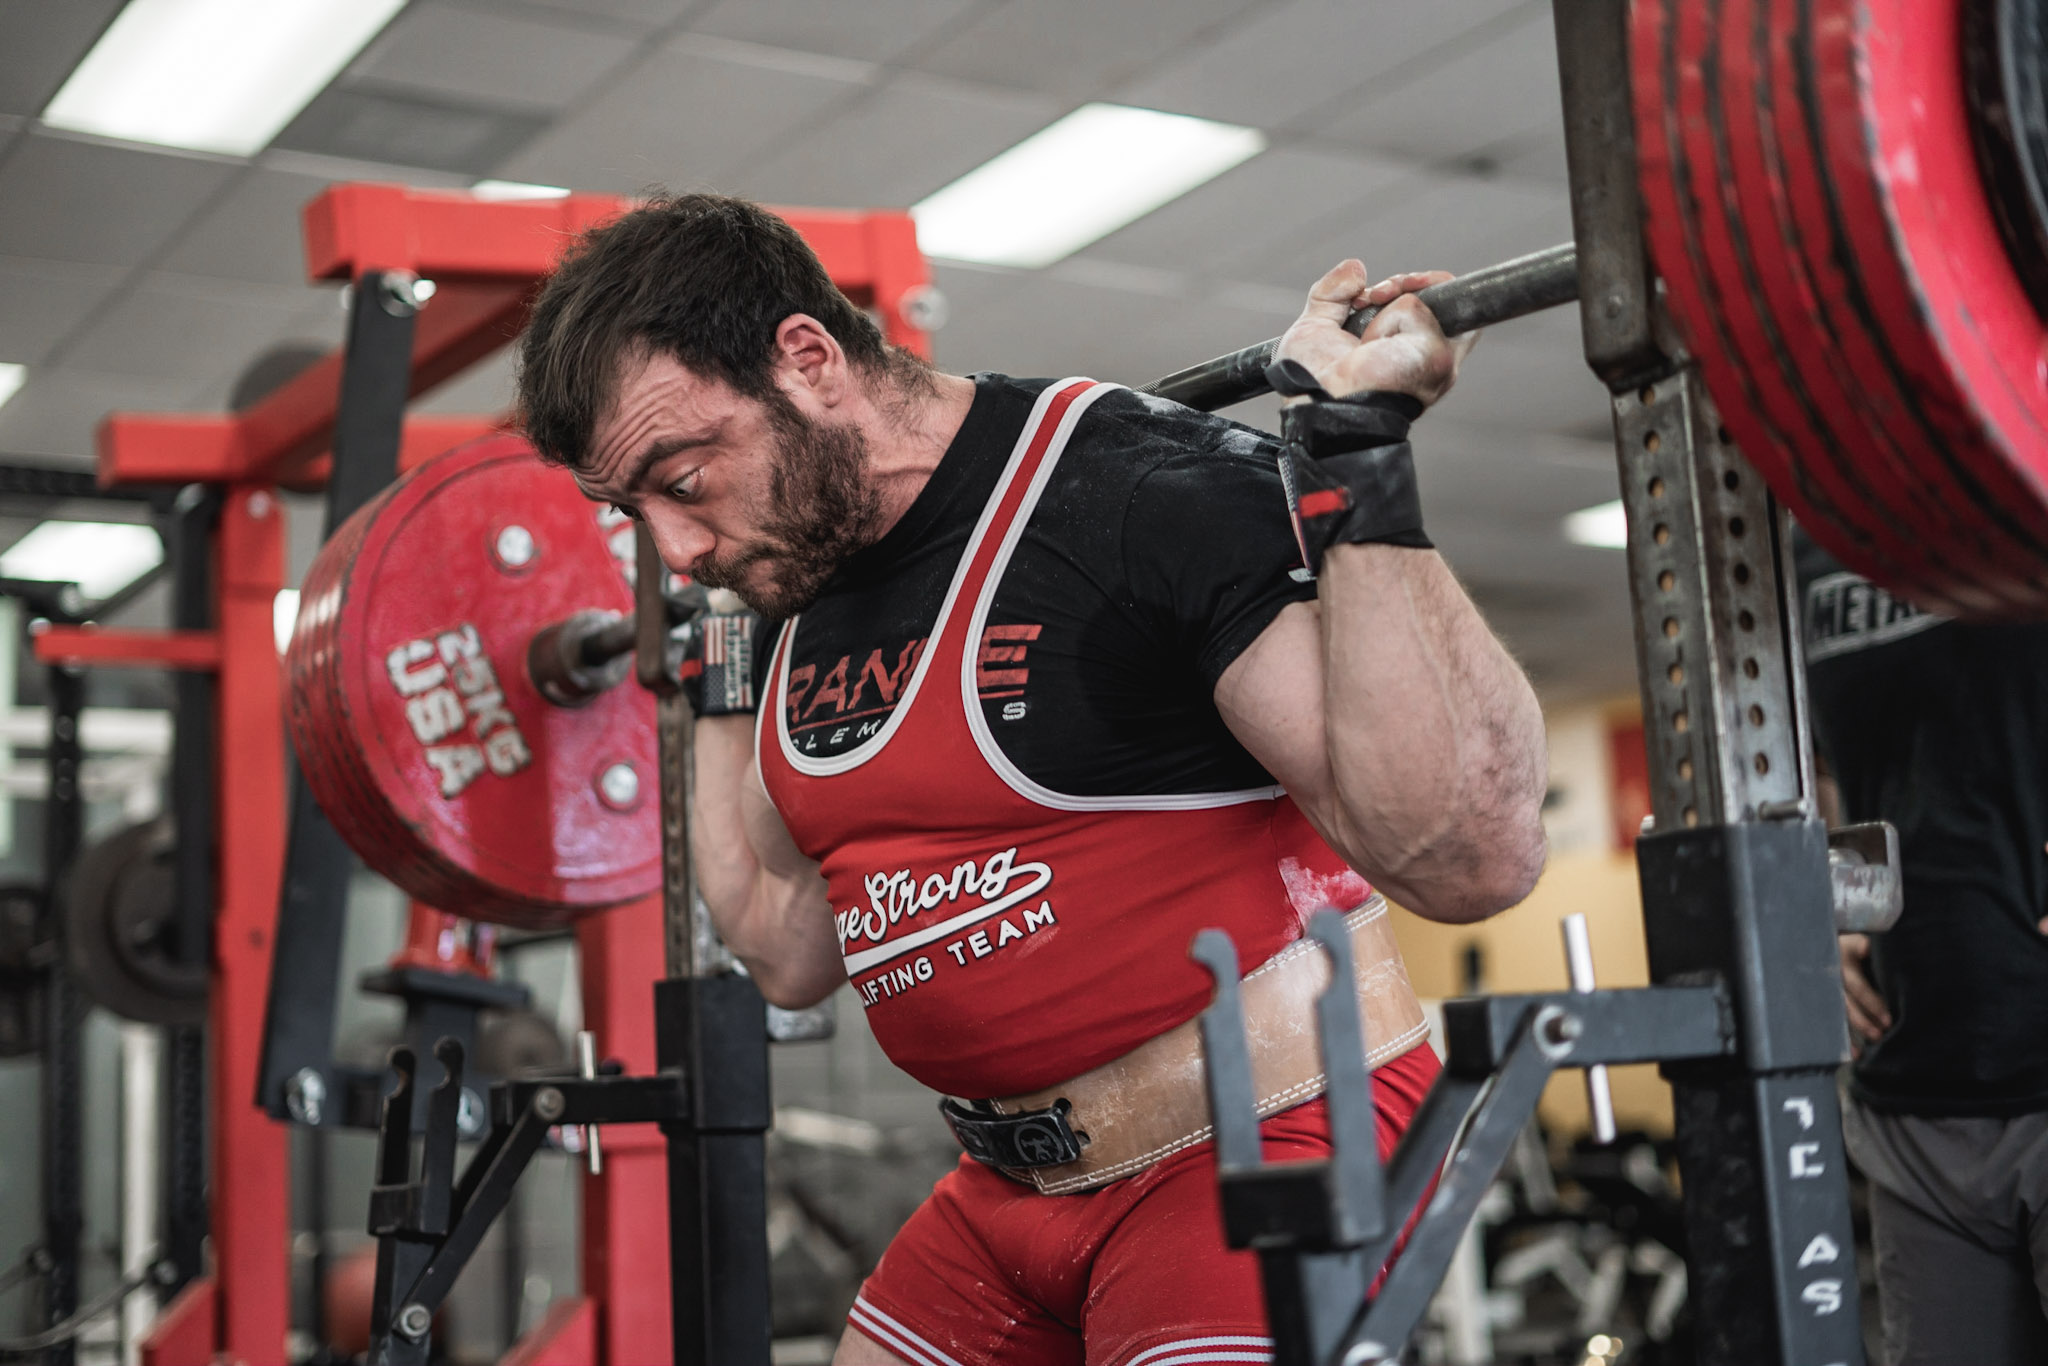

I ran a workshop with Lily at the elitefts Strong(er) Strength Training and Success Summit. Our workshop was teaching the squat, bench press, and deadlift.
Before getting into this, the coolest thing to see with these seminars is if it was worth the attendees’ time and if they would do it again.
With 54 registered, this is a very good return rate on the survey, but as you can see, nobody thought the seminar was worth less than their investment ($300-$400 for registration plus travel and lodging expenses), and 91 percent thought it was worth more or far more than what they invested.

All but one person said they would attend again. Having surveyed every seminar we have ever hosted, there are two indicators that always score well.
This is a good and bad thing. It means our selling of the event sucks, but our product and service is great, but this is not about that. This is about the workshop.
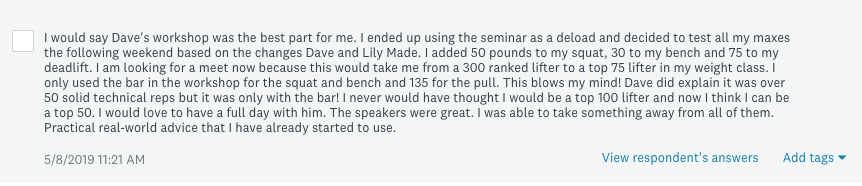
This reply came from the “What did you like best about the seminar?” survey question.
Let me recap a few things. I know who this person is, and while he was not an advanced lifter, he was also not a beginner, either. I would call him a high-level intermediate lifter who was willing to learn and try different things to get better.
Some Key Teaching Points
At elitefts seminars, I will never allow anything to be taught in a non-optimal situation, but I have been asked several times over the past few decades to teach in situations that I would not consider optimal.
In those situations, you can still help but really not do much more than take a shit lift to a suck lift. When you keep the situation optimal, you can do 80 percent more and help the lifter to not only get to a very good technique but also how to keep it while showing the others how to teach the lift as well.
It’s from over 20 years of surveys that we know exactly what optimal is. These are some of those key items and teaching points:
- A head coach who knows how to teach the lifts inside and out, regardless of form and style. With powerlifting, there is what is known as an optimal technique. Then there is the type of form they use: high bar, low bar, wide stance, close stance, etc. (this could be due to body structure or just how they were first shown), and then, style. If you look close enough, no two people will squat exactly the same way. Each has their own style based, again, on how they were built, but this could also be due to a number of other things (how they grip the bar on the squat being an example). A coach needs to know all of these things and how important each one is based on the strength and experience of the lifter.
- The head coach should have one to three other coaches — depending on group size — working with the lifters while they rest. They may reinforce what was just learned under the bar or give another perspective on why it was suggested they change something. Coaches, LISTEN to them to pick up on cues that may be getting missed, keep the flow of lifters to the bar moving so they don’t get cold, and maximize the number of coached reps under the bar.
- The training group size should never exceed 15, regardless of the number of coaches. If there are three coaches, the group size shouldn’t exceed 12, and 12 is really pushing it. 10 is optimal, and anything less than that is even better. The BEST number would be between five and eight. With 10 lifters and two hours for the lift to be taught, they can get between 35 to 50 reps in the eight to fifteen total set range. With three experienced coaches watching, 15 sets of three to five reps can be done around 200 times, with each rep looked at and corrections made. I have been to seminars where the most reps I was able to see someone do were three, maybe five. They would have to go to that same seminar 40 times to have their lift seen the same way it is at one of ours! Yes, I am a bit of an asshole about this, but when people pay to go to a seminar to seek help with their lifts, they should know it takes more than five to ten reps before you can even see any issues, let alone be taught how to fix the problems and make the corrections stick. I have also been doing this exact type of workshop for over 25 years, so I have the experience to know what works and what doesn’t.
- Unless there are advanced lifters, there is never a need to use more than the bar. YES, people’s techniques break down when under load. I get that — everyone does. If someone’s technique is breaking down with 45 pounds, then what is the need to use 60, 70, or 80 percent when they can’t even squat 10, 20, or 30 percent, right?
- Start from the feet and work up to the head when teaching the squat. Get the lower body moving correctly first, then work on the torso, upper back, hands, and head.
- Finally, put it all together and teach them how to wedge and get tight.
- If one cue doesn’t work, STOP using it and pick another one. In most cases, I have seen that the first cue never works, so I resort to saying the same thing in a way that will make them do it. This is why I stress not using the same cue you hear others using unless you know what the outcome of that cue is. The cues also need to be simple because the lifter needs to be able to remember it and make it part of a setup checklist they will run through their head (hopefully, without you having to tell them before you are done working with them).
- Reinforce it.
- Make damn sure they know it — make them prove it to you. I have several ways to try to trip them up. I want to make sure when they leave, they remember what they need to do every time.
- Learn to communicate. I will just leave this here, as this could become a book. You can teach a lifter who turns their head and looks at you the same way you would someone who doesn’t move. The language has to change. If you are a coach (like myself) who uses profanity and run across someone it offends, you either need to find a way to make humor out of it or don’t use profanity. If you are thinking, “Fuck you, I teach the way I teach,” cool! You simply will suck at teaching them because you will be distracting them the entire time. You’re the coach, not them. It’s your job to teach and help them. It’s not their job to let you show them how to lift.
Seminar Takeaways That Will Add 100 Pounds To Your Squat
1. Get Your Feet Right
I’m sure with a quick Google search, you will find dozens of articles telling you how to do this dozens of different ways.
In almost every case, the end result is the same, and that is getting all three points of contact strongly planted into the floor. You may read:
- Rooting
- Spreading
- Turning
- Screwing
- Digging
- Clawing
- Grabbing
You may even read to push out to the sides of your feet, keep the weight on your heels, and stomp the floor. Again, the end result, if you really look closely, is the same as noted above.
Why the differences? I can cite two reasons, but I believe it’s one over the other. The first is so the writer or coach can make themselves stand out from the crowd. While I do know this to be true, I think it stems more from what cues have worked best for the person writing or recording the content. I learned 20 years ago while traveling to teach seminars that the squat was taught differently in different regions of the country.
The takeaway if you are a lifter is to make sure your feet are planted strong. If one explanation doesn’t work for you, try another and another until you get it right. Trust me, you will know when you do.
The takeaway if you are a coach is to know as many ways to teach it as you can. You will have your default style, but if that doesn’t hold, don’t keep pounding it into the ground. Explain it another way. If you have to, have your athlete watch a video of another coach teaching it differently than you. They will NOT think you’re a lesser coach than the one you referred them to watch. It’s actually the opposite because you just proved you put their success over your ego.
2. Stable and Strong Knees
This is one I could write about forever, as it impacts so many things, from ankle mobility to squat stance, hip position, sitting down or back, and so on.
I have my biases, but the truth is that has zero to do with your squat right now. I have found something to be true most of the time. Geared squatters (single-ply or multi-ply) tend to keep their knees stance over the heels. Wrapped knees fall between over the ankle to mid-foot, and sleeves fall from mid-foot to toes. This is where I begin, but the foot must still be grounded.
By watching the foot and the mechanics of the knee, you can quickly see what fits each lifter best. I find using a box to squat on makes this process more helpful. We are not bodybuilding here, so if you see a lot of stress on the VMO, have them sit back more. If you see the knees coming in hard, have them push up. Again, always watch the feet. Ankles may come up, toes might pop up, and the big toe may begin to turn up. This is why coaches should start teaching from the feet up.
At this point, don’t worry at all about the upper body. Just focus on the hips down. I can’t overstate this. Get the lower body right from the start.
Cues that could work:
- “Knees out”
- “Knees, knees, knees”
- “Open taint”
- “Flair”
- “You build from the ground up”
3. Lead with the Sternum
This is another part of teaching the squat where a box becomes vital. For seminars, I love the elitefts squat box because it allows you to stop the lifter in the bottom of the squat and adjust their position to make sure the spine is neutral, the knees are still in place, and of course, the feet are planted.
The most common cues here are telling the lifter to rise with their...
- “Sternum up”
- “Traps first”
- “Chest up”
- “Head up”
Also try:
- “Act like you are on a Smith Machine” as they try to toss the bar to the wall behind them.
- Or whatever else you need to say so the spine stays neutral and the bar travels in a straight line on the way up.
I have no doubt you will have to stop them on the box to readjust many times until they get it. To help aid this process, make sure they pause on the box for one to two seconds.
At this point, you should have grounded feet, a strong knee position, a neutral spine, and a straight bar path on the way up.
This is the time to work on bracing and breathing. I will ask the group to face me a take a deep breath. You want to breathe into your belly so your entire torso is tight. For a review of this, watch:
Again, with the cues, they could be:
- “Breath into your belly”
- “Belly”
- “Break your belt”
- “Air”
- “360”
- “Push into your belt”
Just as with the other cues, find what does what it’s supposed to do, and in this case, it’s to brace and fill the entire torso with air. If they are wearing a belt, there should be more pressure all around the belt, especially around the obliques and lower back.
4. Keep Your Upper Back Tight!
One thing common with all the powerlifts is that you need a very strong upper back. Not just for moving heavy weight, but also for being able to stabilize it as well as having the strength to hold static positions for periods of time while under maximal strain.
This means you must be able to pull your shoulder blades together and pack down while flexing your lats and NOT letting it go. The tension needs to be in your back and lats, not all in the hands and arms. Yes, they need to be tight and locked in but only working as supports to hold the barbell. Your back is what needs to be doing the most support, as it allows the weight to become grounded through your feet.
Your body is a wedge between the floor and the bar — that should be the tightest wedge ever created, and this allows for the greatest transfer of power from the earth to bar.
The cues I’ve heard for the back are:
- “Tuck elbows”
- “Bend the bar around your back”
- “Pull the bar in”
- “Back tight”
- “Pack shoulder blades”
- “Lats tight”
- “Flare”
Again, do whatever it takes to keep the back tight as a rock!
5. Get Your Head Right
Your head position should also align with the spine so it’s neutral. In most cases, this means driving the head back, not up.
Cues:
- “Pack neck”
- “Chin tucked”
- “Head back”
- “Chin to bar”
- “Tuck”
- “Head”
- “Get your head right”
This lets you pull in more air, tighten your back harder, and engage your hips to allow you to flare your knees, which puts more force into the floor, and then in turn, allows for you to plant your feet strong, keep your knees solid, and drive the weight through a solid torso that allows for maximum transfer of force to the barbell.
When you create an optimal situation for your clients, include these five takeaways when teaching the squat, and bring it all together, you’ll have a perfect squat that, when truly practiced and built up, will increase by 100 pounds due to being more efficient and the ability to apply more force.
4 Comments